Creating a revision via workflow
Prerequisites
- Access to the File > Revision menu.
- Access to the Management > Revision menu.
- The revision control via workflow must be properly configured in the category of the document. See further details in the Create a document with revision control article.
- The logged user must have the "Revise" control allowed in document security. See further details in the Apply document security article.
- The latest revision of the document must be closed.
Introduction
Creating a revision via workflow aims to organize processes and increase the efficiency of tasks that must be finished before a certain deadline.
The main advantage of this option is the freedom to build a customized revision that adjusts to each specific case.
The previous step displayed the configuration of a revision via workflow to control the input of receipts in a certain department of the organization; now, see how to create this revision:
Creating a revision for receipt control
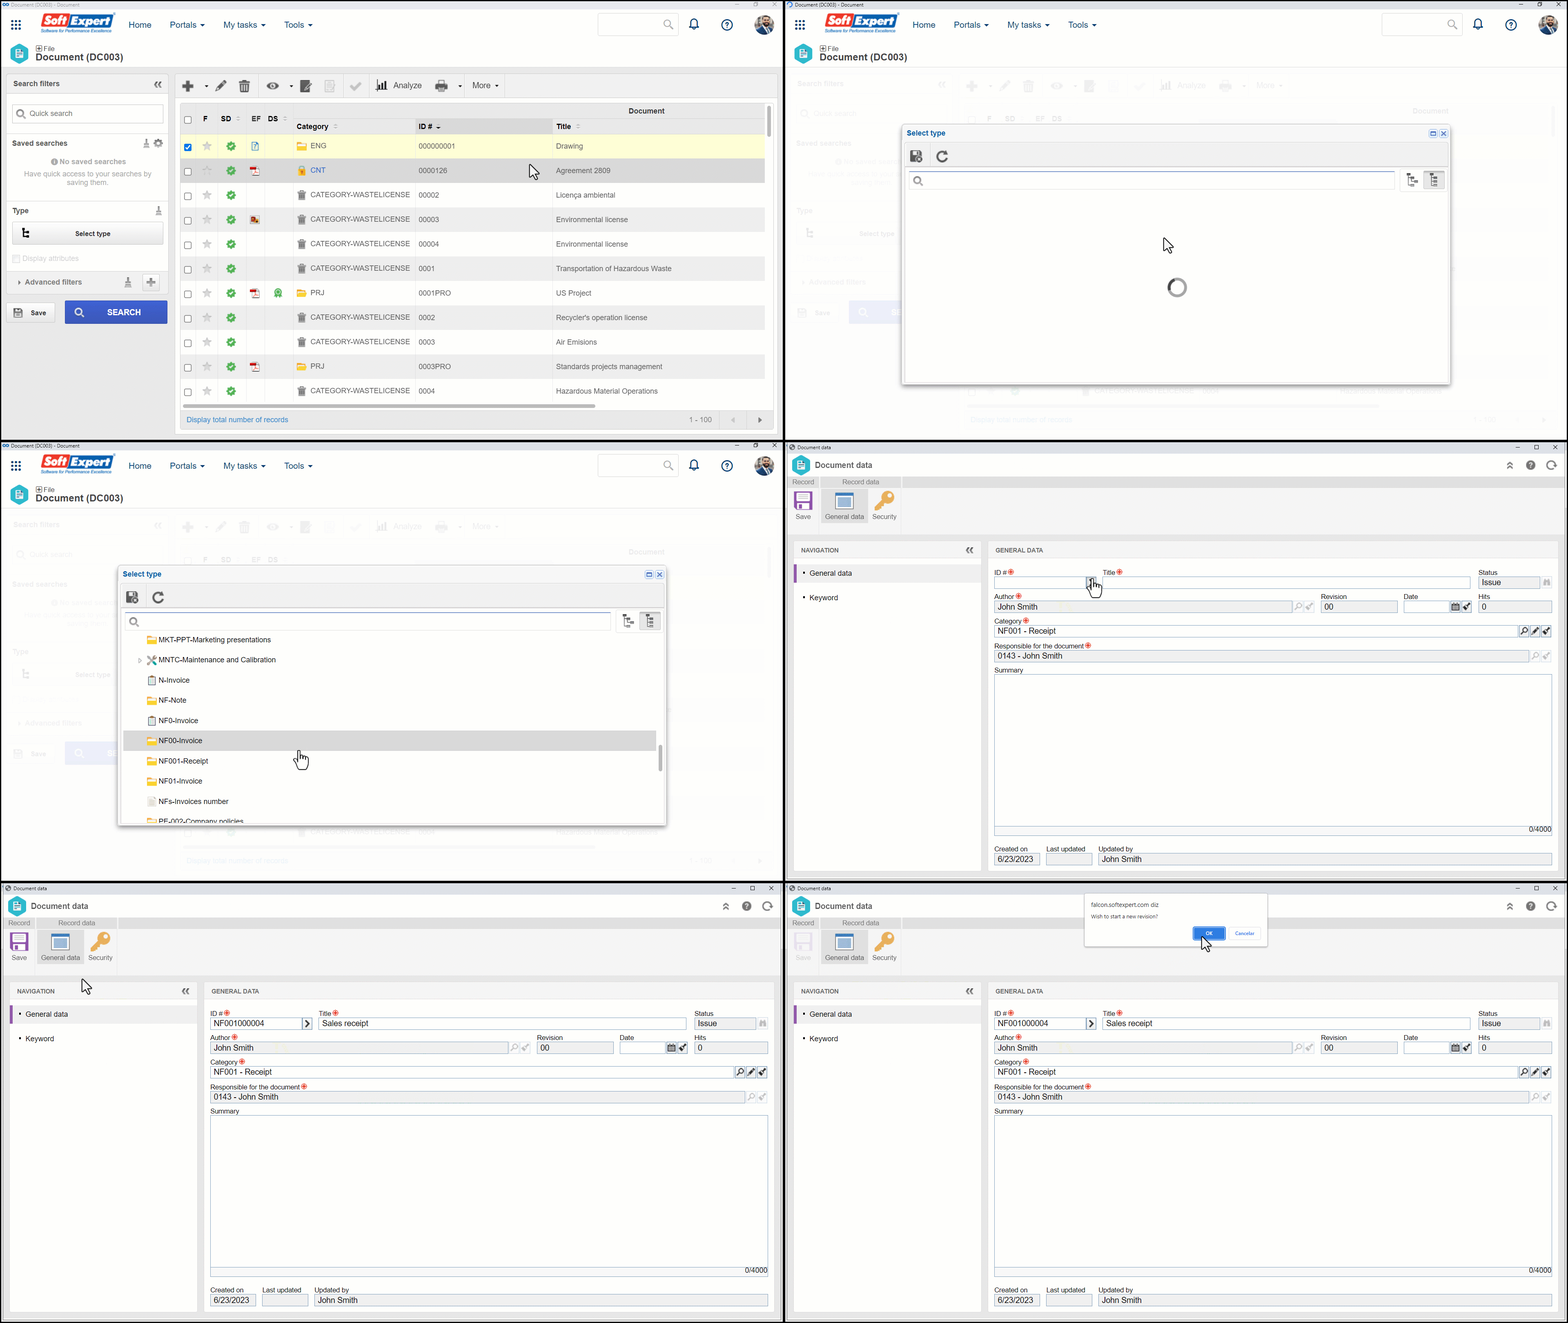
1. Access the File > Document menu and click on the  button.
2. On the screen that will be opened, select a category configured with revision via workflow.
3. For this example, keep the ID # generated automatically by the system and name the title "Sales receipt".
4. Click on Save and accept the system request to create a new revision.

5. Lastly, it is possible to adjust some configurations in the Revision tab as desired.
6. After doing that, click on the  button.
Complementary resources
See further details regarding each field available for the revision:
General
In this section, it is possible to enter the Reason for which the revision was created. Reasons available for selection were created through the Configuration > Revision > Reason menu. If you wish to add a new reason, click on the Add button and, on the screen that will be opened, enter an ID # and a name for the revision reason. It is also possible to enter a description.

The Add button will only be displayed if you have access to the aforementioned menu.
This section also displays some information on the revision in progress, such as revision ID #, status or step, date, and cycle.
The revision ID # field can be edited in any step if it is configured as "Customized".
In the Control section, it is possible to define the dates scheduled for the start and end of the revision. The actual start and end dates are filled out by the system. This section also displays the user responsible for creating the revision. The user responsible for releasing the revision will be automatically filled out once the revision ends.
Then, use the Description field to add additional comments regarding the revision.
Use the Explanation field to highlight the need for the revision. If it has been configured, filling out this field may be mandatory.
Change
Use it to enter the changes that were performed in the document. They may be added both by the user creating the revision and by the drafters through the draft step in the "Document revision" task.
Critique
According to the current step of the revision, the following changes will be available:
-
Review, Approval, Release, or Closure: the executor of the revision may add critiques concerning the revision. To do this, click on the
 button and, in the "Critique" tab of the screen that will be opened, fill out the desired critique.
 -
Draft: in the second cycle or later, the drafter should enter, in this tab, the solutions for each critique entered. To do this, click on the
 button and, in the "Solution" tab of the screen that will be opened, fill out the desired solution.
Revisions
This section displays a listing of all revisions that the document has gone or will go through. Use the  button to view the data of the document revision selected in the listing.
History
Allows viewing the history of users who added comments to the document. Text comments can be also viewed through the Security > Comments section of the document data screen to which the electronic files belong.
Conclusion
Upon finishing the creation of the revision via workflow, the next step is to execute it.


