Configuring a watermark
Prerequisite
- Access to the Configuration > Watermark (DC045) menu.
Introduction
A watermark consists of a text placed in the background, with the intention of labeling an electronic file with information about its origin and characteristics, aiding in the protection of its intellectual property.
This article will cover the steps to add a watermark configuration, which will later be associated with a document category.
Configuring a watermark
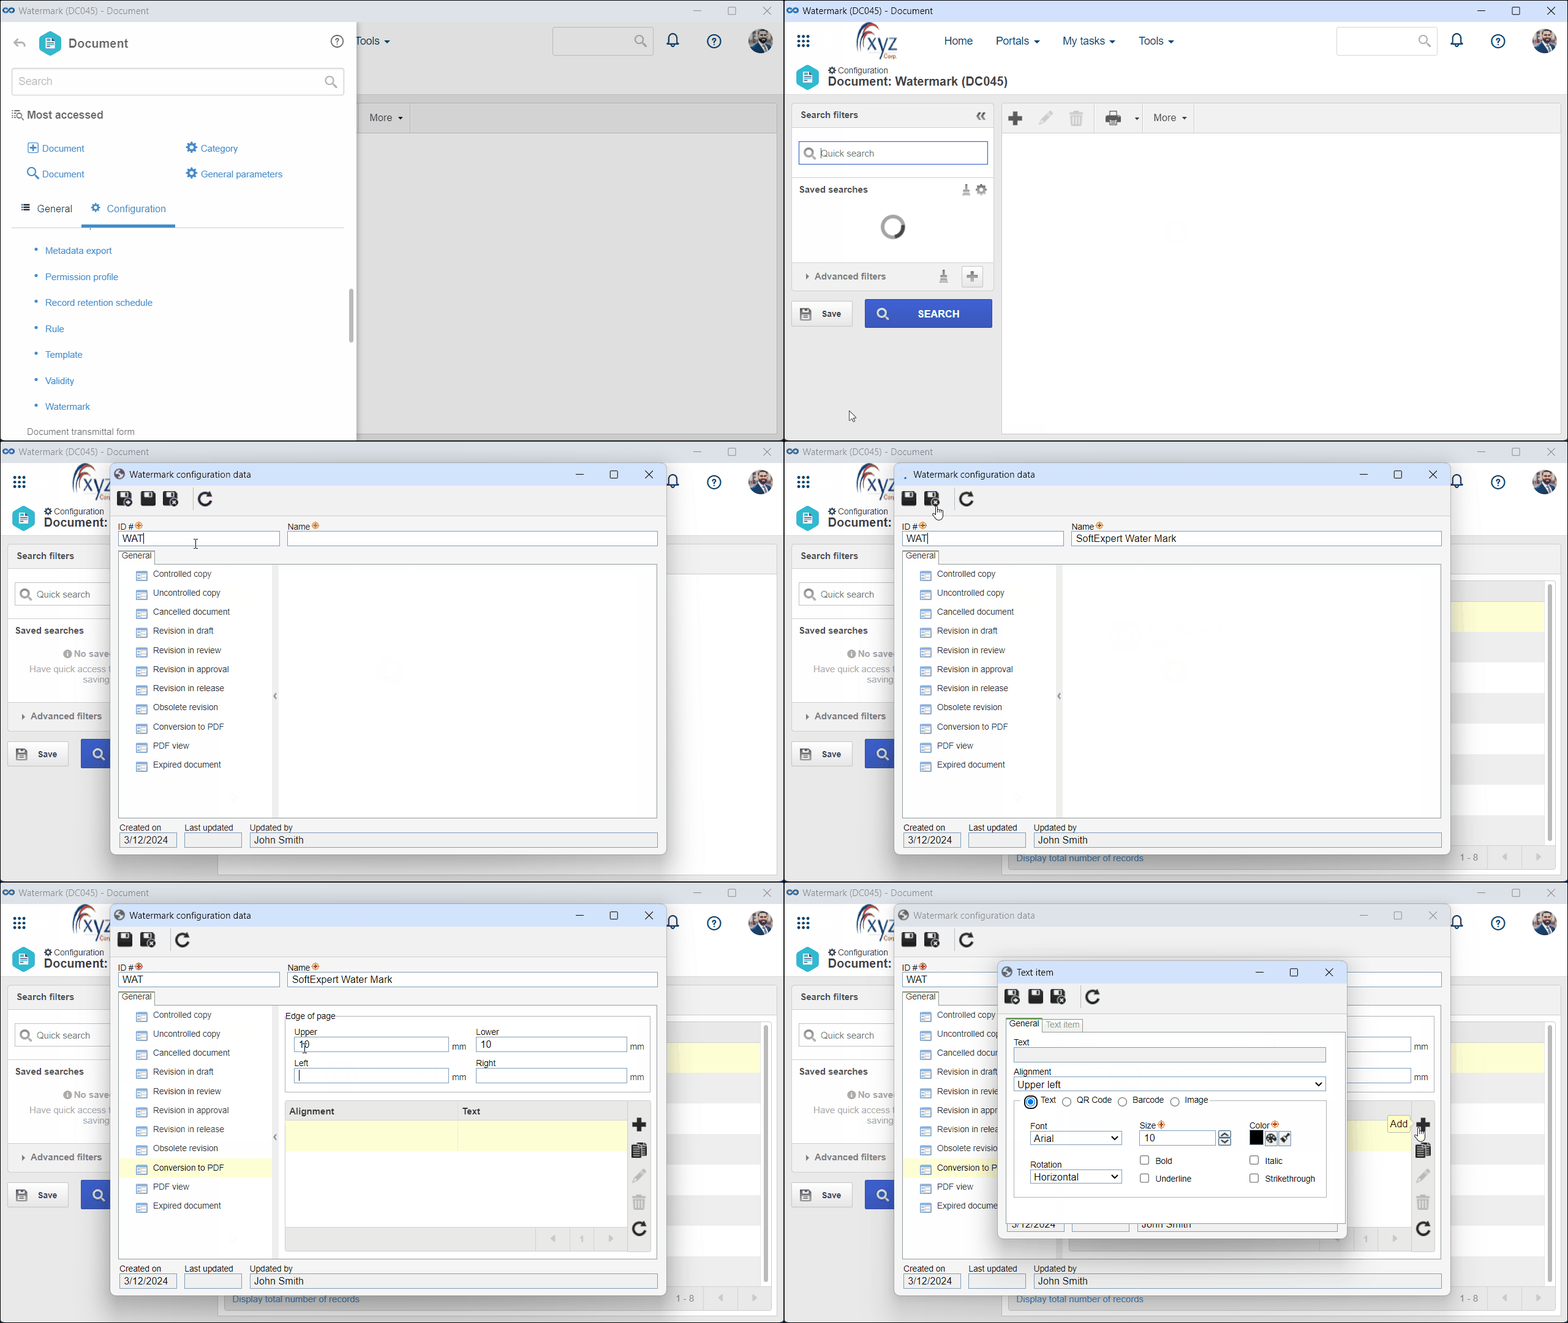
1. Access the Configuration > Watermark (DC045) menu.
2. Click on the  toolbar button.
3. Enter an ID # and a name for the watermark configuration.
4. Click on the  button to save the record.
5. In the General tab, select the status of the document to which the watermark will be applied, such as controlled copy, cancelled document, etc.
6. In the Upper, Lower, Left, and Right fields of the Margin section, enter the values that will delimit, in millimeters, the printing area of the watermark. The watermark items will be placed in the file within the limits set in these fields.
It is necessary to enter at least 10 millimeters in the upper margin, or the watermark will be cropped when printing.
7. Click on the  side toolbar button to add the information that will be displayed as watermark.

8. Add the desired items to the watermark, following the instructions in the articles below:
- Adding a text item to the watermark
- Adding a QR Code as a watermark
- Adding a barcode as a watermark
- Adding an image as a watermark
- Adding a copy cancellation link to a watermark
9. Click on the  button to save the changes.
Conclusion
Thus, the watermark has been configured. Now, simply associate it with the category of the document to which you wish to apply it.