Executing a workflow activity
 |
 |
 |
 |
Prerequisites
- Started workflow.
- Access to the My tasks > Workflow > Activity execution menu.
Introduction
After the instance is started in the Start (WF003) menu, the activity execution tasks are generated for the users set as executors during the modeling of the process that automates the workflow.
Tasks are generated following the flow of the process when the time comes for the activity to be executed.
Users with the Basic license can only execute the activities of processes they started, that is, activities assigned to the process starter. The other activities will be enabled only by accessing with a Staff or Manager license.
This article will teach you to execute workflow activities.
Executing an activity
1. Access the My tasks > Workflow > Activity execution menu.
2. Select the desired activity and click on the  button.
3. If the party responsible for the activity is a group (department, position, team), the system will question whether the user wishes to take responsibility for the execution of the activity. By clicking on OK, the activity will be associated with the authenticated user. By clicking on Cancel, the activity data screen is displayed, but its execution cannot be associated.
4. Once the activity data screen is open, in the Navigation panel, it is possible to enter significant data for the execution of the activity. See how to fill out the activity data in the video below:
The video above is for illustrative purposes only and aims to exemplify the sections and fields that may be displayed in the Navigation panel. It is important to note that their availability will vary according to the configurations set during the creation and modeling of the process (SoftExpert Process).
For further details on the activity data, access the Editing the activity data during execution article.
For further information on associations with items from other components, click here.
Execution menu buttons
|
Click this button to open the workflow activity data in execution mode. If the selected activity is defined for a group (team, department, or department/position), the system will ask if you wish to associate the activity with your user. If the question is confirmed, the activity data will be displayed in execution mode; otherwise, the activity will continue to be associated with the group, and the activity data will be displayed in view mode. |
 |
Click on this button to view the workflow data. |
 |
Click on this button to view the flowchart of the workflow instance. |
 |
Click on this button to associate the execution of an activity with an authenticated user, that is, the activity stops being a group responsibility (team, department, or department/position) and starts being an exclusive responsibility of the user who took it. This button will only be enabled if the activity executor is not a User. |
 |
Click on this button to disassociate the execution of an activity with an authenticated user, that is, the activity stops being an exclusive responsibility and starts being a group responsibility (team, department, or department/position), allowing any user who belongs to it to execute it. This button will only be enabled if the activity executor is a User. |
Additional information
• If the Enable ID # change option and/or the Enable title change option are checked in the activity data during process modeling, a screen will be displayed to allow editing the identification data of the workflow to which this activity belongs.
The editing screen can also be accessed by clicking on the Identification button on the activity data screen toolbar.
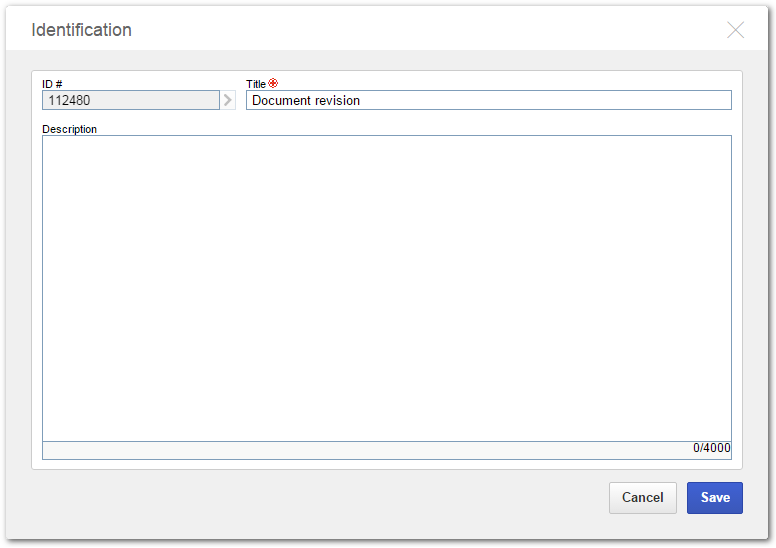
This screen allows editing the following information:
- ID #: this field is filled out with the ID # generated during workflow start. The ID # will be generated according to the preset configurations in the process data screen.
- Title: this field is filled out with the title entered during workflow start. This title can be preset or created by the user, according to the configurations made in the process data screen.
-
Description: enter any relevant information on the workflow to which the activity under execution belongs. It is important to point out that:
- If the Enable description information option is not checked in the process data, this field will not be displayed.
- If the Enable description information option is checked in the process data, but not in the activity data (Tools > Configurations > Instance), this field will be displayed, but it will not be available for editing.
• If the Show form only in activity execution option was checked in the activity data (Tools > Configurations > Form) during process modeling, the Navigation section will not be displayed.
• If the workflow is a sub-process or has a previously started sub-process in its flowchart, the Upper instance or Lower instance section will be displayed.
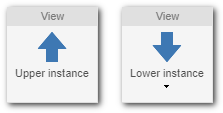
- Upper instance: allows to view the instance data of the upper-level process of the workflow whose activities are being executed.
- Lower instance: allows to view the instance data of the lower-level processes (sub-processes) of the workflow whose activities are being executed.
• If the activity has multiple executors, a comment may only be edited/deleted by the user who added it and only during the execution of the activity.
• In the Configuration > General parameters (WF019) menu, it is possible to parameterize the functioning of the activities during execution:
- Check the Disable timeout control on the activity execution screen (SoftExpert Workflow) option for the timeout control to be disabled and for no timeouts to occur in the SoftExpert Workflow activity execution screen.
- Check the Copy values of the employee profile attributes to the instance option for the values of the attributes in the employee profile to be copied to the process instance. To do that, the attributes that must be filled out in the instance must be associated with the process and the employee profile. If no values are filled out in the profile attribute, no values will be copied to the instance.
• If the Enable message event change option has been checked in the activity data (Tools > Configurations > Instance) during process modeling, and there is a message event configured in the respective field, the Message event section will be displayed. In the section, it is possible to edit the message event data from the process flow associated with the activity being executed.
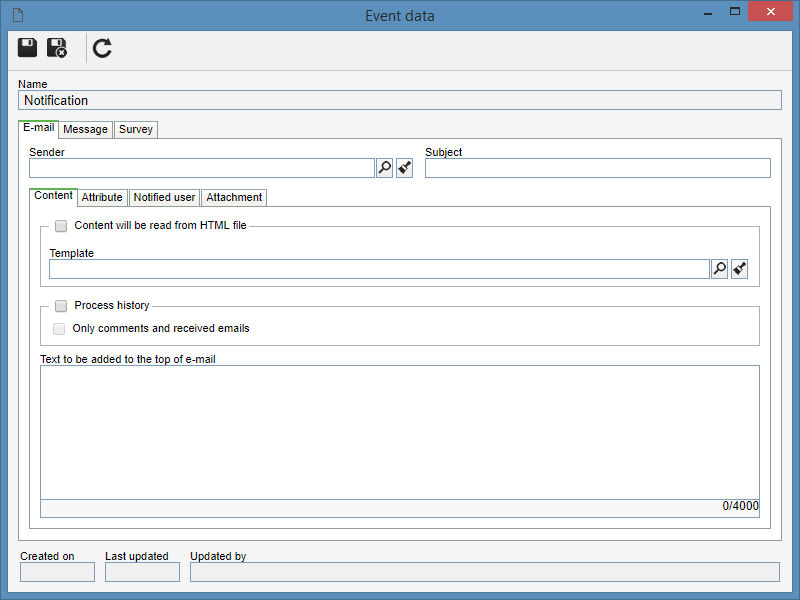
Refer to the SoftExpert Process documentation for a detailed description of the fields displayed on the event data screen.
Execution actions
As displayed on the video, the activity data screen has a field that gathers the actions to be performed in the activity. The options vary according to the configurations made in process modeling, and they can be used to execute the activity or perform other operations with it.
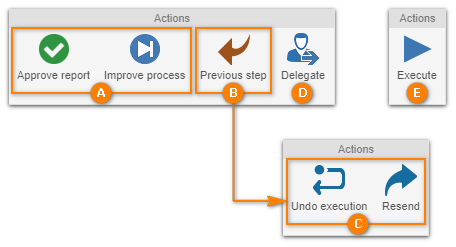
A — The activity actions allow executing the current activity and sending the flow to another element of the process. When you perform an activity action, the system may automatically perform some operations, such as executing an external application, sending an e-mail notification, or enabling a timer event, among others. Each action refers to an output flow of the activity being executed.
B — The Previous step action allows the process flow to return to the previous activity without the need for return action modeling. To execute this action, it is necessary to fill out the Comments field with an explanation and click on the respective option. At this time, the previous activity will be enabled for the responsible party to execute it again.
C — When an activity is returned, the executor can perform the following actions:
- Undo execution: This action cancels the execution of the subsequent activities of the activity in question, allowing a new execution to take place. That is, when executing this action, the activity screen is reloaded with the action options that appear when the activity is enabled for the first time. Remember that, when performing this operation, it is necessary to provide an explanation in the Comments section.
- Resend: Allows you to send the activity back to the same flow point, in which it was found before, without the need to undo its execution.
D — This action enables responsible user to Delegate the execution of the activity to another user. To do so, it is necessary to fill out the Comments field with an explanation and click on the respective option. At this point, a screen to select the user who will take the responsibility for the execution of the activity will be displayed. When saving the selection made, the activity will be enabled for the new responsible party to execute.
E — This action allows you to finish a sub-activity execution.
Action rules
A — Activity actions
Before clicking on this option, make sure all required fields of the activity data screen have been properly filled out. Depending on the configurations made in the activity action data during the process modeling (SoftExpert Process), the completion of some fields or the association of some objects may be required for the activity to be executed successfully.
B — Previous step
This action will only be displayed if the Disable action for sending record back to previous activity option has not been checked in the activity data (Tools > Configurations > Instance) during process modeling.
Even if the Disable action for sending record back to previous activity option is not checked, the Previous step action will not be displayed when:
- The current activity is a sub-activity.
- There is no activity in the return path between the current activity and the start of the instance. For example, when the current activity is the first activity of the instance.
- There is a sub-process in the return path between the current activity and the previous activity.
- There is a gateway in the return path between the current activity and the previous activity.
This action will not be displayed if, in the previous activity, there is an action that changes the status of the action plan.
D — Delegate
This action will only be displayed if the Allow activity to be assigned to another user option has been checked in the activity data (Tools > Configurations > Instance) during the process modeling.
Remember that the activity delegation may be limited to users in the same team as the current activity executor or to users of a specific team. This configuration is set on the activity data screen (Tools > Configurations > Instance) during the process modeling. If no restriction has been configured, then the activity can be delegated to any user.
Timesheet
The Enter time button will be displayed if your organization has an active license for the Time Control component.
By clicking on this button, the timesheet screen will be displayed. For further details on timesheets, click here.
Identification
The Identification button will display, on a screen that will be opened, the ID #, Title, and Workflow type fields. The first two fields are filled out when starting the workflow, and the Workflow type field can be filled out as desired. Note that its completion is not mandatory.
For further details on workflow types, refer to the Configuring a workflow type article.
Conclusion
If the authenticated user is also the executor of the next activity, the system will ask if you wish to execute it. If so, the data screen of the next activity will be displayed for completion.
If the process that automates the workflow has asynchronous system activities in its flow, its execution can be accompanied by the manager of the process/instance, through the Management > Workflow (WF004) menu.