Configuring a copy station
Prerequisite
- Access to the Configuration > Copy distribution > Copy station (DC046) menu.
Introduction
The purpose of the copy station is to control the distribution of the documents in the company, to prevent obsolete versions from being used, and to ensure access to current versions for those who need it.
Later, the copy stations must be associated with the configured documents for the copy distribution to be successful.
In this article, as an example, the “INT01-Work instruction” copy station will be created to be used in the scenario of the copy distribution of a work instruction document.
See how to configure a copy station:
Configuring a copy station
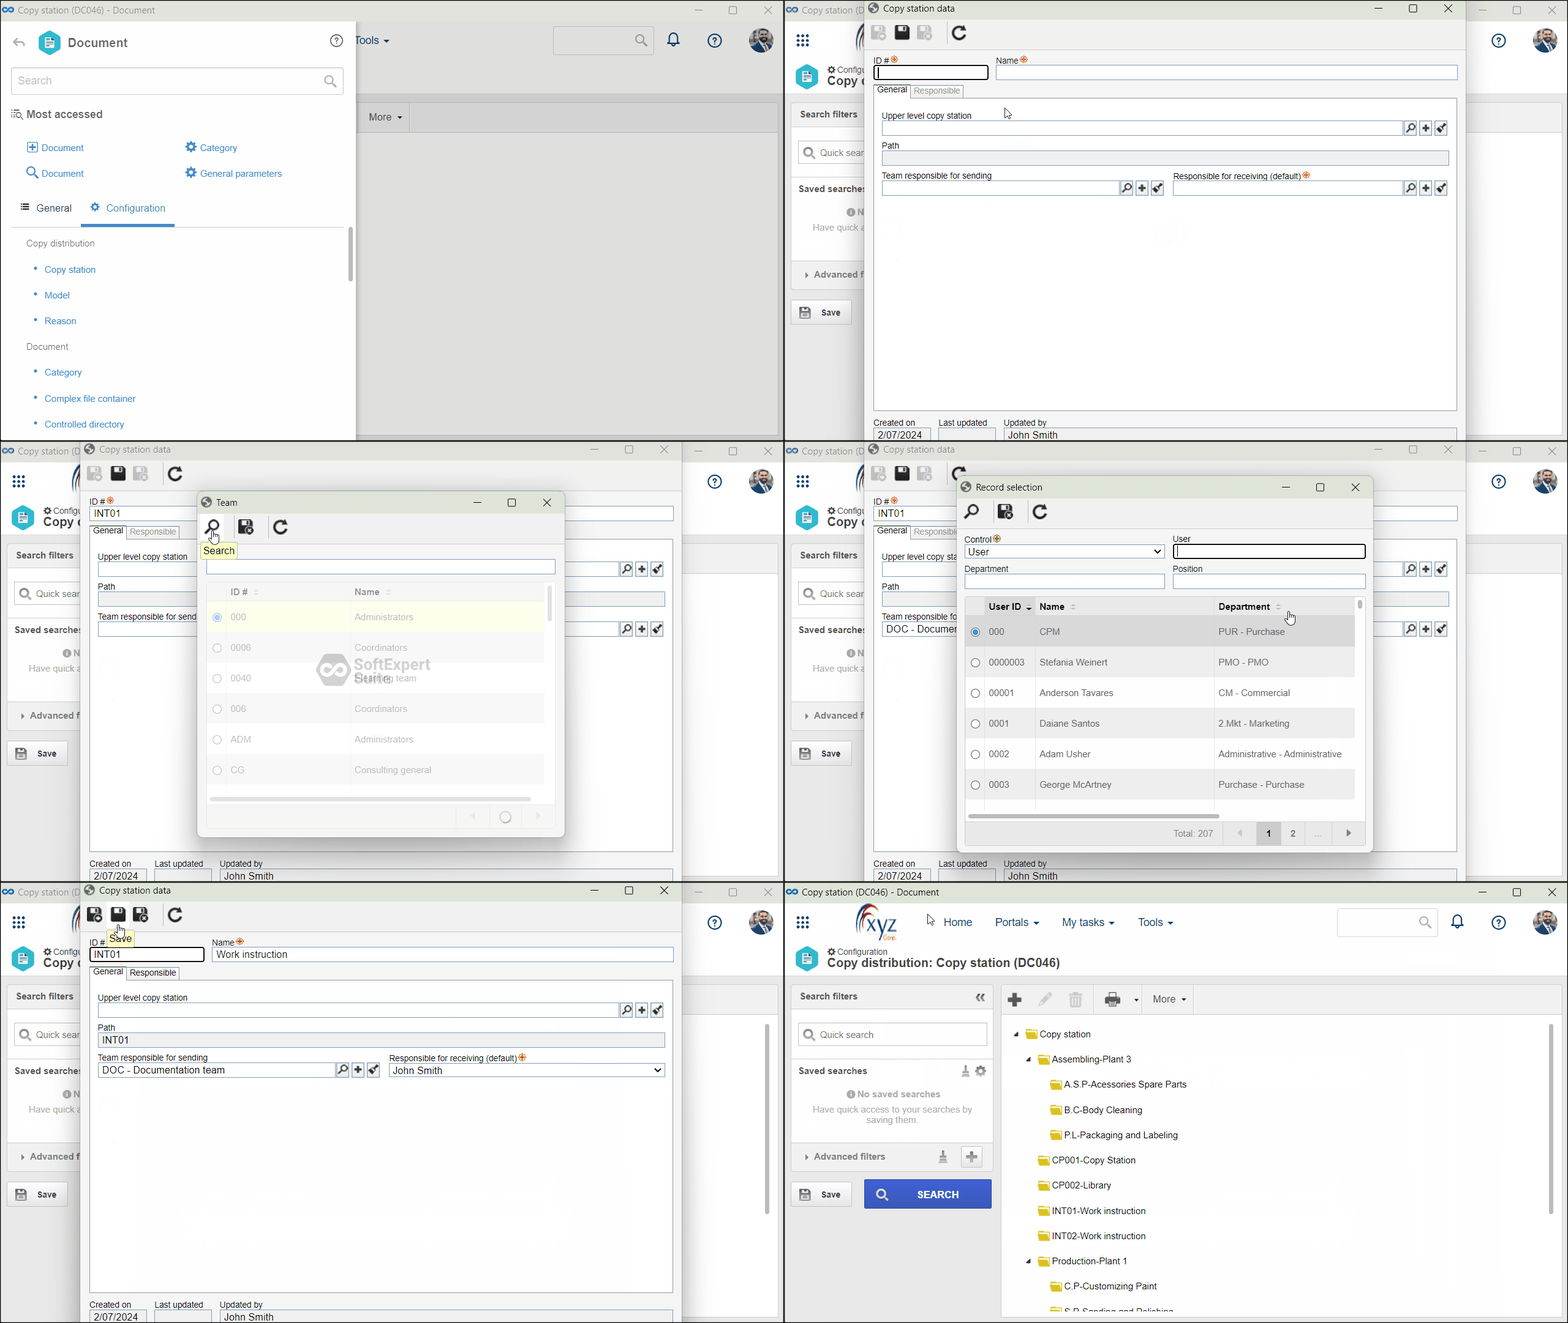
1. Access the Configuration > Copy distribution > Copy station (DC046) menu.
2. Click on the  toolbar button.
3. On the screen that will be opened, enter an ID # and a name for the copy station.
4. In the General tab, fill out the Upper level copy station field for the station to be hierarchically added below another station. To do so, select the desired copy station or create a new one.
If a copy station is selected in the main screen hierarchy, the Upper level copy station field will be filled out by the system, but it is possible to edit it.
The Path field displays the records that are above the copy station in the hierarchy.
5. Select the team that will be responsible for sending the printed copies of the document.
6. Select the default responsible user for receiving the printed copies.
The selected user can be edited after the other responsible users are associated in the Responsible tab.
7. Click on  .
.
8. At this point, the Responsible tab will be enabled to be configured. In it, it is possible to define the other parties responsible for the copy station. The users that are associated in this tab will be available for selection in the Responsible for receiving (default) field of the General tab.
9. Click on the  button on the side toolbar to add one or more responsible parties.
10. On the screen that will be opened, locate and select the desired users and save the selection.
11. Upon finishing the configurations, click on  on the general data screen.

Conclusion
The copy station is duly configured! The next step is to configure the copy distribution in the desired document category.


