How to revise an article
Prerequisites:
- Access to the File > Article (KB002) menu.
- Article created and released.
Introduction
To maintain the standard of articles and a history of changes, SoftExpert Knowledge base provides revision control.
For the article to be available to users, it is necessary to release its revision. After releasing it, if new changes are needed, it will be necessary to add a new revision to the article.
It is important to note that SoftExpert Suite provides three revision templates: ISO9000-based, Workflow, and Simplified. If the simplified revision was chosen for a specific knowledge base, the entire revision process of the article can be performed through the creation menu (KB002), but if the ISO9000-based or Workflow template was chosen, the Article revision task will be generated for the parties responsible for the revision. In this case, the responsible parties will need to access the task to approve or reject the changes made to the article.
See how to perform these operations:
Accepting an article revision
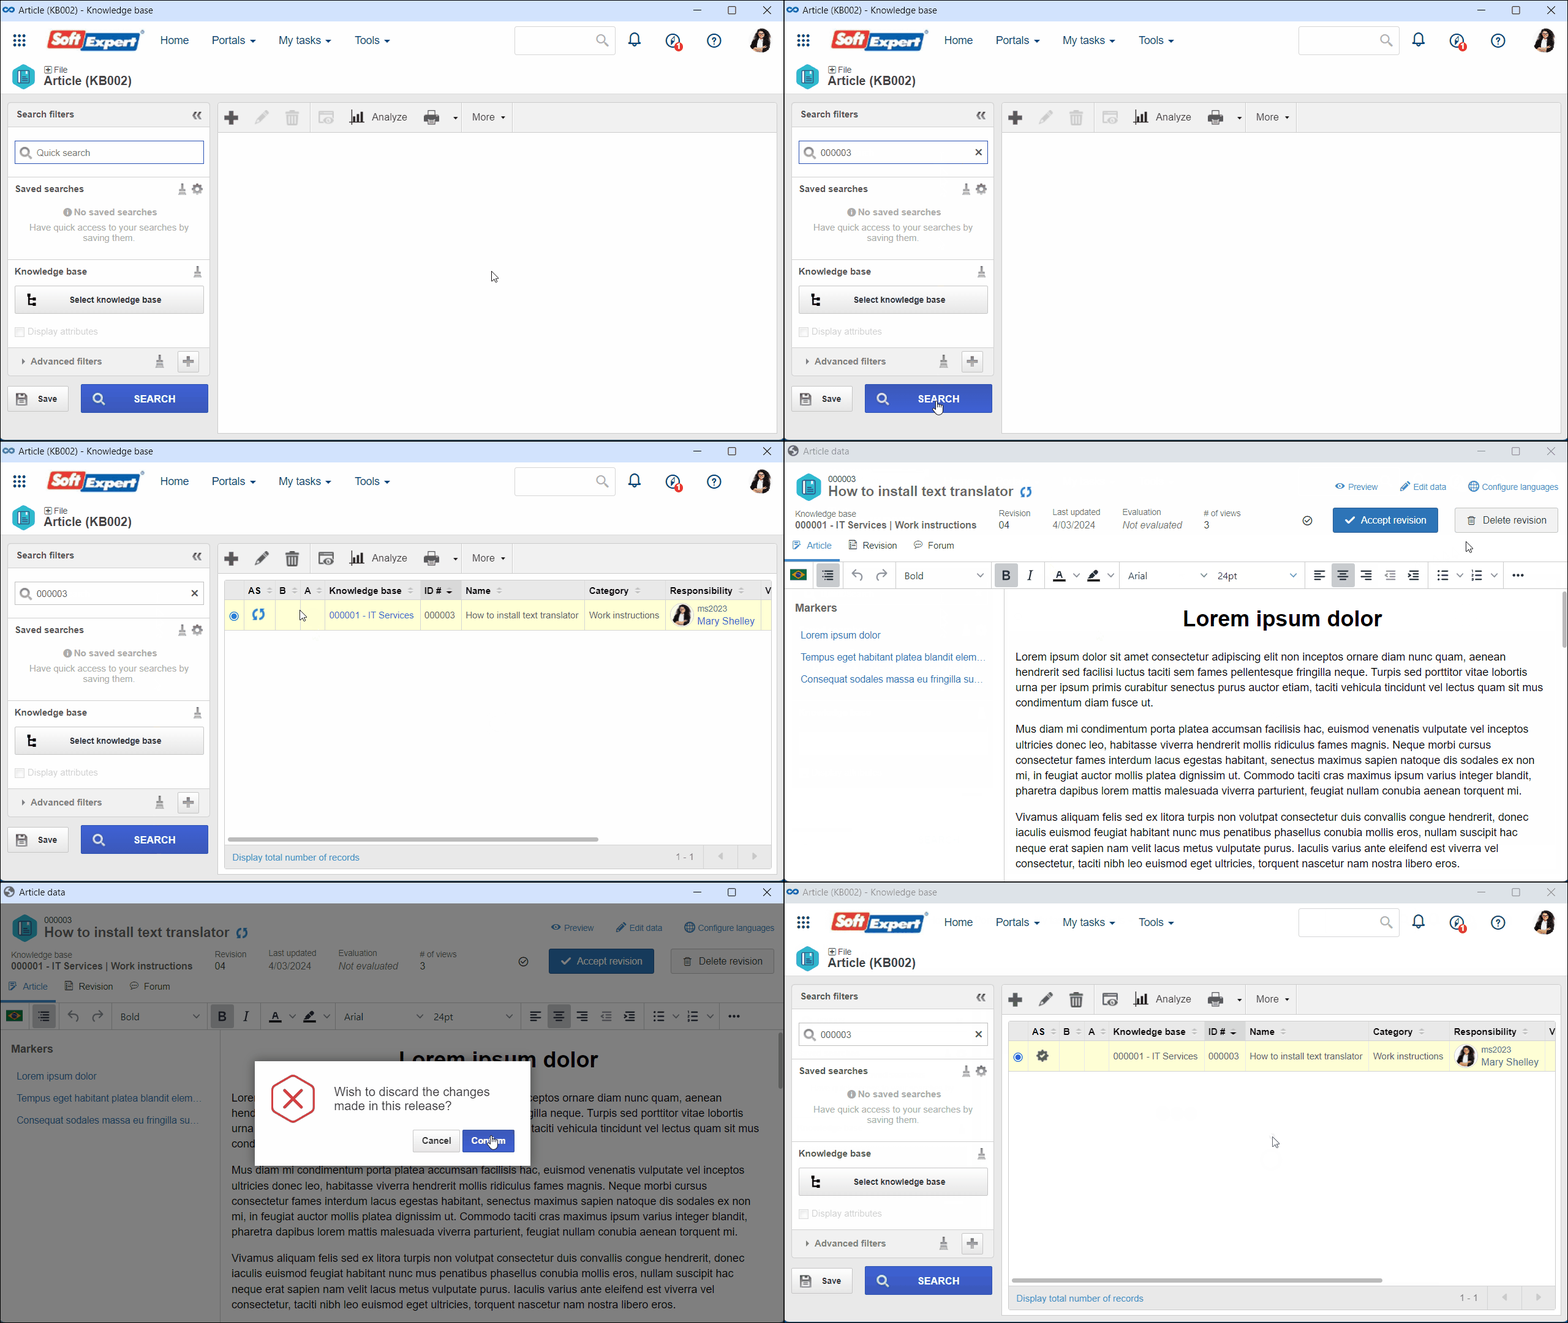
1. On the article data screen, click on the Accept revision button.
2. On the screen that will be opened, click on the Confirm button.

• The system does not allow for releasing the revision of articles whose content is not filled out.
• When the article revision is first released, the Forum tab is enabled. In it, users can create discussion topics about the content of the article.
Executing a revision task
1. Access the task menu, locate the Knowledge Base component, and select the Article revision task.
2. On the menu that will be opened, select the file being revised and click on the  button.
3. Click on the Accept revision button to send the revision to the next step or release the article to users, or click on the Reject revision button to return the revision to the previous step.

Access the What is a revision? article to learn how to configure the revision templates.
Adding a new revision
1. Access the File > Article (KB002) menu.
2. Select the article that must be edited.
3. Click on the  button.
4. On the Article data screen, click on the Add new revision button.
5. Click on the Confirm button.

When a user is making changes to the article, it is blocked from editing. This prevents two people from editing the same article at the same time, causing conflicting changes.
Deleting a revision
In some cases, changes made during the revision are no longer necessary. In these cases, it is possible to delete the revision, so that the last current revision of the article continues to be valid.
1. Access the File > Article (KB002) menu.
2. Select the article being revised.
3. Click on the  button.
4. On the Article data screen, click on the Delete revision button.
5. Click on the Confirm button.

To view the revision history of the article, refer to the Revision tab.
Conclusion
All done! The article revision process is finished.


