Creating an external application
Prerequisites
- Access to the File > Automation > External application (PM042) menu.
- Access to SoftExpert Workflow.
Introduction
External applications are PHPs that run on the server and can be invoked during the execution of a process in SoftExpert Workflow. They can be available both on the SoftExpert Suite server and on a web page.
They are used to solve specific problems that SoftExpert Suite does not yet handle natively.
Its execution can take place in two ways:
- In the execution of a system activity without human interaction. In this case, the system will execute its application and follow the process.
- In the action of a user activity. Here, it is possible to configure that the external application will be executed, which will be followed by the execution of the activity. Or simply execute the external application without executing the activity.
Environments with SoftExpert Suite in a GNU/Linux server:
From version 2.1.3 onwards, the customized external applications that were in the web folder must now be in the customization folder, maintaining the path structure to which they belonged, such as the following folders (considering /usr/local/se to be the path in which SoftExpert Suite was installed):
- /usr/local/se/web/wwwroot/workflow/wf_app
As of 2.1.3, it will be in:
- /usr/local/se/customization/web/wwwroot/workflow/wf_app
Creating an external application
1. Access the File > Automation > External application (PM042) menu.
2. Click on the  button.
3. Enter the ID # and name of the external application.
4. In the General tab, note that the Use native external application field is enabled. This indicates that the native applications of the system will be used.
5. If you keep the Use native external application option enabled, in the Native applications field, select the desired option.
6. If you disable the Use native external application option, in the Application path field, provide the full path where the external application is located. For example: “http://intranet/login.php”.
7. If necessary, in the Description field, enter additional information on the application.
8. Click on the  button.
Adding the external application parameters
During the creation, after saving the external application for the first time, the Parameters tab is enabled, in which all parameters that can be passed at the moment of calling the external application must be provided.
1. In the Parameters tab, click on the button.
2. In the ID # field, enter the name of the parameter to be sent to the external application.
3. Check the Parameter is fixed for all calls field for the parameter to be fixed for all calls to the external application.
4. In the Type field, specify whether the parameter value will be constant or variable.
5. If the parameter type is constant, in the Constant value field, enter the value that will be sent to the external application.
6. If necessary, enter a description for the parameter.
7. Click on the  button.
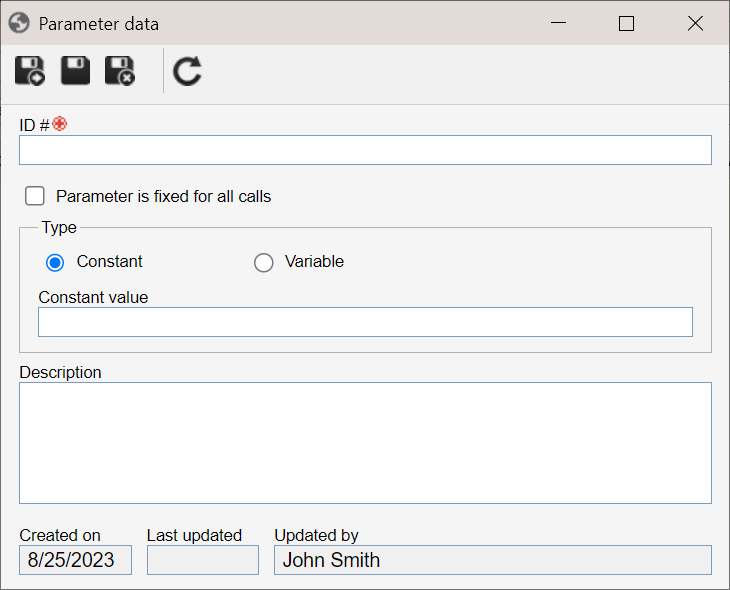
Differences between parameter types:
- Constant parameter: the system will always send the same value to the external application, regardless of the activity or process in which it is used.
- Variable parameter: it is possible to enter the value when configuring the external application in an activity. This way, in a process, the external application can receive a value and, in another process, a different value.
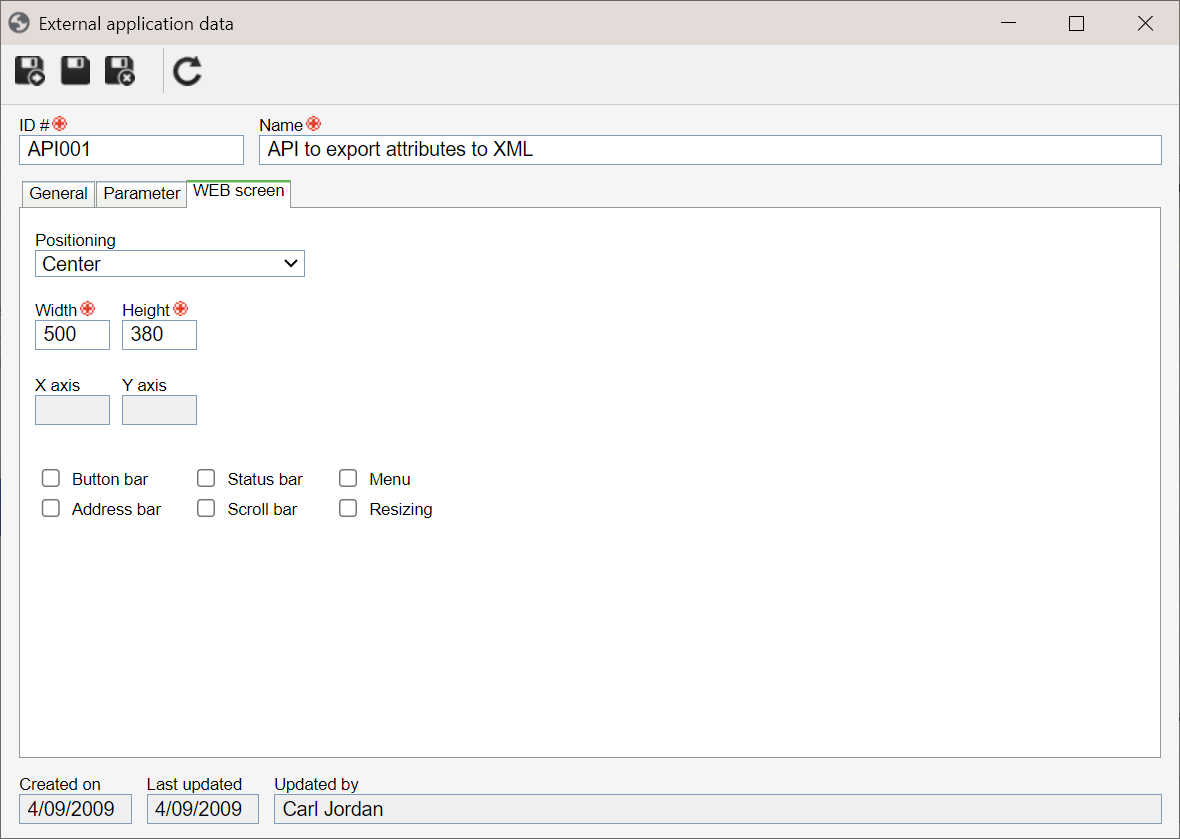
Configuring screen properties
On the WEB screen tab on the external application data screen, configure the screen properties if the execution type is WEB.
1. On the External application data screen, access the WEB screen tab.
2. Select the positioning of the screen for when the external application is called. Choose between Center, Maximized, Upper left, or Customized.
3. The Width and Height fields will be enabled if, in the Positioning field, one of these options is selected: Center, Upper left, or Customized. In this case, enter the height and the width (in pixels) of the external application screen.
4. The X axis and Y axis fields will be enabled if, in the Positioning field, the Customized option has been selected. In this case, set the screen position using the X axis and Y axis fields (in pixels), and set the screen size of the external application using the Height and Width fields (in pixels).
5. The tab presents some more options. Check in the table below what each one represents:
| Button bar | Select this option to show the Internet browser toolbar on the screen. |
| Address bar | Select this option to show the address bar of the internet browser on the screen. |
| Status bar | Select this option to show the status bar on the screen. |
| Scroll bar | Select this option to show the scroll bars (vertical and horizontal) on the screen. |
| Menu | Select this option to show the menu on the screen. |
| Resizing | Select this option to allow the screen to be resized. |
6. Click on the button.
Upon finishing all external application configurations, click on the button.
Conclusion
The external application will be created and ready to be used in the execution of a process in SoftExpert Workflow.