Managing deadlines
Prerequisites
Introduction
In SoftExpert Process, it is possible to manage deadlines using the deadline feature. The deadline represents a stopwatch that triggers an action when it reaches zero. That is, when an activity or process reaches a certain execution time set as its deadline, an action will be triggered.
This feature can be configured for the process and for the process activities.
To configure the deadline of a process, on the process data screen, click on the Configurations button and then on Deadline. The deadline management screen will be opened:

To configure the deadline of an activity, on the activity data screen, click on the Configurations button and then on Deadline. The deadline management screen will be opened:
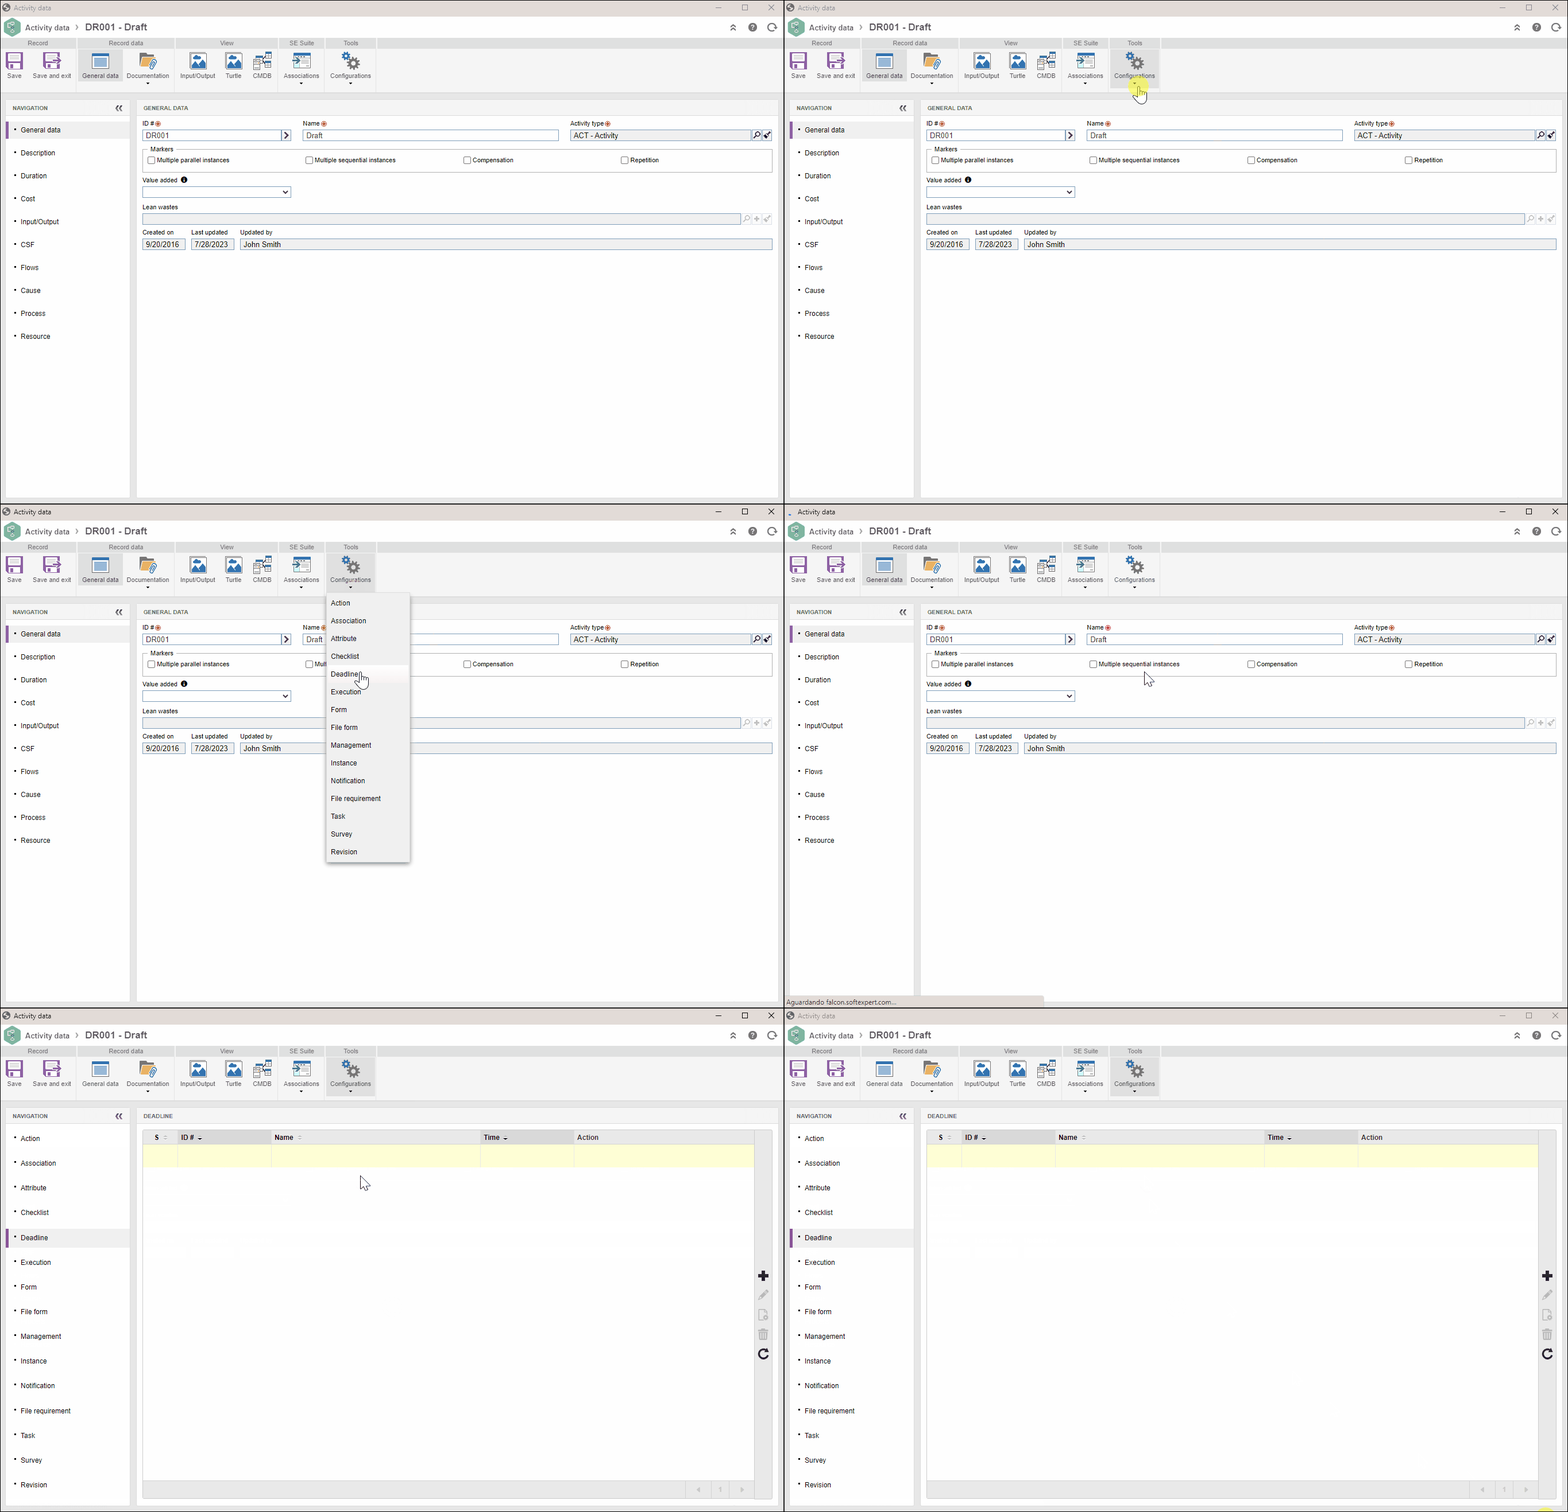
On the screen that will be opened, perform the following steps:
Managing deadlines
1. Click on the  button.
2. On the screen that will open, enter an ID # and a name for the deadline.
3. In the Time field, enter how much time the execution of the process or activity must take for the deadline action to be triggered. It will not be possible to select a time shorter than 15 minutes for the scheduling.
4. Save the record. At this point, the other fields will be enabled for completion.
5. In the Action tab, configure the action that will be triggered by the deadline. In order to do that, use the following fields:
- Change executor: this option is valid for activity deadlines. If this field is checked, when the deadline is reached, the activity executor can be changed. In the New executor field, select who will carry out the activity.
- Alert responsible users: check this option to send an e-mail notification to certain responsible users as soon as the execution duration of the process or activity reaches the time set as the deadline. Use the buttons in this section to associate the responsible users that will be notified.
This notification corresponds to the "Expired deadline" e-mail, which shows the information of the process or activity to which the deadline is related.
6. Click on Save and exit.
With the deadline record saved, it is possible to use the other buttons in the Deadline section:
 |
Click on this button to edit the configurations of the selected deadline. |
 |
Click on this button to disable/enable a selected deadline. |
 |
Click on this button to delete the selected deadline . |
Conclusion
Thus, after saving the configurations, when the deadline is reached, the actions configured above will be triggered.