Creating an execution matrix
Prerequisites
- Access to the File > Automation > Execution matrix (PM043) menu.
- Previously configured attribute.
Introduction
An execution matrix relates an attribute and its values to an executor (user).
This allows the activity to be executed by a different executor according to the value entered in the attribute.
To do so, after creating the execution matrix, it is necessary to associate it with the desired activities.
Thus, the activities will go through the execution configured in the matrix.
This topic will teach you to configure the execution matrices of process activities.
Creating an execution matrix
1. Access the File > Automation > Execution matrix (PM043) menu.
2. Click on the  button.

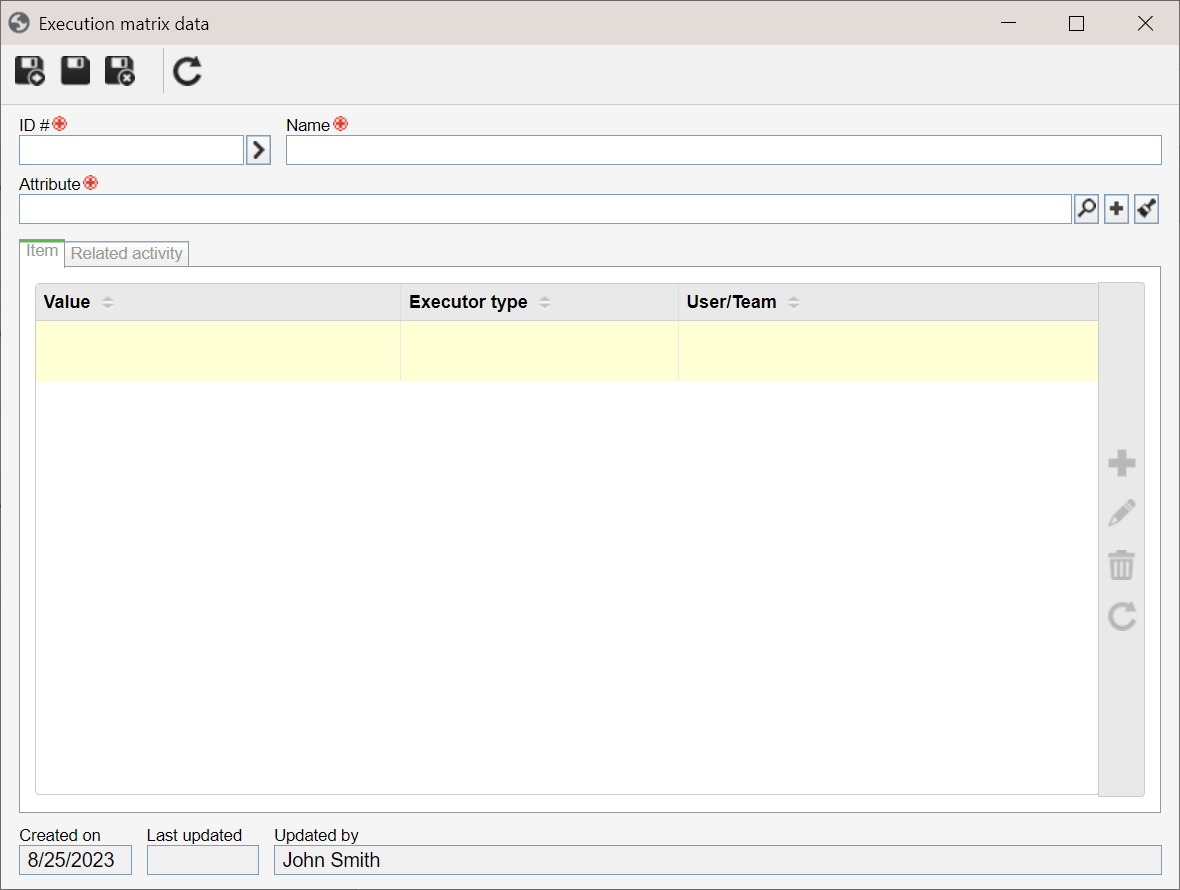
3. On the screen that will be opened, enter an ID # and a name.
4. Click on the  button and select the Attribute to be associated with the execution matrix.
If the corresponding attribute has not been previously created, click on the  button on this field to create it. For further details on attributes and their creation, refer to the What is an attribute? article.
5. Click on the  button. Upon saving the record, the other tabs on the screen will be enabled.
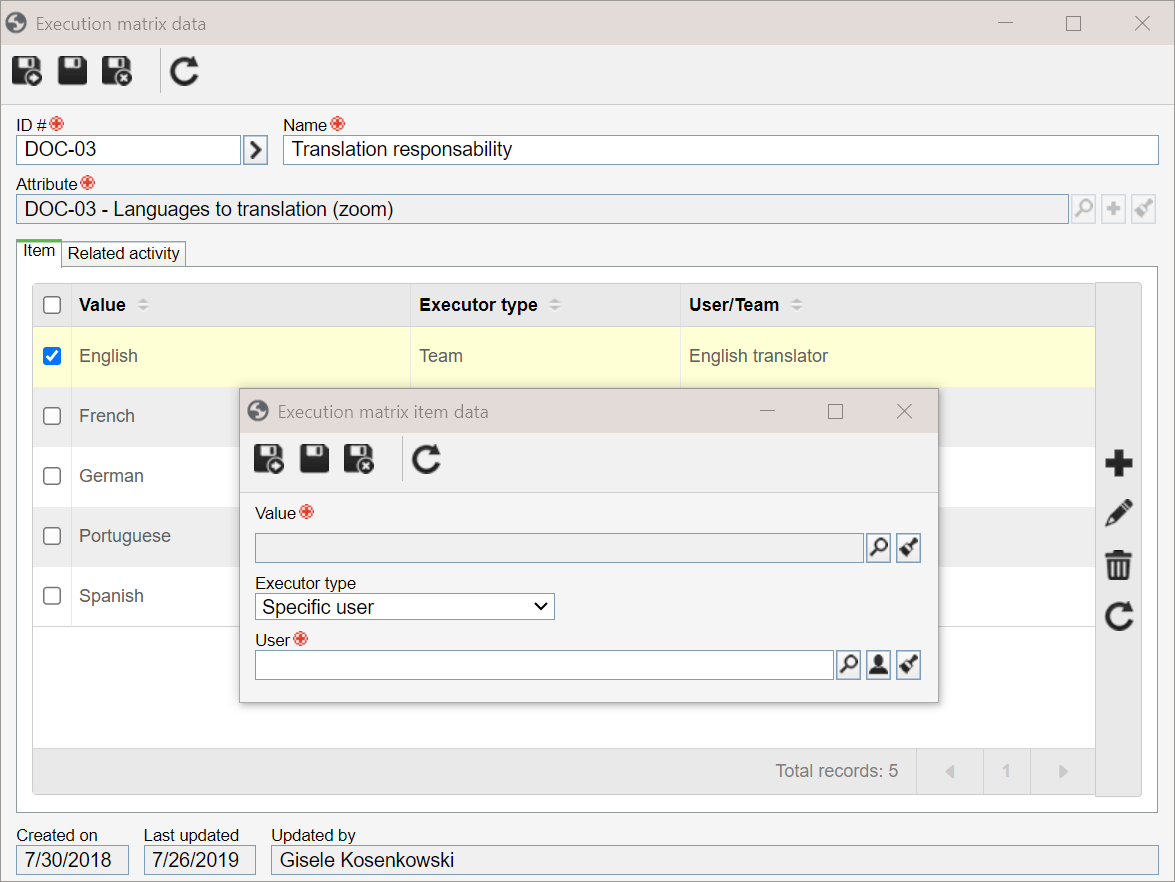
6. Use the Item tab to associate the items that will compose the execution matrix. To do so, click on the  button and add the requested information.
See the fields on the Execution matrix item data screen:

Value: assign a value to the item (attribute) of the execution matrix. When the activity is executed in the SoftExpert Workflow component and this value is entered for the attribute, the activity execution becomes the responsibility of the user selected on this screen.
Executor type: select the type of executor who is responsible for the activity when the value defined on this screen is entered in the activity execution.
User: select the user who will execute the activity that meets the execution matrix condition.
Save the information on the execution matrix item. Create as many items as necessary.
7. The Related activity tab lists all activities associated with the execution matrix.
6. Once the records are finished, click on the  button.
Conclusion
Once the data is added, the execution matrix has been configured.
The next step is to associate it with the desired activities. To learn more about this association, refer to the Configuring the management in the activity article.