Defining the portal category
Prerequisite
- Access to the Portals menu.
- Permission to edit portals.
Introduction
SoftExpert Suite allows for creating categories and classifying portals through them, according to approach, responsibility, or aid in the management of the organization content.
See how to use these resources:
Creating categories
To create categories, perform the following steps:
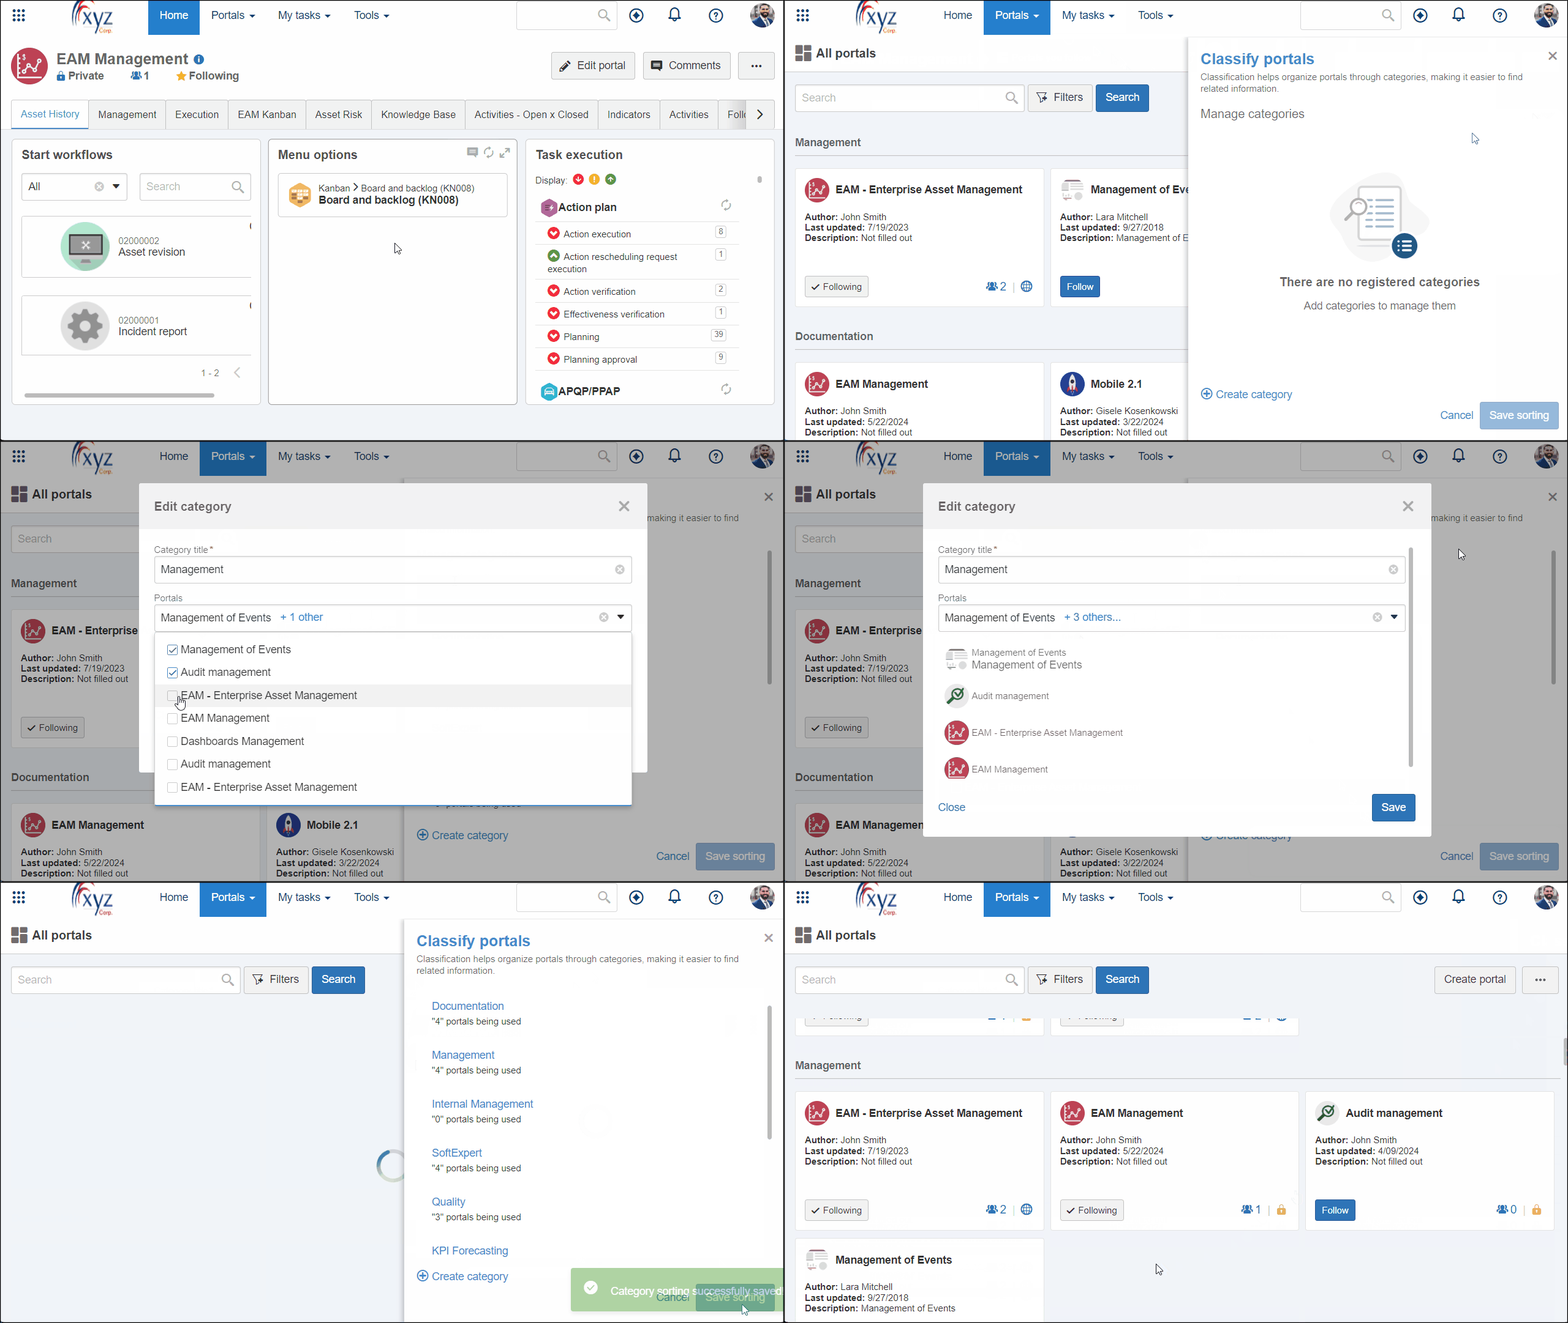
1. Access the Portals > See all menu.
2. Click on the  > Classify portals button.
3. On the Classify portals panel, click on the Create category field.
4. On the screen that will be opened, enter the Category title.
5. In the Portals field, select which portals will be classified under this category.
6. After defining the portals that will be part of this category, click on Save. To create several categories in a row, leave the Create new category field enabled.
7. If you wish to add more categories, repeat the procedures above.

Classifying portals
This step will teach you to classify portals by using the categories previously created in the system:
1. Access the Portals > See all menu.
2. On the screen that has the portals, click on  and select the Classify portals option to manage the categories assigned to the portals.
3. At this point, all created categories will be listed. Each one displays how many portals use it. Select the category and click on the  button.
4. On the editing screen, click on Portals.
5. Enable the portals that must be part of the category.
6. To remove a classification, simply disable the portal.
7. Click on Save to finish the procedure.

Conclusion
By following the mentioned steps, it will be possible to categorize the portals, facilitating the identification of their themes, departments, and responsible parties.


