Configure a process for automation
This article is valid until version 2.1.9 of the system. Click here to access the documentation referring to later versions.
This topic will show you how to configure a process for automation.
As an example, we will use the purchase request process created in the Create a process topic.
To this end, simply follow the steps below:
1st step: Enable process for automation
For this step, your user must have access to the SE Workflow component.
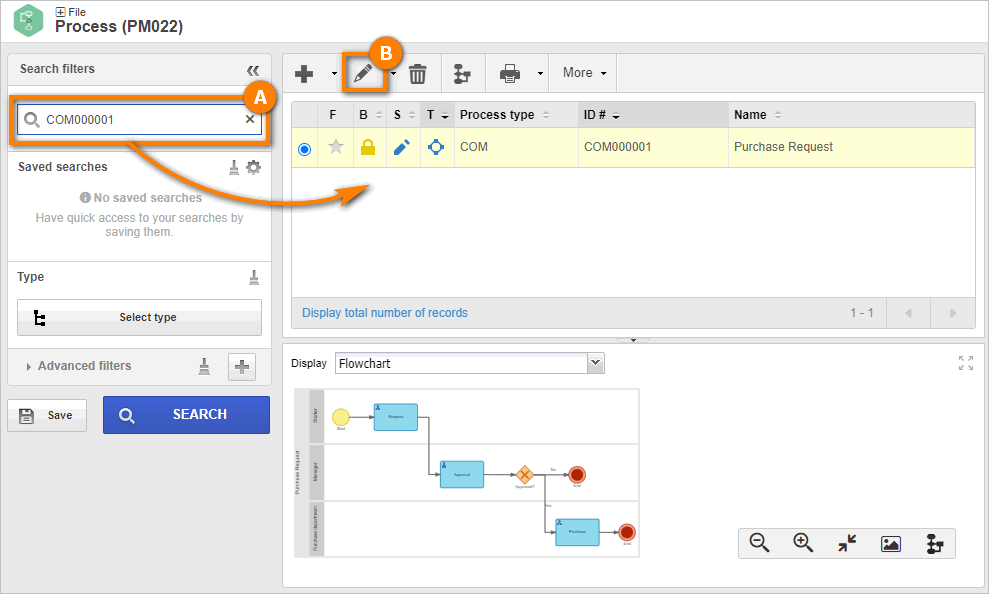
To enable the process for automation, go to the PM022 menu.
In the Quick search field, search for the "Purchase request" process and click on the  button.
On the process data screen, we will enable the process for editing first.
To do so, click on the Enable editing button.
Then, go to the Automation tab and, on the screen that will open, check the Enable automation option.
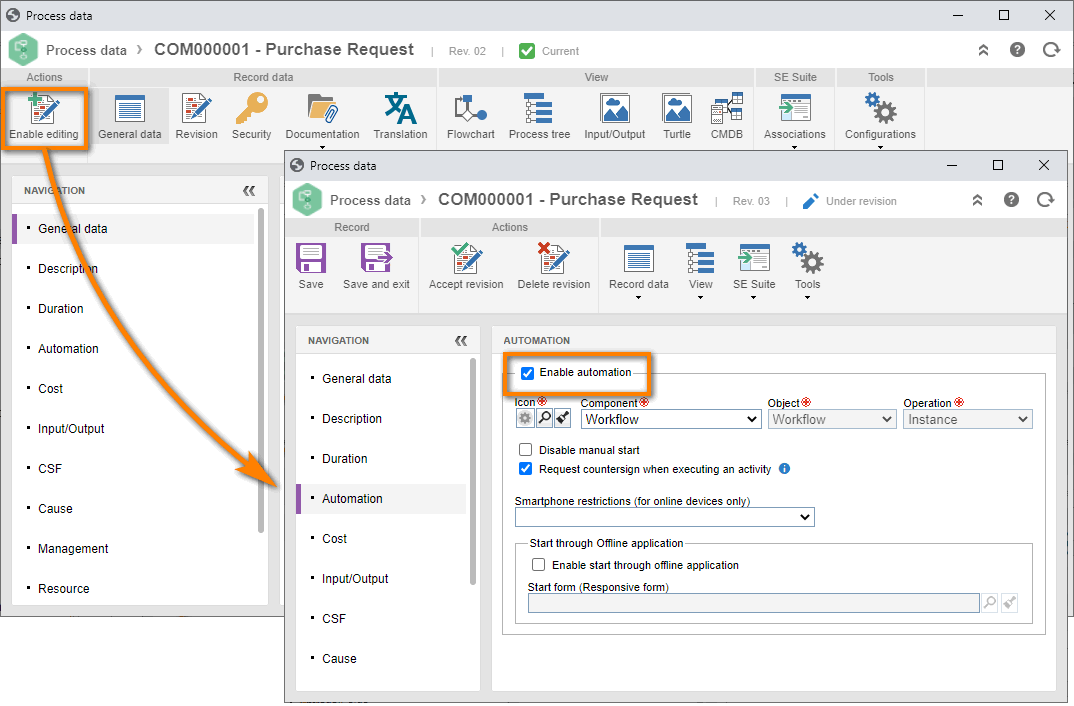
After doing that, click on the  button.
2nd step: Configure participants
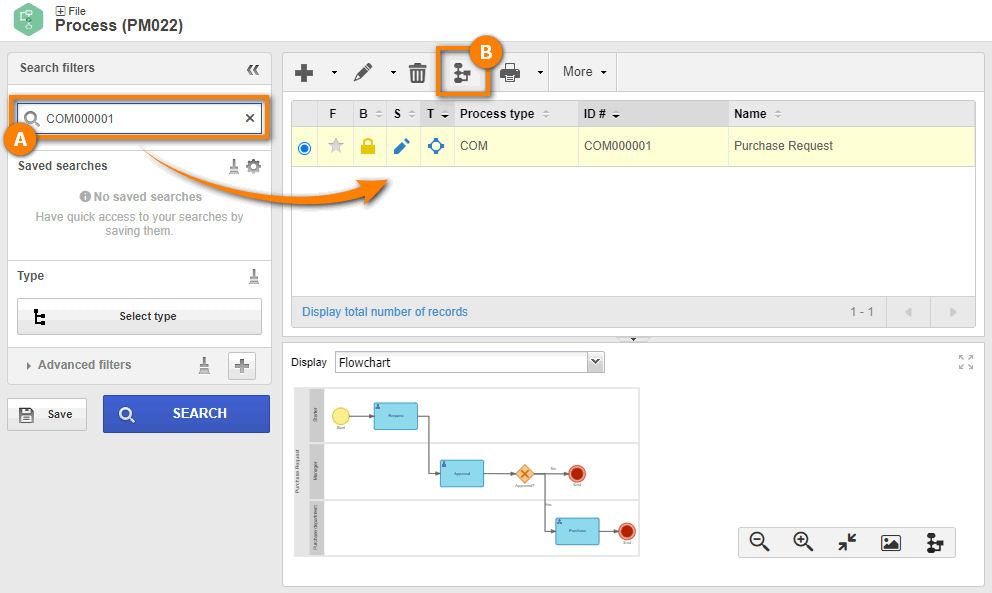
With the process enabled for automation, we will open the process designer.
Go to the PM022 menu; in the Quick search field, search for the "Purchase request" process and click on the  button.
In the process designer, select the second lane "Manager".
Then, select the "Functional role" option in the item panel.
In the Functional role field, click on the  button.
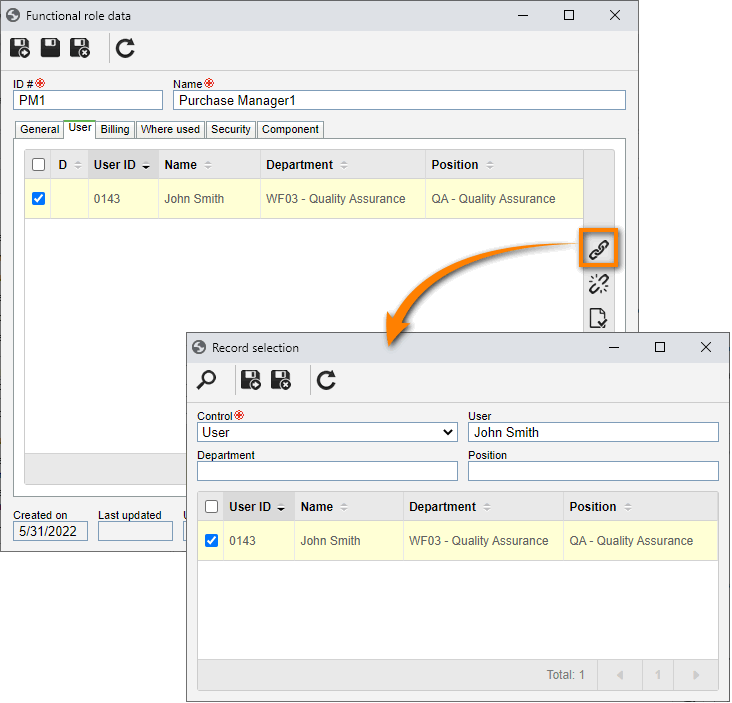
On the screen that will open, fill in the ID # field with "PM" and the Name field with "Purchase manager".
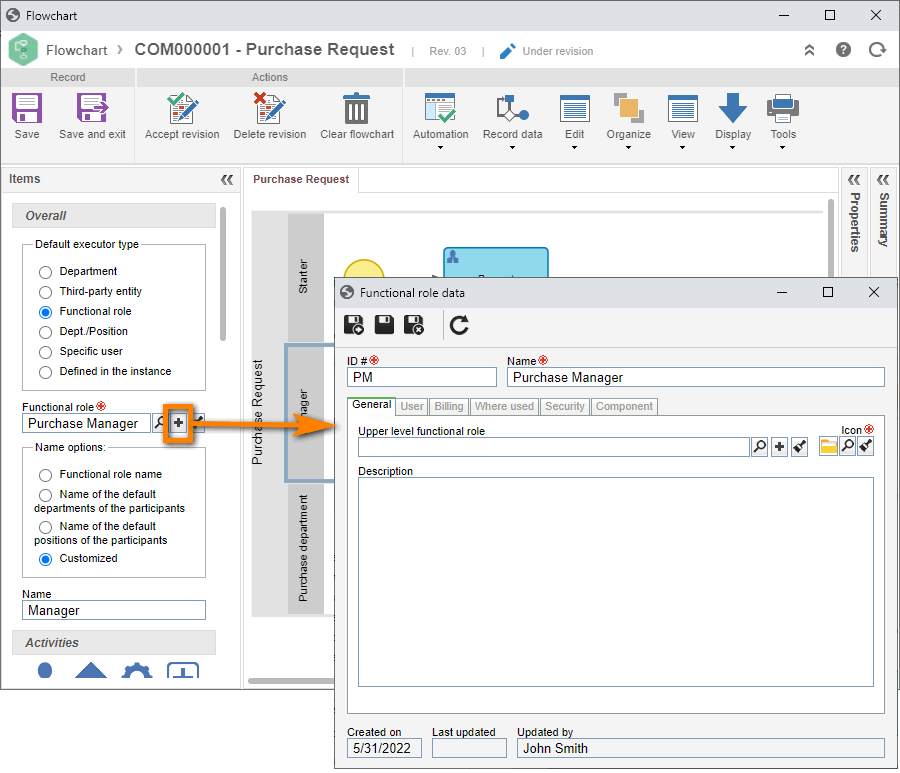
After doing that, click on the  button.
When the screen reloads, go to the User tab and click on the  button.
For this example, associate your own user.
Then, click on the button.
As a result, the process designer screen must be shown with the functional role field completed.
Finally, click on the Save and exit button.
Follow the same steps for the "Purchase department" lane:
In the process designer, select the second lane "Purchase department.
Select the "Functional role" option in the item panel.
In the Functional role field, click on the button.
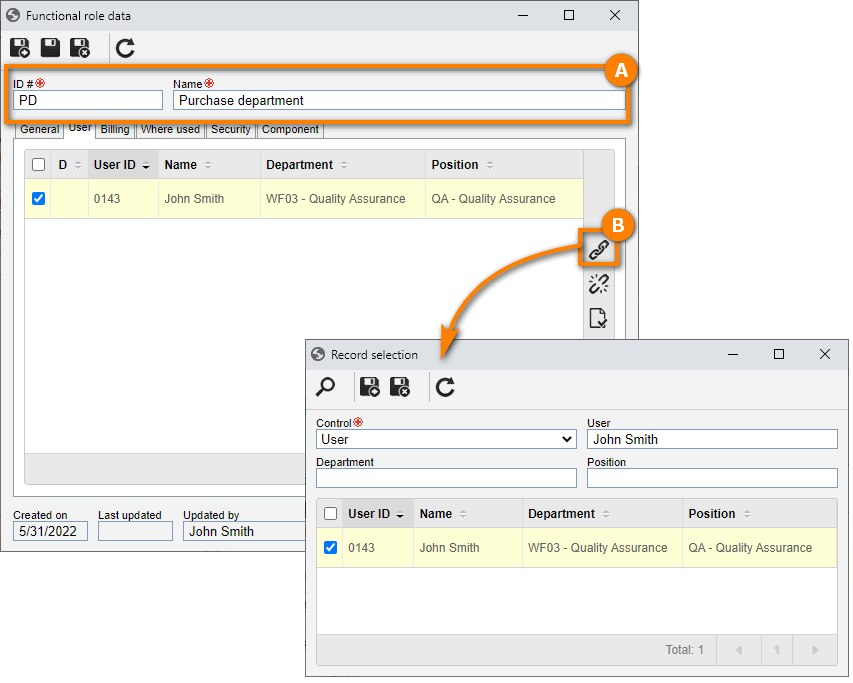
On the screen that will open, fill in the ID # field with "PD" and the Name field with "Purchase department".
Click on the button.
When the screen reloads, go to the User tab and click on the button to associate your user.
Then, click on the button.
In this way, we have successfully configured the participants!
3rd step: Create dynamic fields
Now that your process has its executors configured, we will create fields to request the participants.
To this end, go to the Configuration > Attributes (PM003) menu and click on the button.
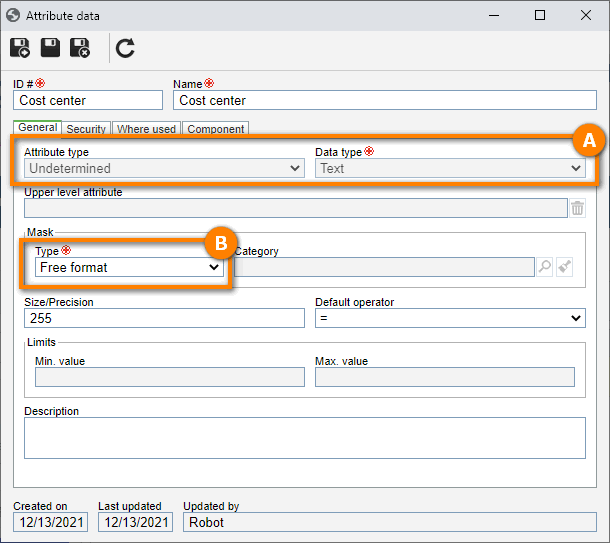
On the attribute data screen, we will create the following records:
1. Cost center: Undetermined text-type field for entering the cost center.
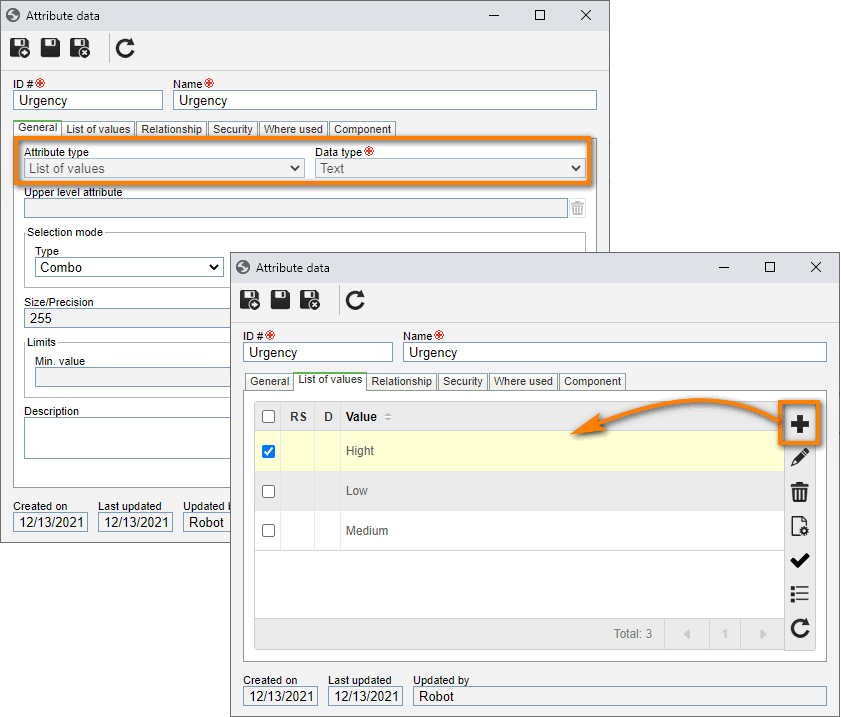
2. Urgency: List of values field for entering the urgency. Example: High, Medium, Low.
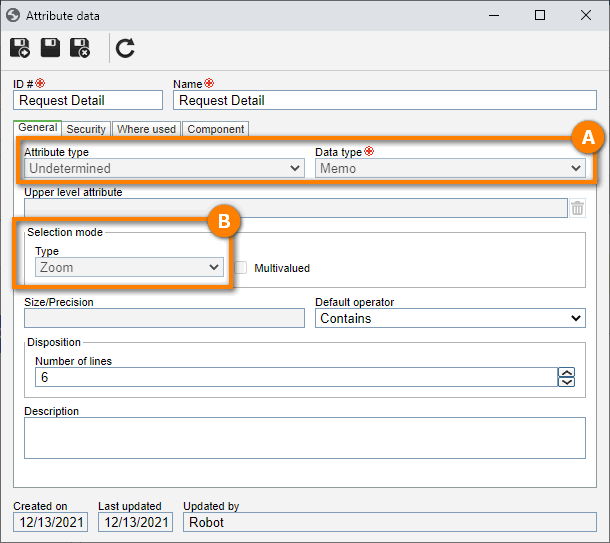
3. Request detail: Memo field for entering the order details.
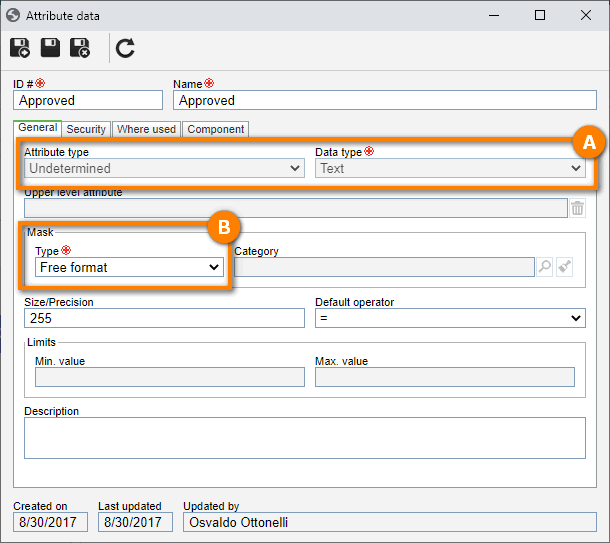
4. Approved: List of values field for informing whether the order has been approved: Yes/No.
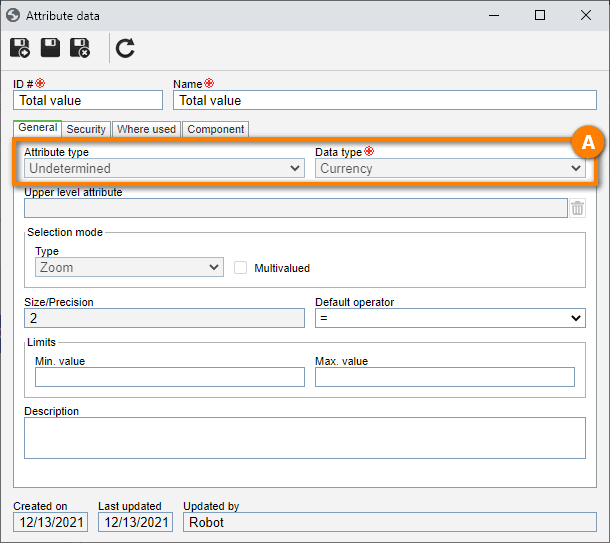
5. Total value: Currency field for entering the total order value.
Done. We have successfully created the dynamic fields!
4th step: Associate attributes in the activities
Now that the attributes are created, we will associate them with the process and with the activities.
To this end, go to the PM022 menu and, in the Quick search field, search for the "Purchase request" process.
Then, click on the button.
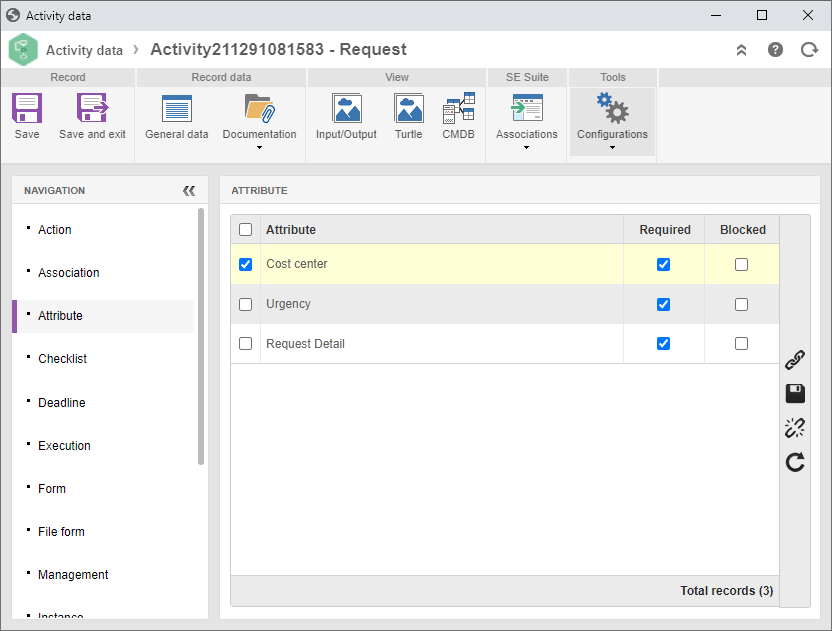
Double-click on the first activity, "Request", to open the data screen.
Then, go to the Configurations > Attribute tab and click on the button.
On the screen that will open, select the "All" option, search for the "Cost" attribute and click on the button.
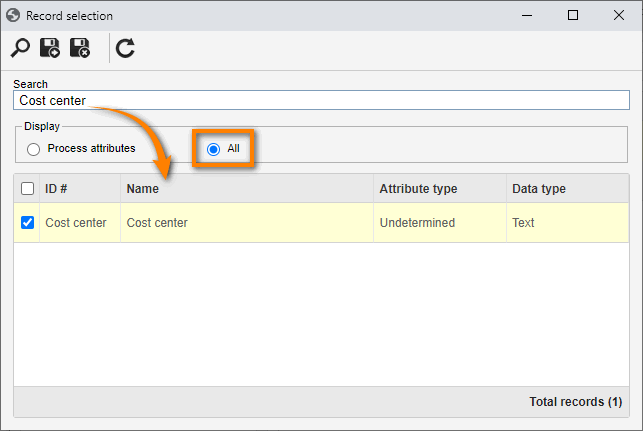
Repeat these steps for the "Urgency" and "Request detail" attributes.
After that, check the Required column option for all attributes and click on the button from the side toolbar.
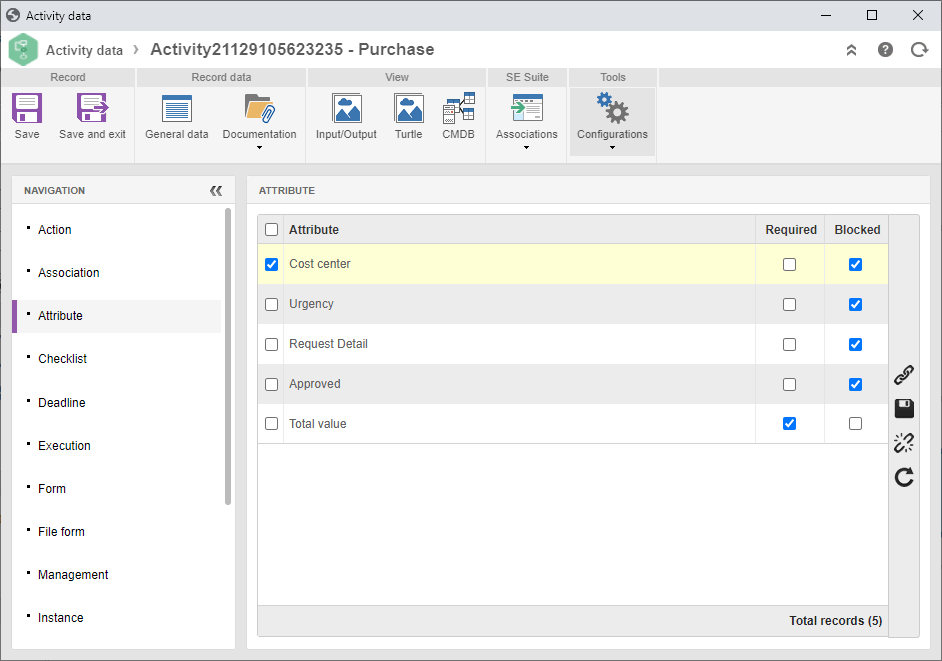
Now, we will configure the attributes of the second activity.
To do so, follow the same steps as those of the first activity:
1. Double-click on the second activity.
2. Go to the Configurations > Attribute tab and click on the button.
3. On the screen that will open, select the "All" option, search for the attributes and click on the button.
4. Check the box of the Required field for all attributes and click on the button.
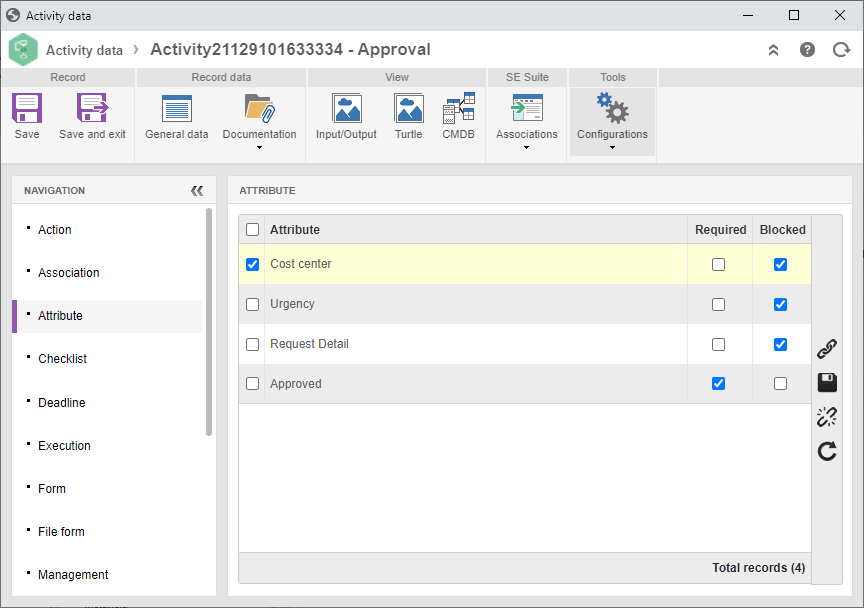
In the second activity, the attributes must be configured as read-only because the activity is only to approve the purchase.
To this end, check the Block column option for the 3 attributes and click on .
In the second activity, "Approval", we need an attribute to inform whether the process has been approved or not.
In this case, we will associate one attribute more.
To do so, click on the button.
After that, search by "Approved", check "All" and click on the button.
To finish this activity, check the box of the "Required" field for the attribute and click on the button.
Repeat the procedure for the "Purchase" activity", associate all attributes of the "Approval" activity as read-only, and add the "Total value" attribute as required.
Done. We have successfully configured the gateway route!
5th step: Configure gateway route
After configuring the participants and attributes in the activities, we will set the route in the XOR gateway.
In this example, if the value of the Approved field is equal to "Yes", the process must follow the route to the "Purchase" activity".
Otherwise, it must go directly to the end point.
To start the configuration, access the gateway data screen and double-click on the XOR item in the flowchart.
Then, go to the Output flow tab, select the route that goes to the "Purchase" destination and click on the button.
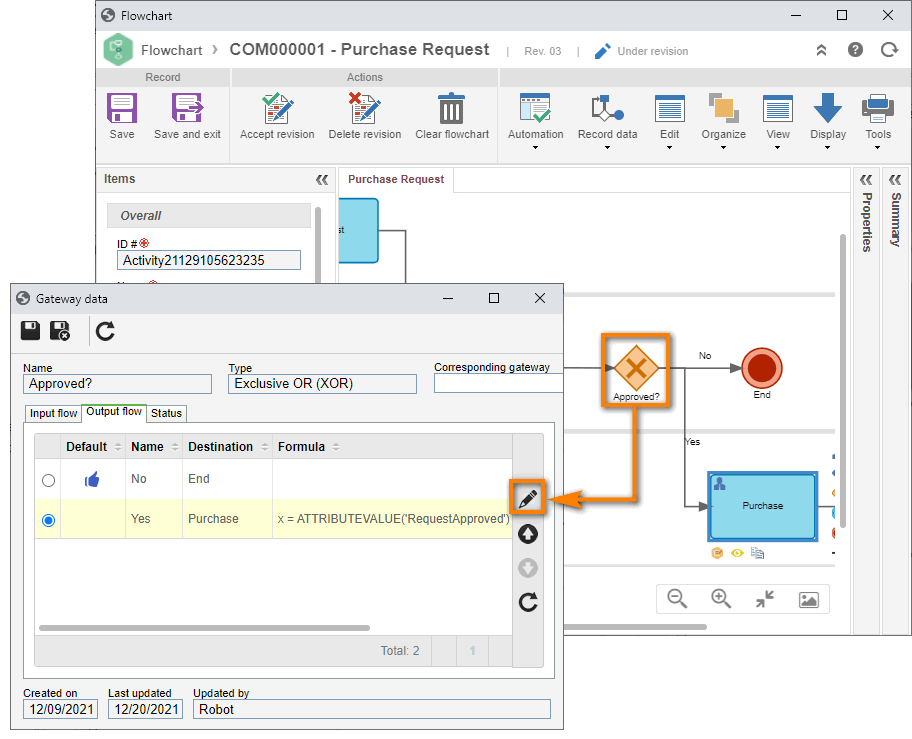
On the flow data screen, fill in the Order field with "2" and click on the  button of the Formula field.
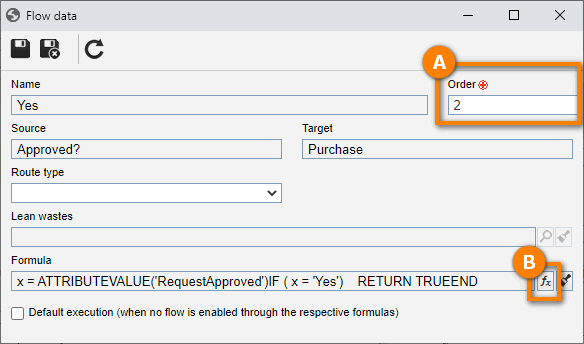
In the formula, we will create a variable that will receive the attribute value.
To this end, type (x =) and click on Process > Attribute value.
On the screen that will open, enter the "Approved" attribute and click on the button.
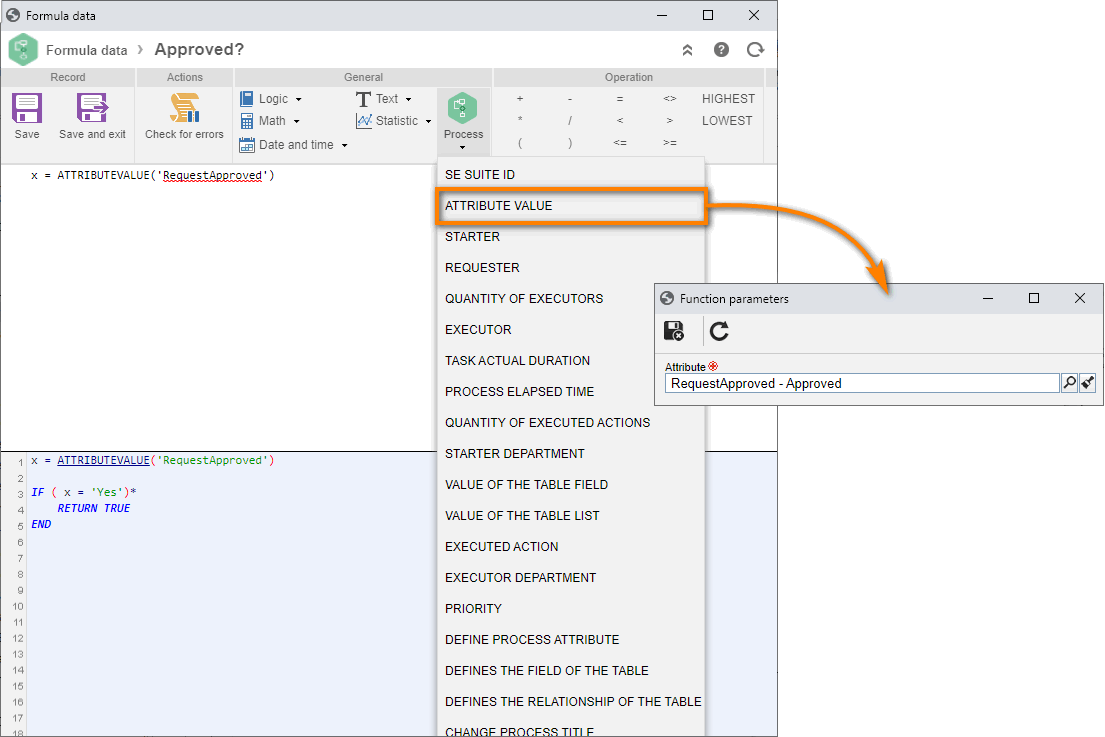
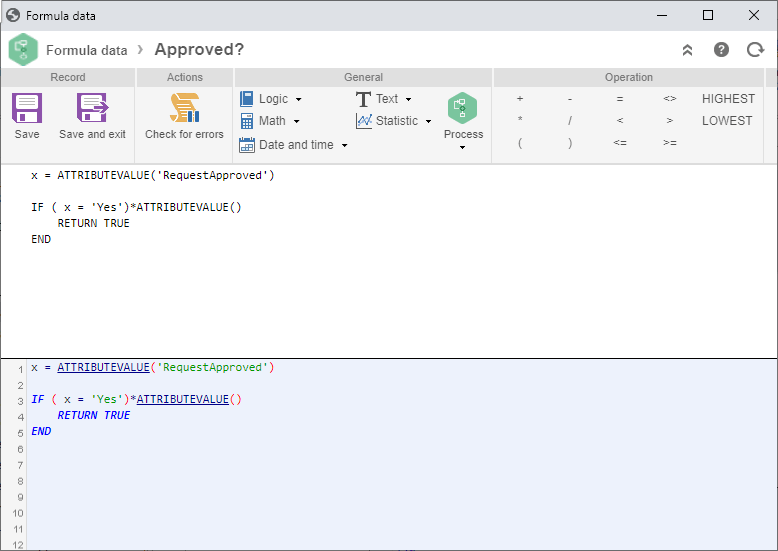
Now, complete the formula setting this condition:
x = ATTRIBUTEVALUE('RequestApproved')
IF ( x = 'Yes')
RETURN TRUE
END
IF the x value is equal to "Yes", return true.
When the return is true, the system understands that it must follow that route.
XOR executes only 1 output with true return.
After completing the formula, click on the Save and exit button.
Then, click on the button, on the data screen of the flow that contains the formula field.
In this way, the route rule for the "Purchase" activity has been configured.
Now, just set the standard route for the "No" option in the flow.
To do so, on the XOR gateway data screen, select the output flow of the rejection route that goes to the end point and click on .
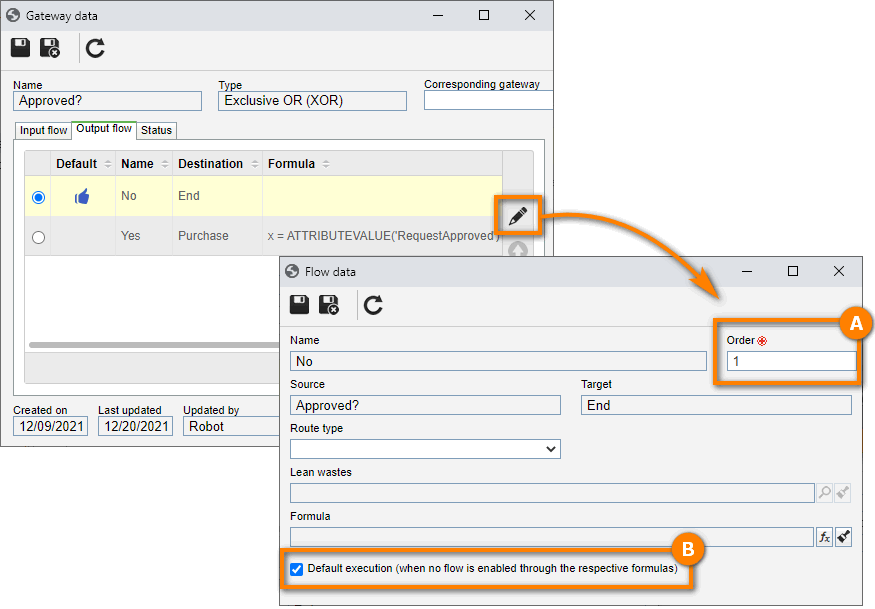
Then, check the default execution option and click on the button of the flow data screen and the gateway data screen.
Done. We have successfully configured the gateway route!
6th step: Start instance
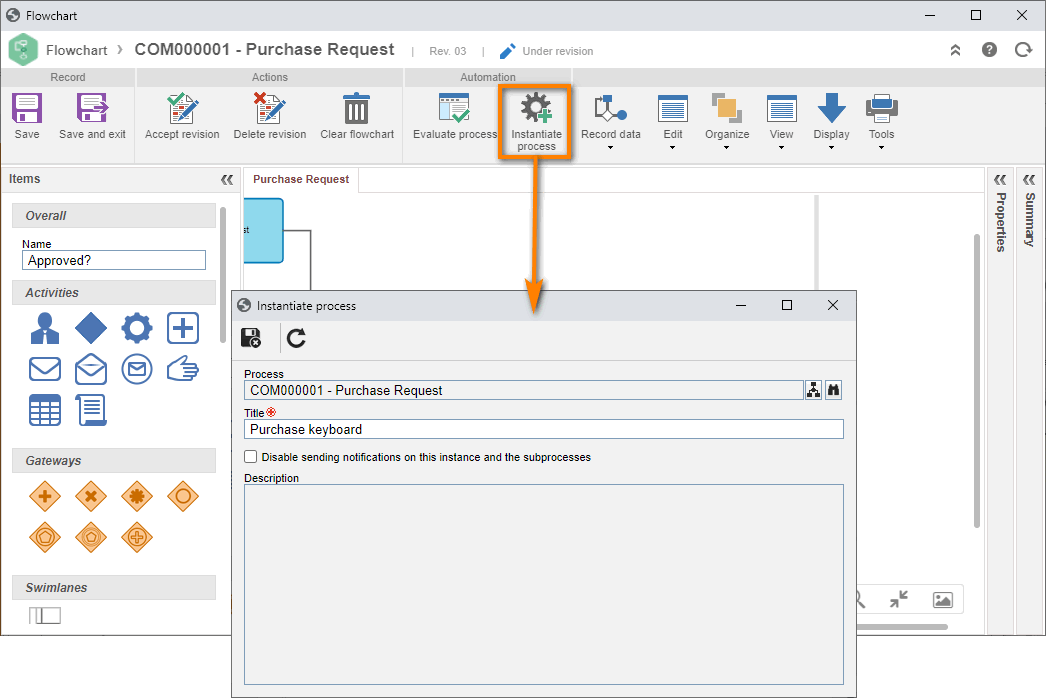
After modeling the process, it is possible to start a validation instance from the revision on edit mode.
To this end, click on the Instantiate process tab.
On the screen that will open, enter the title "Purchase keyboard" for the instance that will be executed.
After setting the title, click on the button.
Done. An instance has been successfully created!