Create a process
This article is valid until version 2.1.9 of the system. Click here to access the documentation referring to later versions.
This topic will teach you to create a process with simplified revision control.
As an example, we will use a purchase request process.
To this end, simply follow the steps below:
1st step: Create a process type
A process needs a type to classify it and keep it all organized.
The goal of this step is to create a type with the default configuration of the system, which has public security control for all internal users and simplified revision control.
To this end, go to the Classification > Process type (PM032) menu and click on the  button.
On the process type data screen, fill in the ID # field with the "COM" value and the Name field with "Commercial".
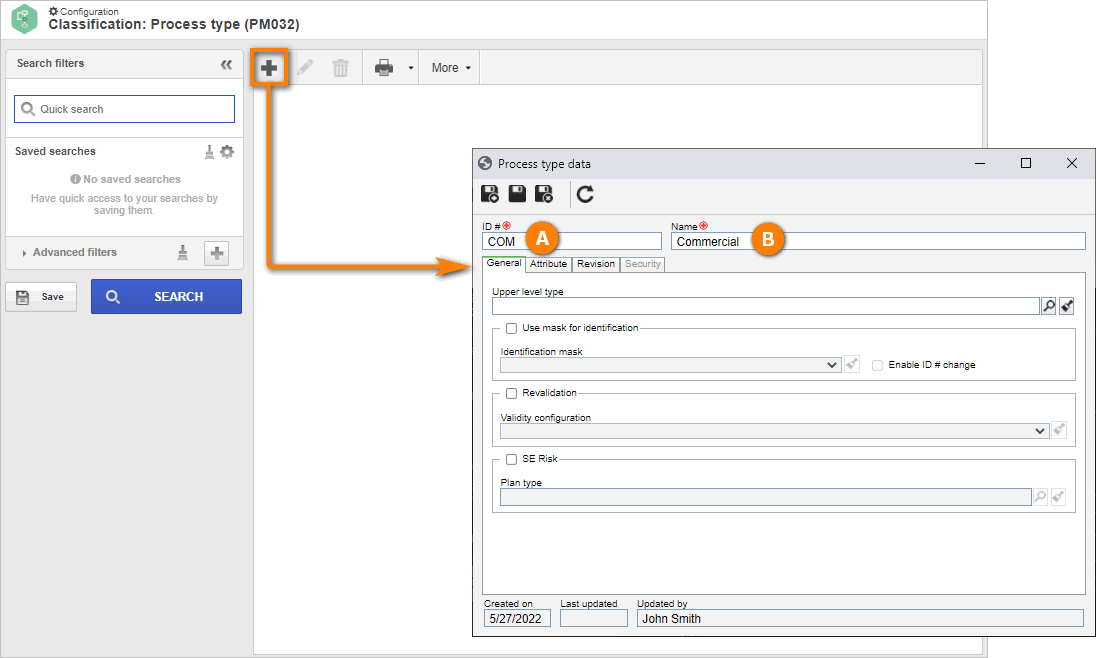
After doing that, click on the  button.
Done. We have successfully created a process type!
2nd step: Create a process
The processes of an organization are composed of a set of interrelated activities with the purpose of providing products or services to its customers.
To create a process, go to the PM022 menu and click on the Select type button.
Select the "Commercial" type, created in the previous step, and click on the Apply button.
Then, click on the arrow next to the button and select the BPMN option.
On the screen that will open, click on the arrow next to the ID # field to generate a sequential number.
In the Name field, enter the "Purchase request" value.
For this example, keep the Responsible user field with your user selected.
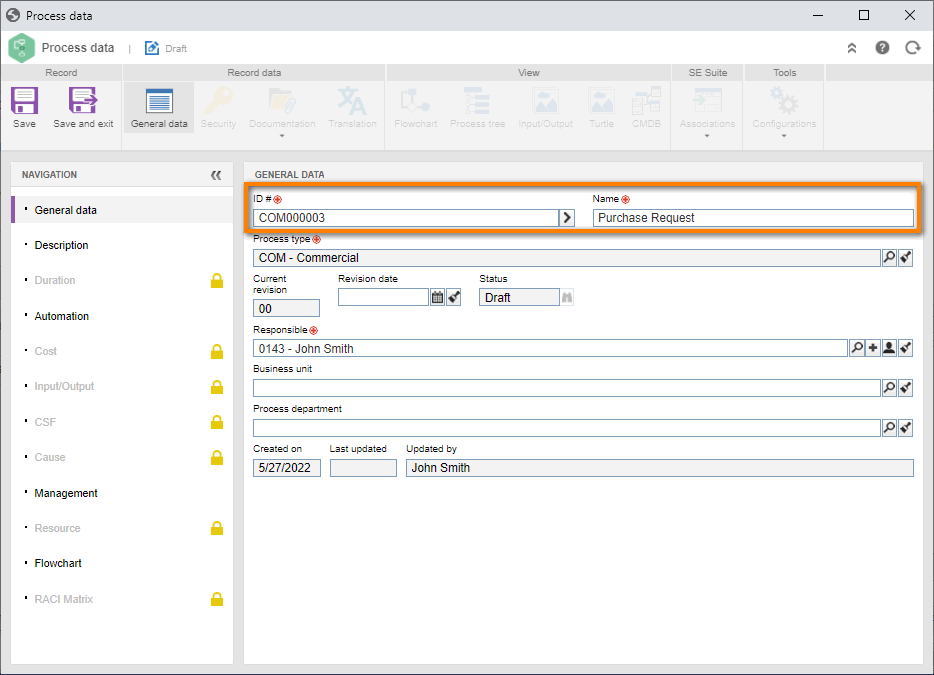
After doing that, click on the Save and exit button.
In this way, we have successfully created a process!
3rd step: Create items in the process flowchart
By default, the system presents the process containing a swimlane as a starter and a start item.
Swimlanes represent the participants of a process.
In this way, we will know who the participants of a process are simply by viewing the design.
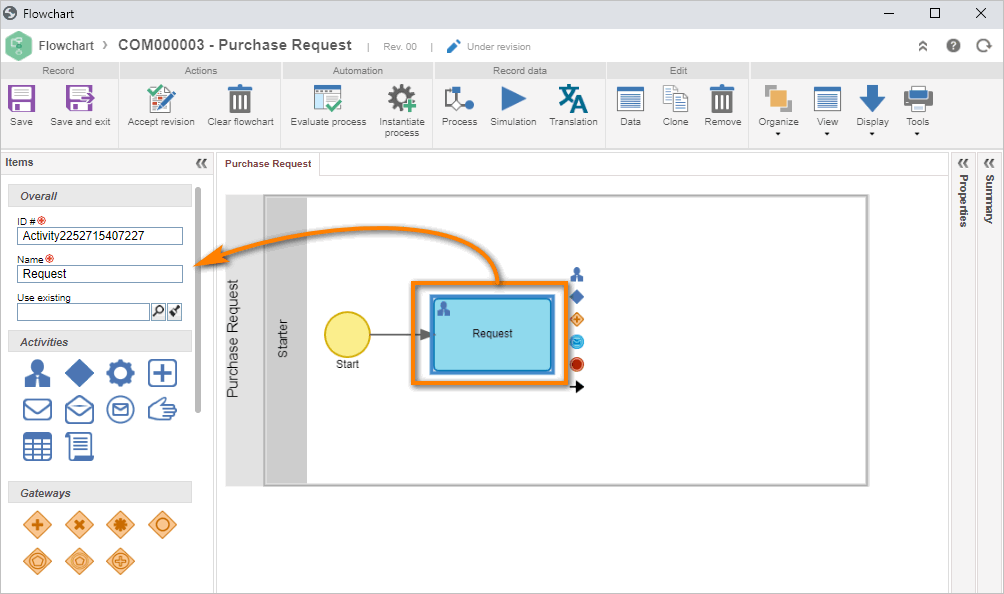
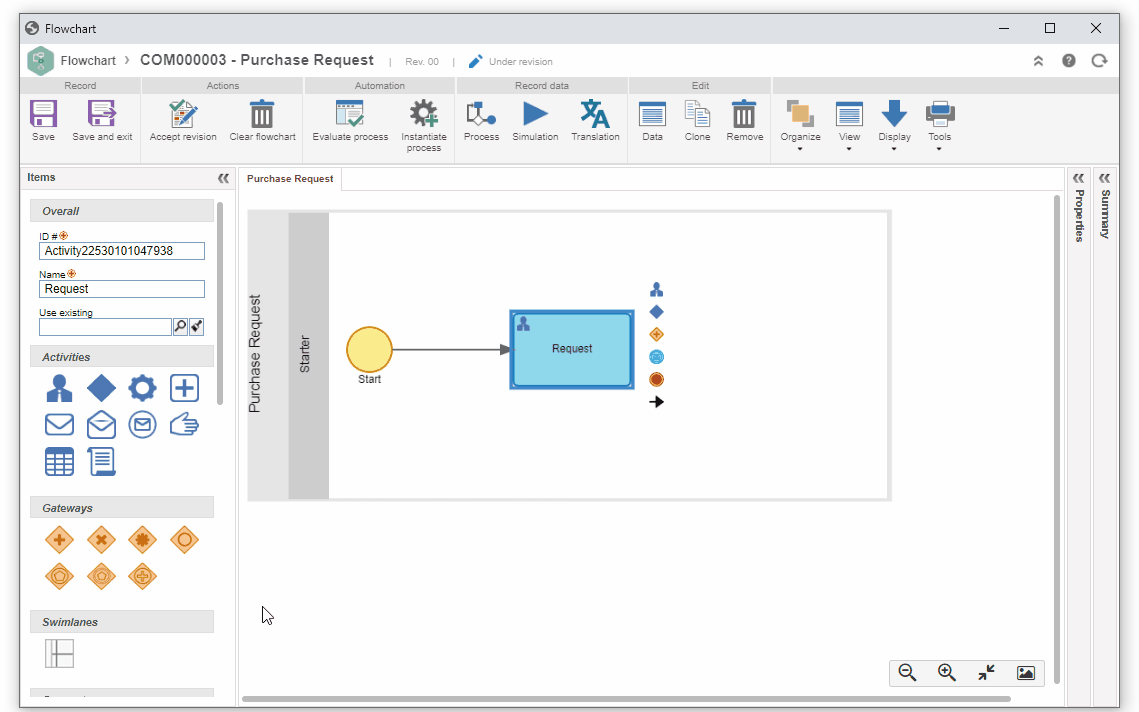
To start our flowchart, go to the PM022 menu and, in the Quick search field, search for the "Purchase request" process.
Click on the  button and, on the screen that will open, click on the first menu item to create the first activity of the process.
In the activity panel, click on the  icon, which represents a user activity, and drag it to the flowchart area.
Fill in the Name field that will be shown with the "Request" value.
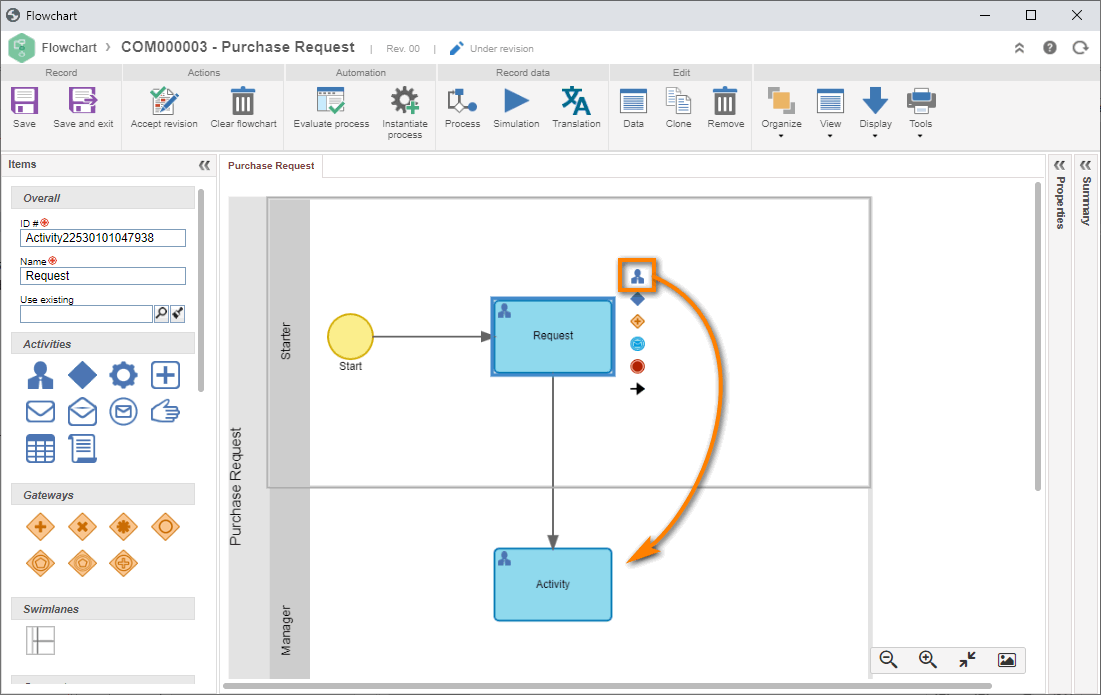
The next process activity is approval by the purchase manager.
We will create a new swimlane for the managing participant by clicking on the  element in the left panel.
Then, change the swimlane name to "Manager".
After that, we will click on and drag the element of the quick creation menu to create the "Approval" activity, as shown in the image below.
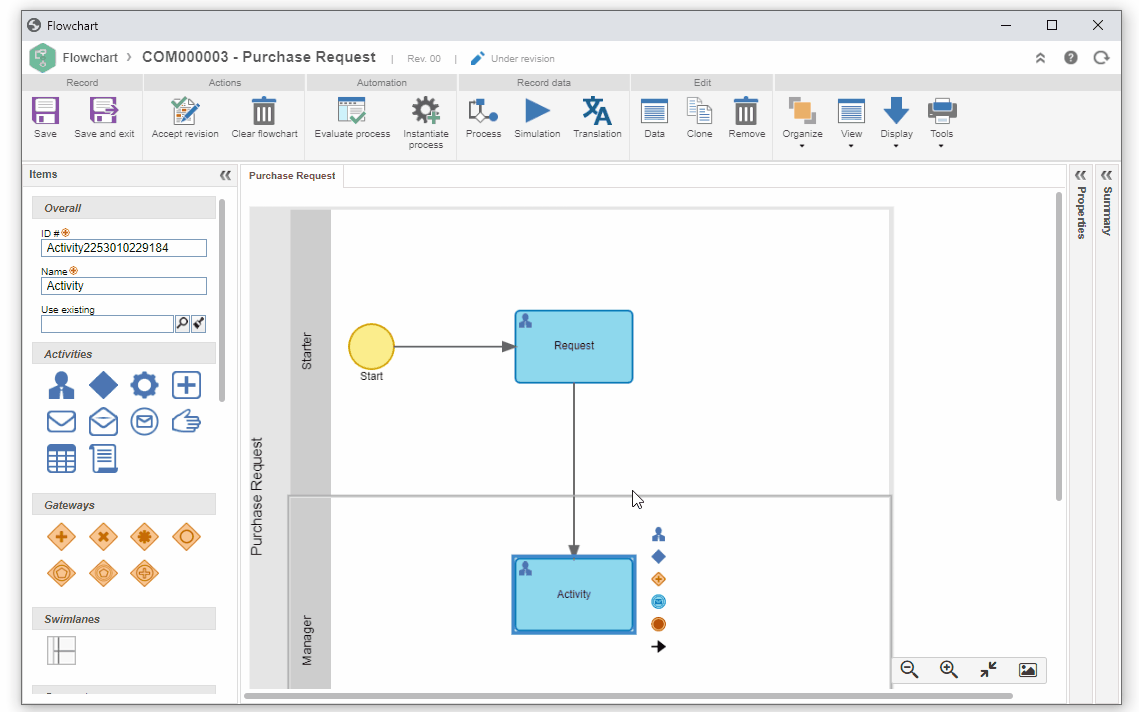
In the approval activity, we will add a field to inform whether the request can be approved or rejected.
After the approval activity, we will determine whether the process will move on to purchase completion or will be finished due to rejection.
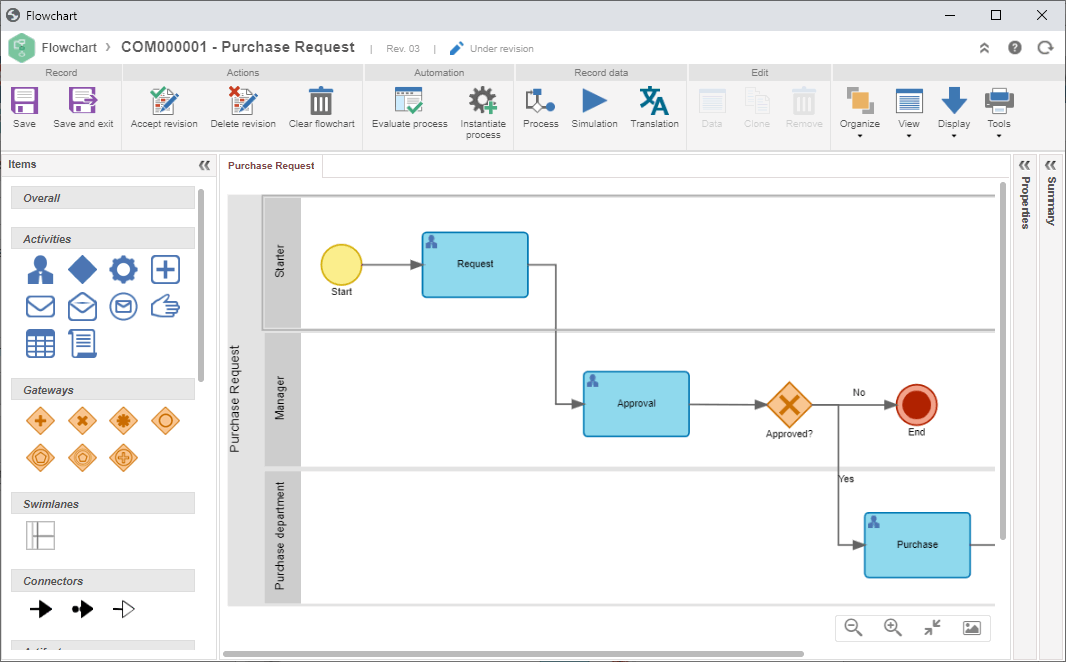
To do so, we will use the gateway XOR decision element, represented by the  icon.
icon.
Gateways are control elements that divide and unify the flow.
Select and drag the XOR element to the flowchart.
Connect the approval activity to XOR, select the approval activity and click on the last element of the creation menu.
Then, click on the XOR item and, with the item selected, change the name to "Approved", as shown in the image below.
Now that we have learned to create elements, flows, and adjust the items, we will finish the process with the following steps:
1. Create another swimlane and rename it to "Purchase department".
2. Create an end point item  from XOR.
3. Create a user activity from XOR.
4. Rename the activity to "Purchase".
5. From the "Purchase" activity, create an end point by dragging the icon.
6. Select the XOR output flows and insert the "Yes" and "No" values.
After doing that, click on the Save button.
In this way, we have successfully finished the creation of items in the flowchart!
The BPMN has many other elements that can be used in a process. For more details on each panel item, refer to the SE Process manual.
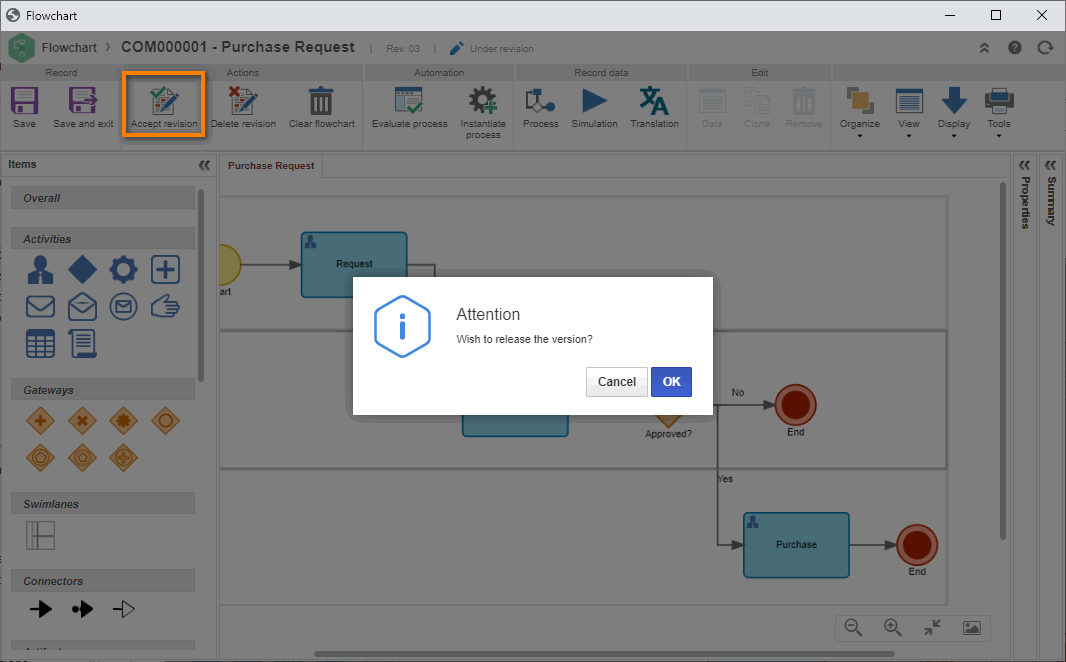
4th step: Release version
Because the process type is configured with simplified revision, after structuring the process, we can release it.
To do so, just click on the Accept revision button and confirm the system request.
Done. Your process has been successfully created!