Initial configurations
Similar to incidents, problems are based on processes that must have automation enabled.
Moreover, it is possible to enable the cause analysis for a better understanding of the problems that are reported in the system.
To perform these configurations, follow the steps below:
1st step: Configuring a process for automation
As previously mentioned, it is necessary to have an automated process to report problems. To do that, we will copy the "Purchase request incident" process from the SoftExpert Incident quick guide and configure it according to the SoftExpert Problem needs.
To copy a process, go to the PM022 menu and, in the Quick search field, search for the "Purchase request incident" process.
Then, select it and click on the More > Clone record button.
On the screen that will be opened, select the current revision in the Reference revision field and fill out the ID # field with "PR3" and the Name field with "Purchase request problem".
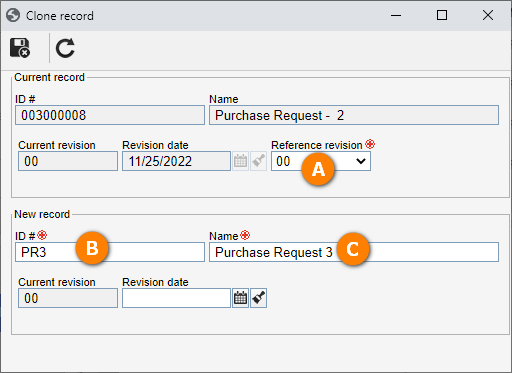
After doing that, click on the  button.
Back to the main screen, select the process created from the copy and click on the  button.
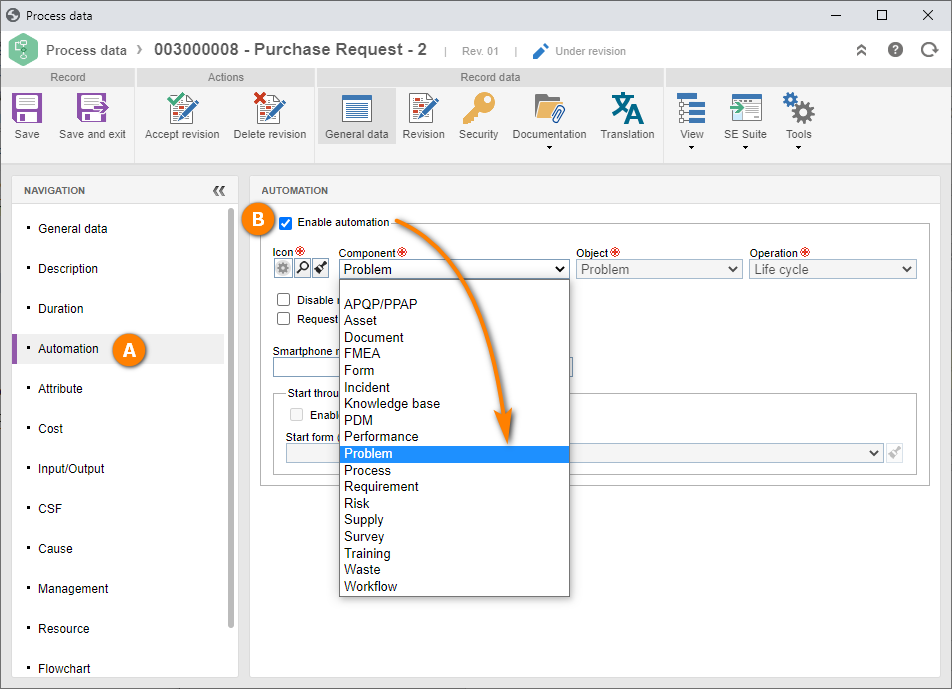
Go to the Automation tab and select the Enable automation field.
In the Component field, select the "Problem" option.
After doing that, click on the Save and exit button.
Keep the process selected in the list of records.
2nd step: Enabling a cause analysis
A cause analysis is a feature that stores the details of the analysis of a problem; to use it in a process, it is necessary to enable it.
To do this, simply follow the steps below:
1. After selecting the process in the list of records, click on the  button.
2. On the flowchart that will be displayed, double-click on the "Request" activity.
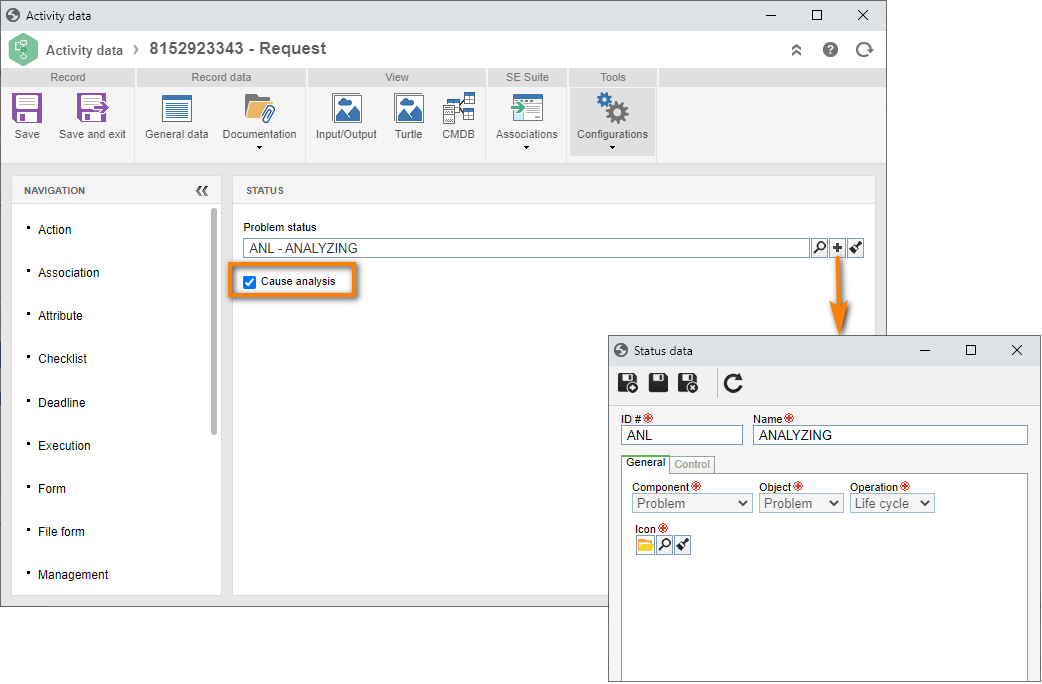
3. On the activity data screen, access the Configurations > Status tab and check the Cause analysis field.
4. In the Problem status field, click on the  button.
5. On the screen that will open, fill in the ID # field with "ANL" and the Name field with "Analyzing".
6. Once done, click on the Save and Accept revision buttons respectively.