Create a list of values in the form
In the form, we can create several types of lists, such as: simple lists, dataset lists, or advanced lists.
For this topic, we will use advanced lists.
With this type of list, it is possible to create tables, fields, and records, and to apply filters among them.
To this end, simply follow the steps below:
1st step: Create a table and a form
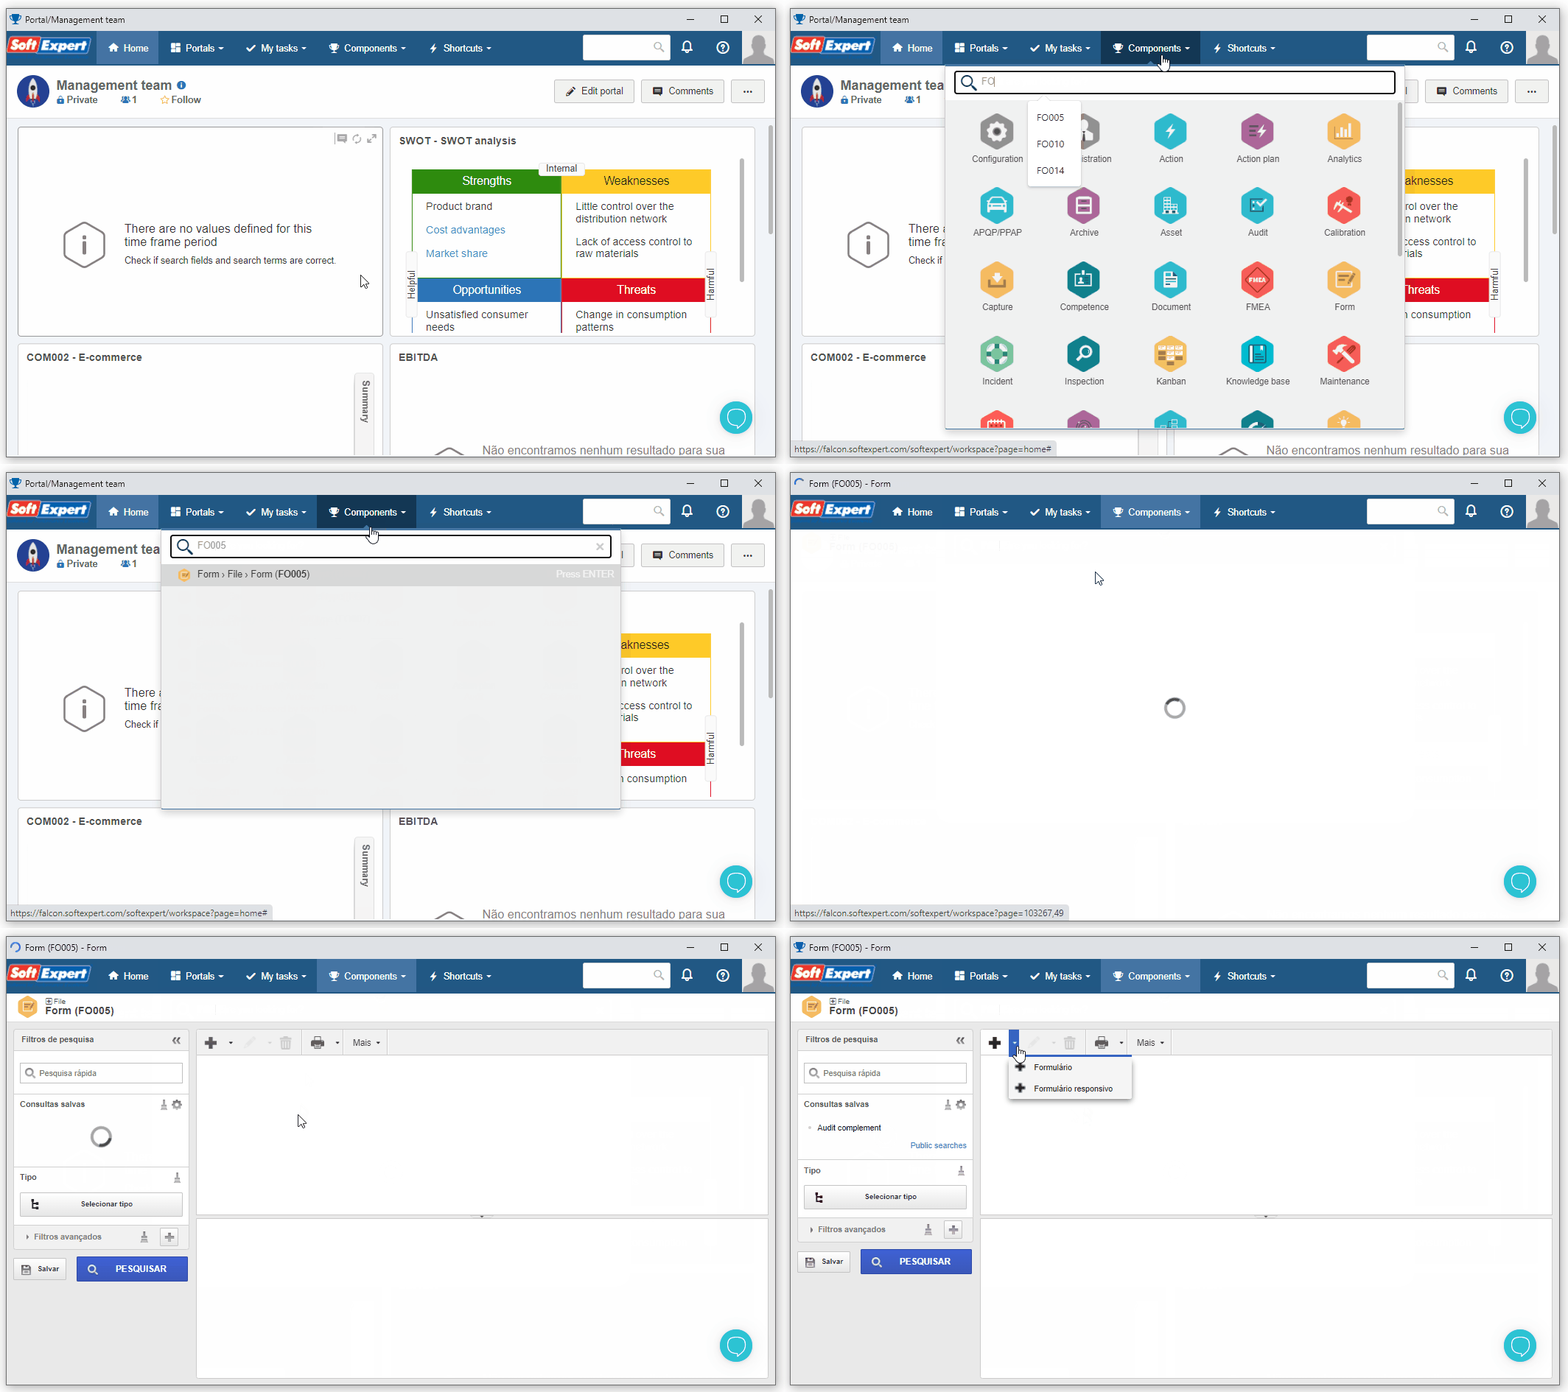
To do that, go to the Form (FO005) menu, click on the arrow next to the  button and select the Responsive form option.

On the screen that will open, enter "EMP" as ID # and "Employee" as name.
Then, disable the Select an existing table button.
As a result, the ID # and Name fields of the table will be shown filled with the same values as those entered for the form.
In the Table type field, enter the type created in the Create a table type step.

After doing that, click on the Save & close button.
Done. We have successfully created the table and the form!
2nd step: Create a list of values
Now that we have a new form, we will create a list of values.
To do so, select and drag the "Advanced list" element to the modeling area.

After doing that, select the field and click on the Configure elements > Tables and fields buttons.
On the screen that will open, we will create a table for our example.
To do so, fill in the table name with the "FOSTATE" value and click on the Create button.
Then, enter "FOSTATE" in the ID # and Name fields.
In the Table type field, enter the type created in the Create a table type step.
Finally, click on the Save & close button.

After creating the table, we will enter the name "Employee State List" for our list.
This name will be used to create a relationship between the "Employee" table and the "FOSTATE" table.
Also, click on the Select the fields button to indicate which fields will be shown on the list.

Because we have created our table, the field selection screen will be shown without records.
To add them, click on the Add field button.
Then, set the ID # as "nmstate", the name as "State name", and for the type, select the "Text" option.
After doing that, click on the Save & close button.

Now, with the field created, enable it so that it appears on our list of values.

Thus, we have successfully finished the creation of a list of values!
3rd step: Create records in the list of values
Now that we have created our list of values in the form, we need to insert values.
To do so, go to the File > Table (FO014) menu.
In the Quick search field, search for the "FOSTATE" table and click on the  button.

On the table data screen, click on the Field option and check the field for it to be displayed on the lists of records, as shown in the image below.

As a result, when the records of the FOSTATE table are listed, the "State name" column will be shown.
Then, select the Record option and click on the  button.
For our example, we will add these states: Florida, Texas, and California.

Now, we will preview the data by accessing the form editor through the FO005 menu.

Thus, we have successfully added records to the list of values!
4th step: Create records for the city
Still on the form editor screen, we will create our city list.
To this end, we will repeat the steps in the Create a list of values topic:
Select and drag the "Advanced list" element to the modeling area.
Select the field and click on the Configure elements > Tables and fields buttons.
Set the table name with the "FOCITY" value and click on the Create FOCITY button.
Fill in the ID # and Name fields with "FOCITY".
Click on the Save and exit button.
Fill in the List field with "Employee city list".

5th step: Create records for the city
Now, we will create a relationship between the city and state tables so that, when a city is created, it is possible to set to which city it belongs.
To do so, go to the FO014 menu and, in the Quick search field, search for the FOCITY table.
Click on the  button and, on the screen that will open, select the Relationship tab
Enter "relcitystate" as ID #, "Relationship between city and state" as name, and "FOSTATE" as destination table.

Then, go to the Record tab and click on the  button to add the following city records:
- Houston – Texas
- Miami – Florida
- Los Angeles - California

Now, we will preview the data by accessing the form editor through the FO005 menu.
Note that the cities are listed, but are not yet filtered by state.

Thus, we have successfully created records for our city!
6th step: Add filter to the list
Still on the form editor screen, keep the List of cities field selected and click on the Configure elements > Tables and fields button.
On the tables and fields screen, click on the Add filter button.
Then, go to the Relationship tab and, in the List field, select the list of the relationship created between city and state.
In the Operator field, select the "Equal" option, and in the Form field, select "State".
Click on the Apply and Save & close buttons to confirm the filter configuration.

Done. Now the cities are filtered by state!