Editing workflow data
 |
 |
 |
 |
Prerequisites
- Access to the Management > Workflow (WF004) menu.
- Started workflows.
Introduction
In the workflow management menu, the process or instance manager can perform changes directly to the workflow data screen.
See the available changes below:
Managing workflows
1. Go to the Management > Workflow (WF004) menu.
2. Search for and select the workflow you wish to edit.
2. Click on the  button.
3. The Workflow data screen will be displayed:
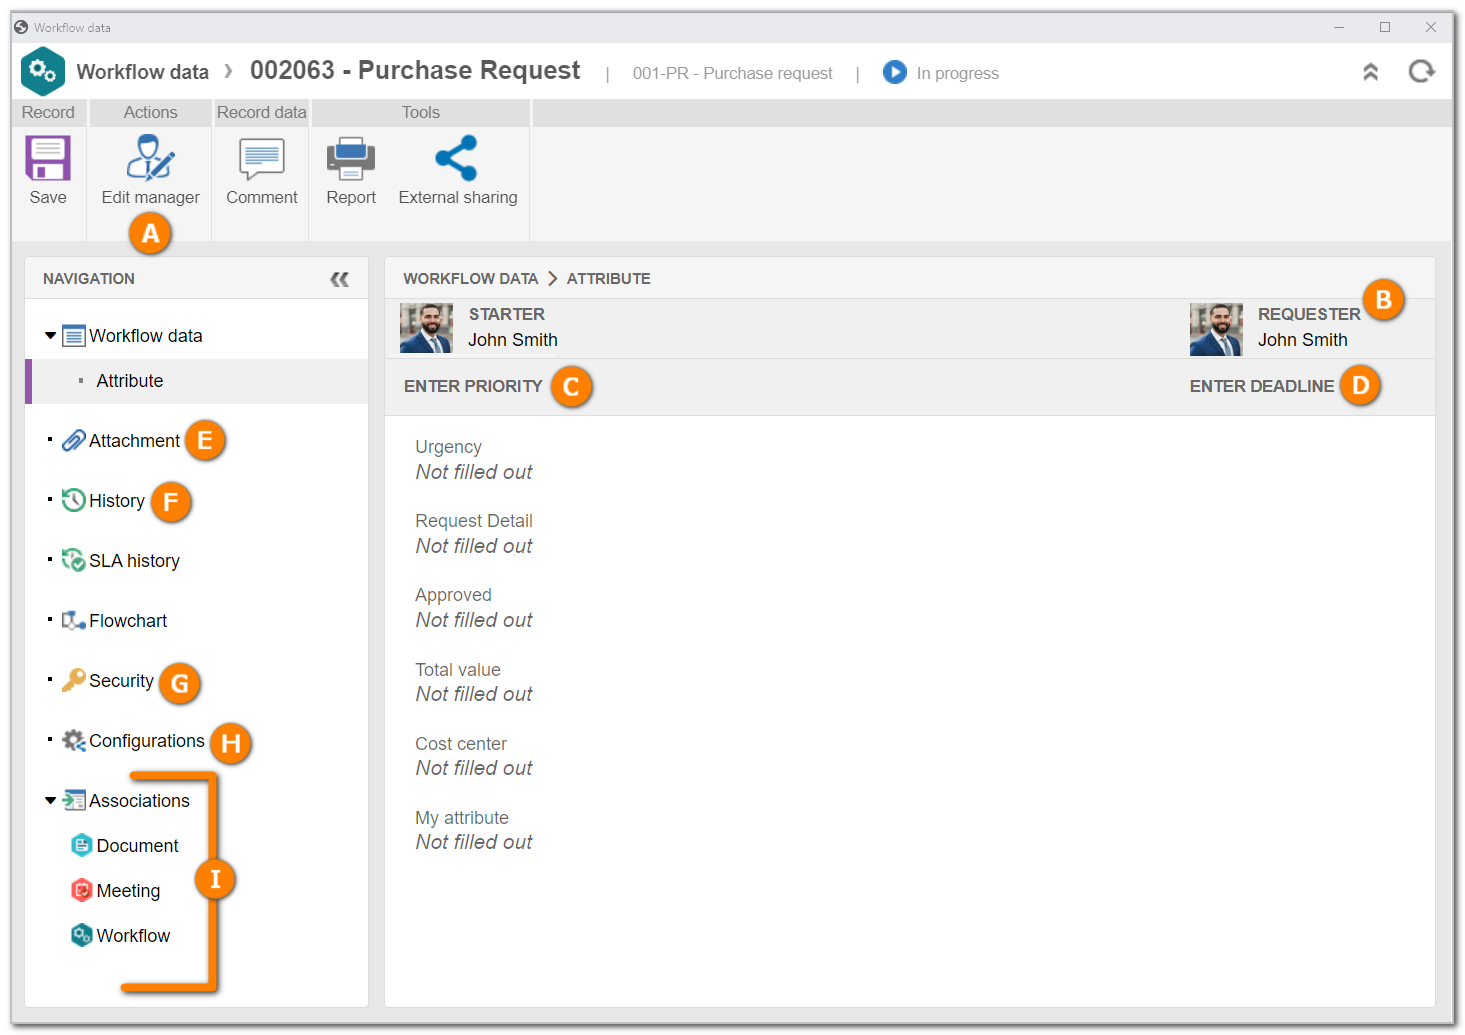
A - Button that allows editing the instance manager.
B - Button that allows editing the workflow requester.
C - Button that allows entering or editing (if it has already been entered during the execution of the workflow activities) the workflow priority.
D - Button that allows entering or editing the workflow execution deadline.
E - In the Attachment section, in the Navigation panel, in addition to viewing the workflow attachments, it is possible to add new ones.
F - In the History section, in the Navigation panel, in addition to viewing the workflow history, it is possible to add comments about the instance.
G - In the Security section, located in the Navigation panel, in addition to viewing, it is also possible to edit the workflow security list.
H - In the Configurations section, in the Navigation panel, it is possible to resend or delete the external sharing e-mail.
I - In the Associations section, in the Navigation panel, the system will display the objects that were associated with the workflow. If no object has been associated, this section will not be displayed. Note: the instance/process manager may add/associate/disassociate objects.
The other sections of the workflow data screen allow you to view the completed information during the execution of the workflow activities in question.
See how to edit data:
Edit manager
To change the instance manager, click on the Edit manager button, located on the button panel on the data screen.
Then, select the new instance manager:
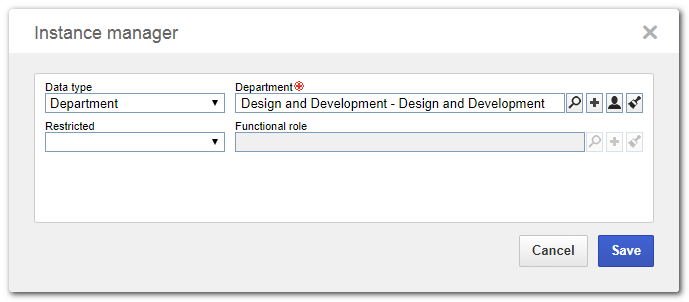
Type: select the workflow manager type. According to the selected type, the field next to it will be enabled for the selection of the desired Manager.
If the selected manager is a specific Department, the following field will be enabled:
Restricted: select one of the options to restrict the workflow managers that belong to the Department selected previously. According to the selected option, the respective field will be enabled for selection of the function or team of the users who will be managers of the workflow.
Edit requester
To edit the workflow requester, go to the Workflow data, located on the Navigation panel. After that, click on the button next to the Requester field and, on the screen that opens, select the user who will be the requester of the workflow.
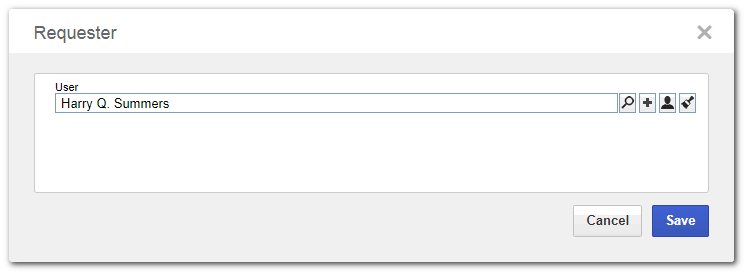
This field will only be displayed if, in the process data (Configurations > Instance), the Allow entering requester option is checked.
Change priority
To enter or change the priority of the workflow, go to Workflow data, located on the Navigation panel.
Then, click on the button next to the Enter priority/Priority field and on the screen that will be displayed select the value of each evaluation criterion.
The method used to enter the values and available criteria will vary according to the configurations performed in the evaluation method set in the process.
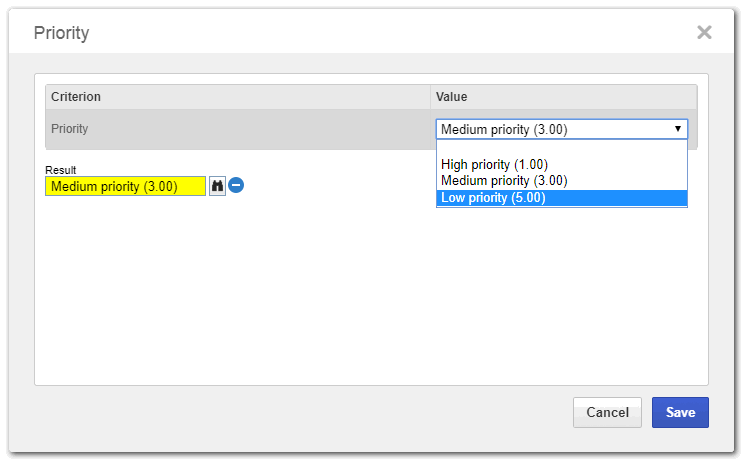
This option will only be displayed if, in the process data (Configurations > Instance), an evaluation method is associated.
Configurations
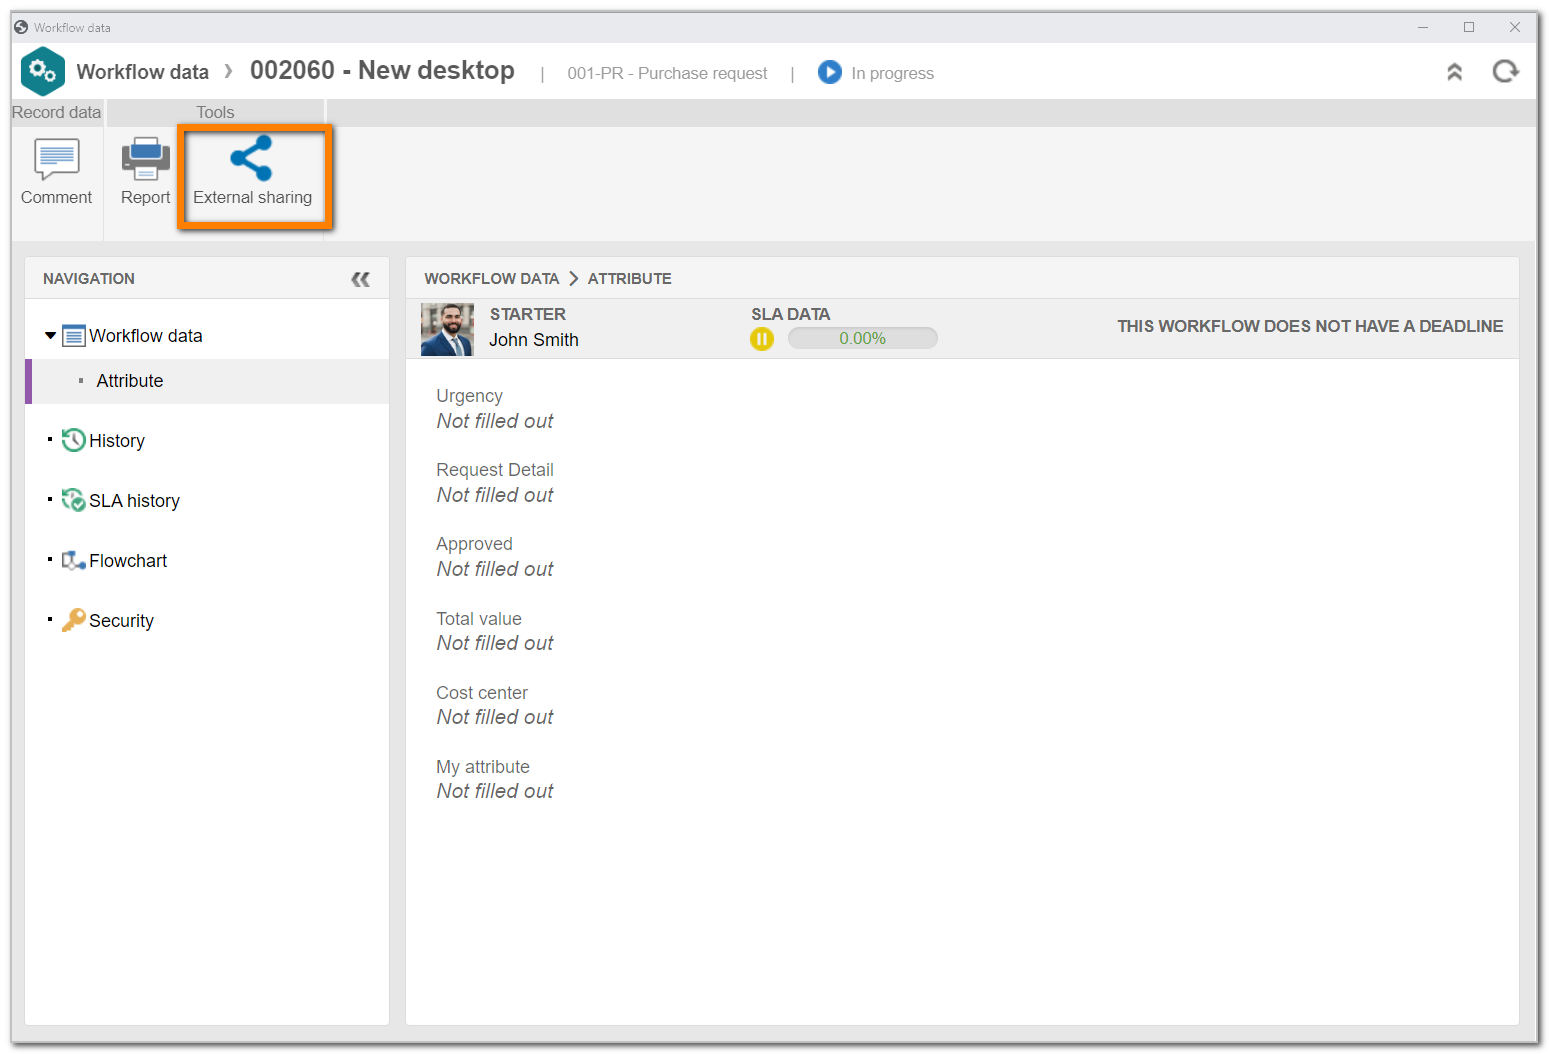
The Configurations tab allows editing the external sharing data of the activity.
For the data to be displayed in the tab, they must be configured by clicking on the External sharing button on the toolbar.
After clicking on the button, the External sharing screen will be opened:
In the first field of the Link for sharing tab, the link to be used for external sharing of the electronic files of the document is displayed.
Use the Copy button to copy the link to the transfer area and paste it as desired, or the QRCode button to generate the sharing QRCode.
To facilitate the usage of the link, it is possible to enable the Make public option. It allows any person with the previously mentioned link to access the document, even if they do not have access to SoftExpert Suite. If the option is not enabled, when using the link, the login and password to access the system will be requested.
Moreover, if the option is checked, the Public link validity field will be enabled. By default, the public link validity is displayed as indeterminate. Click on this option to set a specific validity for the link. In this case, set the date or click on the option until which the link will be valid for public access.
The Make public option will only be available if the user has the "Save locally" control enabled in the process security.
Another possibility is to send the link via e-mail instead of copying it. To do that, configure the following fields:
- Who do you wish to share it with?: fill out this field to enter the system users who have a configured e-mail and e-mails from people who do not have access to SoftExpert Suite, to whom you wish to send the sharing link.
- Share message: fill out this field with the message that should appear in the body of the email that will be sent with the sharing link.
After setting all desired configurations, click on the Send button.
If the sharing link is sent via e-mail, the Statistic tab will be enabled, in which it will be possible to see if the people to whom the sharing link was sent opened the e-mail and if they used the link that was sent.
The sharing link will be sent to the recipients according to the system's email notification configuration. To do this, configure the e-mail server in the Configuration component.
Once the e-mail sending adjustments are made, the information will be displayed in the Configurations section on the Navigation panel.
In this section, use the available buttons to perform the desired operation:
 |
Use this button to delete the sharing e-mail record. |
 |
Use this button to resend the sharing e-mail. |
4 . After performing the necessary changes, click on the Save button.
Additional information
• For further details on editing the activity deadline, click here.
• For further details on adding attachments and comments to the history, refer to the Editing the activity data during execution article.
• See further details on the association options here.
• Learn how to edit the activity security here.
Conclusion
Thus, it was possible to perform the desired changes and adjust the workflow data successfully.