Using Google Docs for electronic files
Prerequisites
- Access to the Configuration > General parameters (DC035) menu.
- Access to the File > Document (DC003) menu.
- User registered in Google Drive with a Google account logged into the browser.
- SoftExpert user with a Google e-mail registered in the account.
- User with the "View" and "Edit" controls enabled in the security list of the document.
- Document in the Revision or Indexing step.
Introduction
The Document component allows using Google Docs to edit and view the electronic files of the documents during revision or indexing. The file will be opened through the browser in the Google editor and, upon closing the revision, it will be stored again in the Document component.
However, the Google Drive API must be integrated with the Document component to be able to edit the electronic files through Google.
See how to perform these operations below:
Configuring the Google Drive API
1. Access Google Developer Console and log in with your Google e-mail.
2. Click on Select a project and, on the screen that will be opened, select the New project option.
3. On the screen that will be displayed, fill out the Project name field. If necessary, it is possible to edit the project code.
4. Click on Create. Then, return to the Select a project option and, on the screen that will be opened, locate and open the created project.
5. On the menu located in the upper left corner, select the IAM and Administrator > Service accounts option.
6. Then, click on Create service account. There are a few steps to configure in order to create the service account:
Steps to create the service account
| Step | What to do? |
| Service account details |
|
| Grant the service account access to the project (optional) | In the Select role field, choose the Project > Editor option and click on Continue. |
| Grant the user access to this service account (optional) | Simply click on Finish. |
7. Upon returning to the Service accounts menu after the creation, click on Manage keys in the Actions column.
8. On the screen that will be displayed, click on Add key > Create new key.
9. Select the P12 option and click on Create.
10. A .p12 file will be downloaded. Store the .p12 file, as it will be used later.
11. Back to the Service accounts menu, select the Manage details option in the Actions column.
12. Copy the values displayed in the Exclusive ID and E-mail fields. Store them in a safe location, as they will be used later.
13. In the upper left corner menu, select the APIs and services > APIs and activated services option.
14. Locate and click on the Google Drive API option.
15. On the screen that will open, click on Activate.
For further details on this procedure, refer to the trainings given by Training SoftExpert.
Integration with the Document component
1. Access the Configuration > General parameters (DC035) menu and go to the Google Drive section.
2. Check the Enable editing with Google Drive option.
3. In the Service account ID and Service account owner email fields, enter the data copied from step 12 of the Google Drive API configuration.
4. In the .P12 File field, click on the  button and locate the .p12 file downloaded to your directory in step 10 of the Google Drive API configuration.
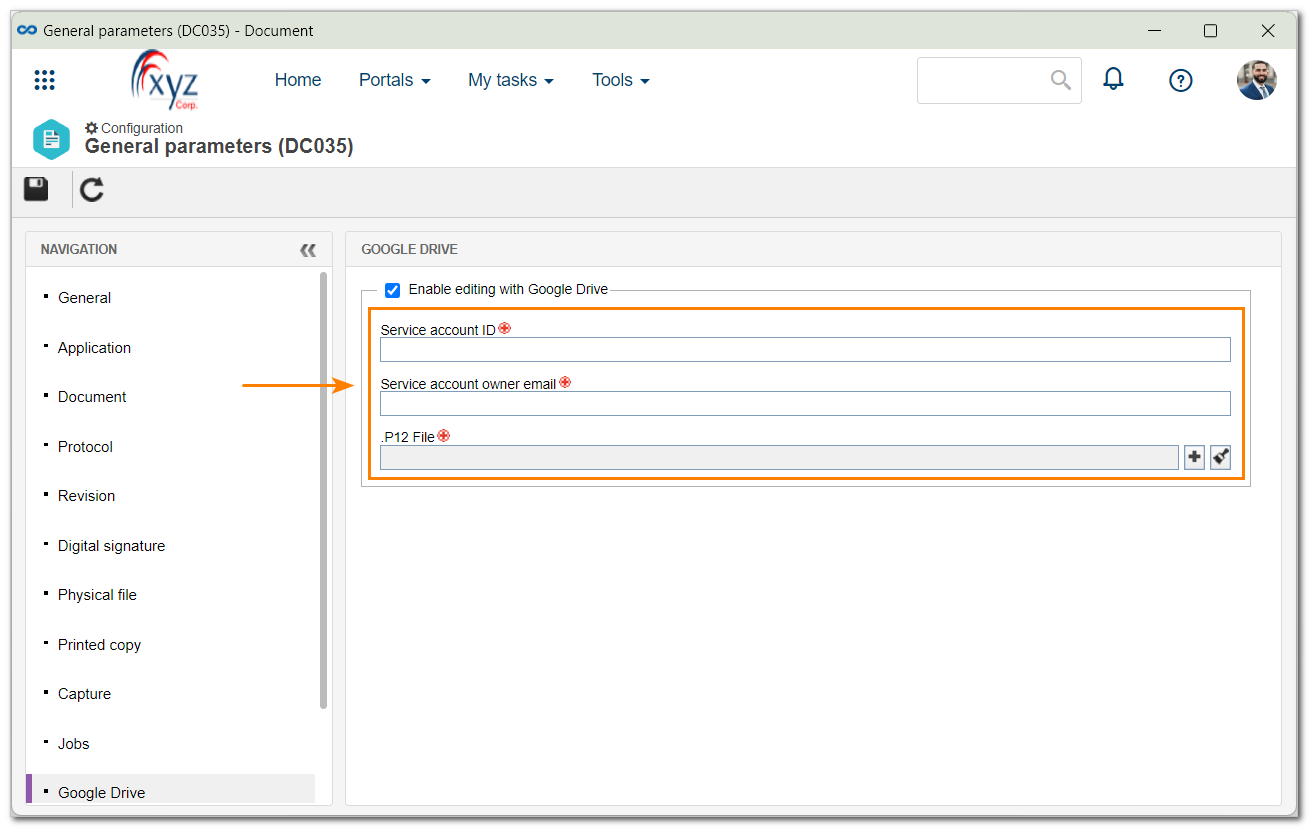
5. Check the Convert file to PDF using Google Drive option if desired. Once this option is checked, the system will use Google Drive to convert the electronic files of documents to PDF, as long as publishing in PDF is configured in their category.
6. Click on the  button to save the changes.
- The API is compatible with files with the following extensions: .docx, .odt, .xlsx, .xlsm, .ods, .pptx, .odp, .rtf and .txt.
- If .doc, .xls or .ppt files are edited, they will be converted to .docx, .xlsx and .pptx, respectively.
- By using this API, resources such as docvariables and watermarks will not be applied. In the case of .xlsx documents, the printing area resource will also not be available.
- When the (administrator) accounts are switched, the files will remain linked to the old account. In order not to lose information, make sure the files have been released before switching accounts.
Using Google for electronic files
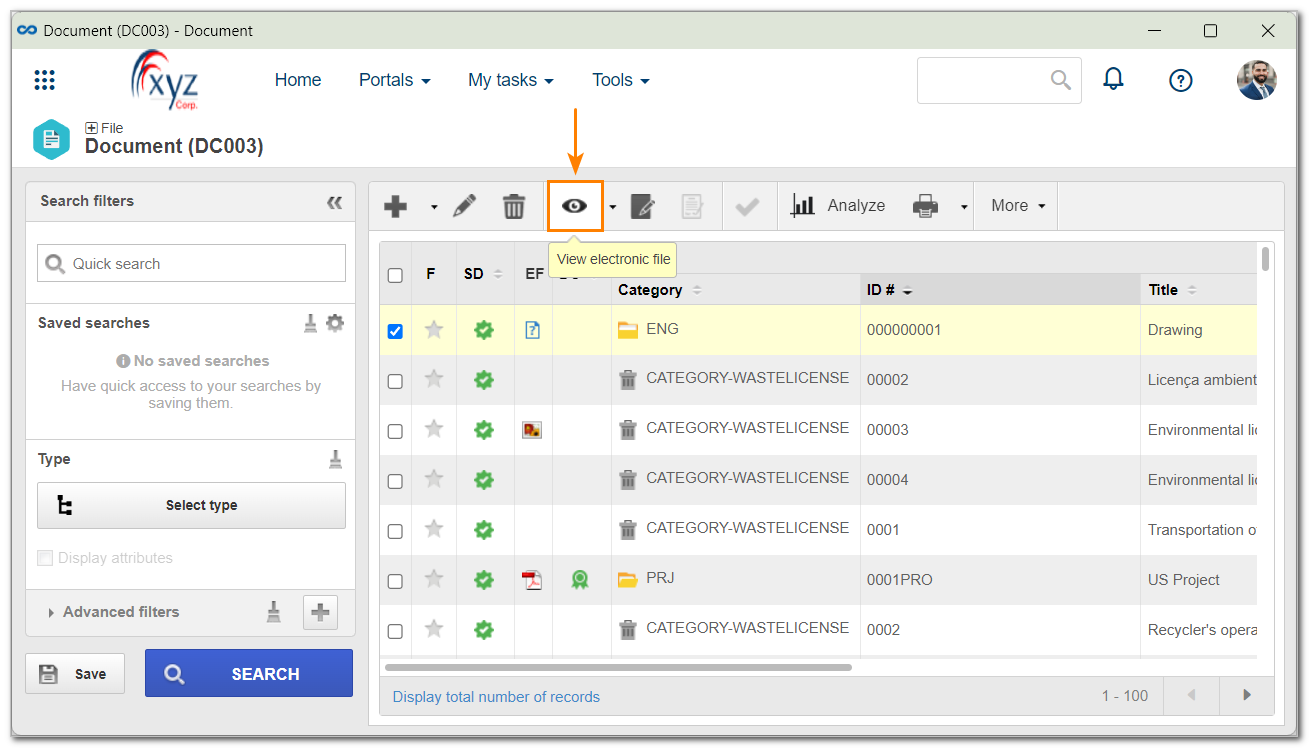
1. Access the File > Document (DC003) menu.
2. In the list of records, select the desired documents.
3. Click on the  button on the toolbar to view or edit the electronic file with Google Docs.
- If the Double click electronic file to view it option is checked in the General tab of the general parameters, the files can also be viewed by double clicking on the document to which they belong. This option will not be available if the document status is "Issue".
- It is possible to view the electronic file in a quick way by clicking on the icon displayed in the EF column. If there is more than one electronic file associated with the document, a screen will be opened with a list of all associated electronic files. Click on the file you wish to view.
In addition to the File > Document (DC003) menu, it is possible to view or edit the electronic files in the revision or indexing steps through Google Docs in the following menus:
- Execution > Revision (DC016);
- My Tasks (Execution) > Document revision;
- My Tasks (Tracking) > Revision tracking.
In other menus, the file will be opened by the viewer configured in the Application tab of the general parameters.
Conclusion
Thus, Google Drive has been integrated and the electronic file was viewed and edited with Google Docs.