Operations with the workflow flowchart
Prerequisites
- Access to the Management > Workflow (WF004) menu.
- Started workflow.
- User defined as process or instance manager.
- To edit the flow of a workflow by adding or deleting activities, gateways, or sub-processes, the workflow must be blocked for editing.
Introduction
The flowchart allows for viewing at which point of the flow the execution of a workflow is found, as well as editing some data, such as the executors of activities that have not been executed yet and the deadline of activities enabled for execution.
Performing operations in the flowchart will not be possible; it will be displayed only for viewing when the workflow status is "Postponed", "Cancelled", or "Closed", or when the logged user is not the instance/process manager or does not have the edit control allowed on the workflow security list.
See the operations that can be performed in the flowchart:
Available operations
To access the available operations, follow the steps below:
1. Go to the Management > Workflow (WF004) menu.
2. In the list of records, select the workflow in progress in whose flowchart you wish to perform an operation.
Workflows with In progress status can be identified, in the list of records, by the  icon.
icon.
3. Click on the  button. At this point, the system opens the flowchart editing screen:
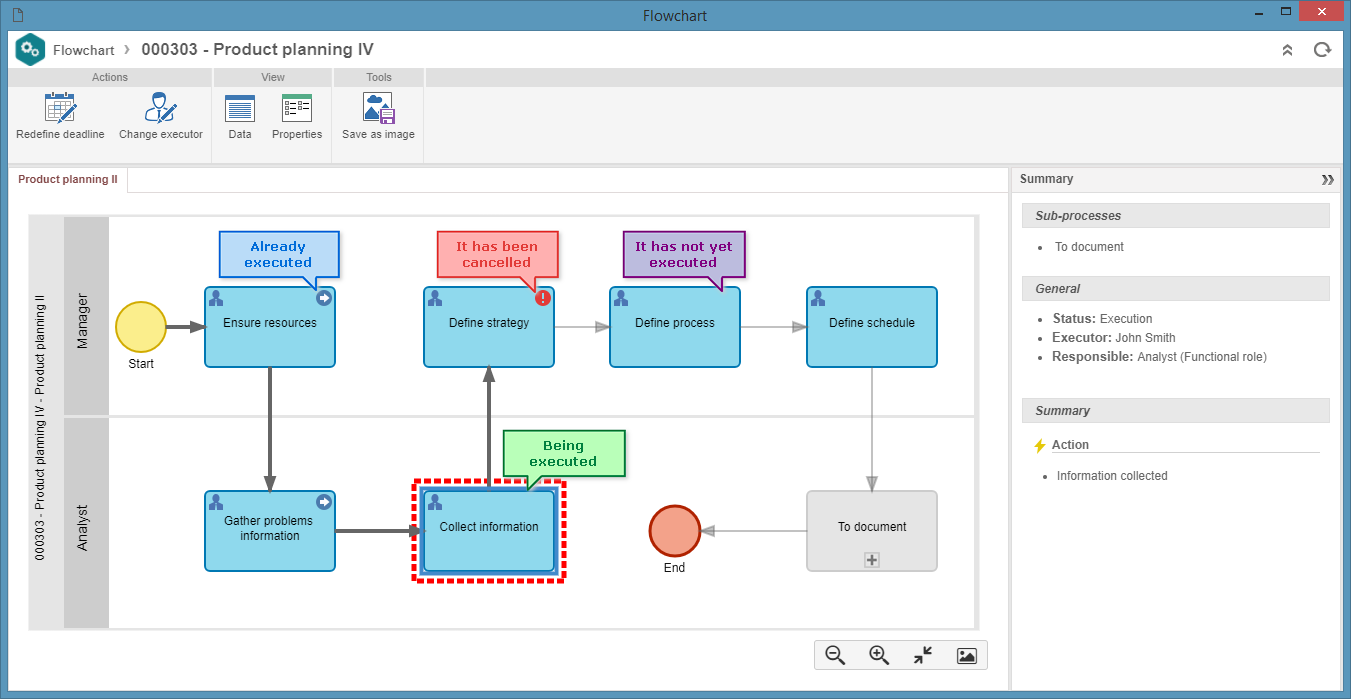
- The icons for the actions performed on the executed or cancelled activities are displayed in the flowchart, allowing you to visually identify the action that was taken on each activity.
- If the party responsible for executing an activity is a group (department, position, or team), when it is selected in the flowchart, the Summary panel will display the party responsible for the execution, and clicking on the executor will display the list of users who are members of the group, that is, the possible executors of the activity.
4. Select the flowchart activity/decision you wish to edit.
5. At this point, some operations will be displayed in the Actions area, in the upper panel of the screen. The operations available in this section vary according to the status of the selected activity/decision. See below the possible operations and execute them as desired:
Enable item
The Enable item button will only be enabled when you select an activity/decision that has already been executed.
After clicking on this button, use the screen that will open to provide an explanation for returning the activity/decision to execution.
After entering the explanation, click on the  button. At this point, the activity will be re-enabled for execution.
The activity information, such as attachments, attributes, and checklists, will not be lost.
Redefine activity deadline
The Redefine deadline button will be enabled when you select an activity/decision that is under execution.
Clicking on this button will display a screen in which the date, the time, and an explanation referring to the activity/decision deadline change must be provided.
After entering the new deadline of the activity, click on the Save button.
Editing the activity executor
The Change executor button is enabled when you select an activity/decision that is under execution or has not yet been executed.
Clicking on this button will display a screen in which the new executor of the activity should be selected. To do that, fill out the following fields:
Responsibility type: in this field, select the responsibility type defined for the activity:
- Specific user: the activity must be executed by a particular user. To this end, in the Specific user section, select the desired user in the respective field.
- Team: the activity must be executed by a user belonging to a certain team. To this end, in the Team section, select the team responsible for the activity execution.
- Department: the activity must be executed by a user from a certain department. To this end, in the Department section, select the department responsible for executing the activity.
- Department/Position: the activity must be executed by a user holding a certain position in a certain department. To this end, in the Department/Position section, select the department and the position of the user who will be responsible for executing the activity.
Explanation: enter an explanation to change the executor of the activity.
After performing the changes, click on the Save button.
6. In the Visualize area, in the upper panel on the screen, some operations will be available. The operations available in this section vary according to the status of the selected activity/decision. See below the possible operations and execute them as desired:
Activity/Decision data
The Data button allows for viewing the data of the activity/decision recorded in the flowchart. It is not possible to edit the record; its data can only be viewed.
Activities that have been enabled already cannot have their data accessed through the workflow flowchart, only through the template process.
Properties
The Properties button allows for editing data of activities that have not been enabled. To do so, the user must have permission to "Edit" the instance in the workflow security.
Changes made to the workflow do not impact the template process. A copy is created on demand with the changes made to this instance only.
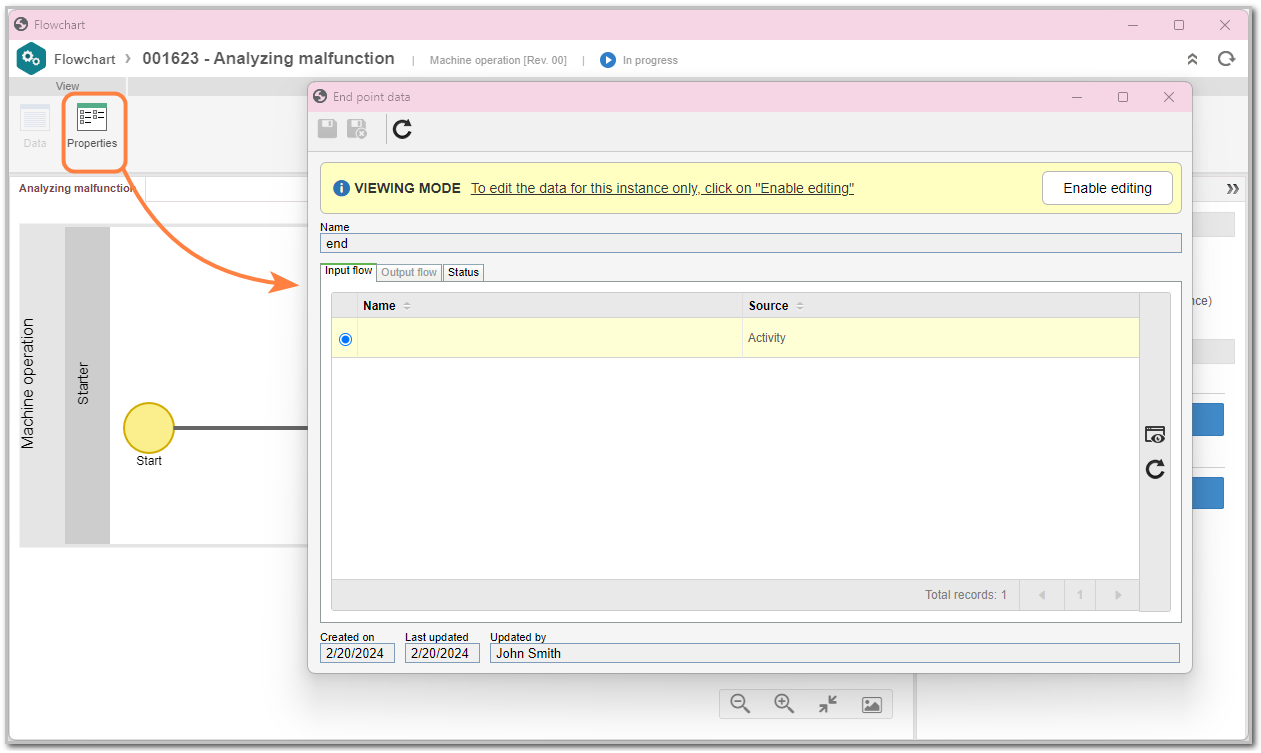
After selecting an intermediate or final event (Message (send), Timer, End point, Gateways, Cancel, Error, etc.) and clicking on Properties, a screen with the event data will open. A message will inform that the record is in viewing mode; to perform changes, it is necessary to click on Enable editing.
Once editing is enabled, the record can be changed. Data that cannot be edited will be copied from the template process.
In addition to editing some data referring to activities, it is also possible to configure several elements related to them, such as actions, attributes, execution, and forms. To access these configurations, in the Tools area, click on Configurations. A list with the configurable elements will be displayed.

Then, select the desired option.
To illustrate, this article will present the configuration processes for the Action and Automatic execution screens.
Action

1. On the Action data screen, fill in the required fields (Sequence, Name, and Icon).
2. In the General tab, fill in the fields as needed:

- Execute activity: the activity can be executed according to the configured route type, which may be Fixed or Skip (in this case, it is possible to create a new action in the activity so that the route skips to another element). The Default target required field must be filled in.
If the Skip option is selected, the target may be an activity element, a final event, or an intermediate event of the Timer type or of the Message (send) type.
- Run external application: allows for configuring the execution of an external application associated with the activity.
- Disable manual execution: blocks the manual execution of the activity.
3. In the Rule tab, define the items that must necessarily be specified for the action.

4. After finishing the configurations, click on Save and exit.
Automatic execution

1. On the screen, select the automatic execution options. Depending on the chosen option, an activity will be executed automatically after the configured time or due to the cancellation or closure of an item, such as an initiative, project, maintenance activity, etc.
See the table below to understand each configuration and select those that meet your needs:
Option |
Description |
Required fields |
Comments |
| Automatic execution by time | Executes an action automatically after a certain time | - Time (hhh:mm, days, weeks, or months) - Action to be executed |
- The action needs to be configured in the Action section of the activity/decision. - Minimum time: 15 minutes. - If this option is not checked, the activity remains pending until manual execution. |
|
Automatically execute this activity when: Closing the blocking associations |
Executes an action automatically as soon as the blocking associations are closed | Action to be executed | - The action needs to be configured in the Action section of the activity/decision. - If this option is not checked, the activity remains pending after the blocking associations are closed. |
|
Automatically execute this activity when: Closing the plans and isolated actions |
Executes an action automatically after the closure of associated plans and/or actions |
- Associated with the activity - Action to be executed |
- The action needs to be configured in the Action section of the activity/decision. - If this option is not checked, the activity remains pending even after the associated items are closed. |
| Cancel a document | Executes an action automatically as soon as a document is cancelled | Action to be executed |
- The action needs to be configured in the Action section of the activity/decision. - If this option is not checked, the activity remains pending even after the document is cancelled. |
| End an initiative | Executes an action automatically as soon as an initiative is ended | Action to be executed |
- The action needs to be configured in the Action section of the activity/decision. - If this option is not checked, the activity remains pending even after the initiative is ended. |
| Close warehouse event (Input/Output) | Executes an action automatically as soon as a storeroom event is closed | Action to be executed |
- The action needs to be configured in the Action section of the activity/decision. - If this option is not checked, the activity remains pending even after the event is closed. |
| Close a maintenance activity (Maintenance, Calibration, and Verification) | Executes an action automatically as soon as the maintenances associated in this activity are closed |
Action to be executed |
- The action needs to be configured in the Action section of the activity/decision. - If this option is not checked, the activity remains pending even after the maintenances are closed. |
| Close action plan date rescheduling | Executes an action automatically as soon as the date rescheduling of an action plan is closed | Action to be executed |
- The action needs to be configured in the Action section of the activity/decision. - If this option is not checked, the activity remains pending even after the rescheduling is closed. |
| Close a program | Executes an action automatically as soon as a program is closed | Action to be executed |
- The action needs to be configured in the Action section of the activity/decision. - If this option is not checked, the activity remains pending even after the program is closed. |
| Close a project | Executes an action automatically as soon as a project is closed | Action to be executed |
- The action needs to be configured in the Action section of the activity/decision. - If this option is not checked, the activity remains pending even after the project is closed. |
| Closing the kanban tasks | Executes an action automatically as soon as kanban tasks are closed | Action to be executed |
- The action needs to be configured in the Action section of the activity/decision. - If this option is not checked, the activity remains pending even after the kanban tasks are closed. |
| End control evaluation | Executes an action automatically as soon as a control evaluation is ended | Action to be executed |
- The action needs to be configured in the Action section of the activity/decision. - If this option is not checked, the activity remains pending even after the evaluation is ended. |
| End risk evaluation | Executes an action automatically as soon as a risk evaluation is ended | Action to be executed |
- The action needs to be configured in the Action section of the activity/decision. - If this option is not checked, the activity remains pending even after the evaluation is ended. |
| End training for all participants | Executes an action automatically as soon as the training of all participants is ended | Action to be executed |
- The action needs to be configured in the Action section of the activity/decision. - If this option is not checked, the activity remains pending even after the training is ended. |
| End object revision (Asset, Supply, Item, Document, or Process) | Executes an action automatically as soon as an object revision is ended | Action to be executed |
- The action needs to be configured in the Action section of the activity/decision. - If this option is not checked, the activity remains pending even after the revision is ended. |
| Close the creation of an object (Asset, Supply, Item, Document, or Process) | Executes an action automatically as soon as the creation of an object is closed | Action to be executed |
- The action needs to be configured in the Action section of the activity/decision. - If this option is not checked, the activity remains pending even after the creation is closed. |
2. After finishing the configurations, click on Save and exit.
7. After performing all desired operations, save and close the record.
Conclusion
Thus, you have accessed and executed all possible operations referring to the flowchart of a workflow!