Exporting and importing forms
Prerequisites
- Access to the File > Form (FO005) menu.
- Previously created and designed web form.
- Previously created and designed responsive form.
Introduction
It is possible to import forms from files saved in a directory on the computer through the File > Form (FO005) menu.
This resource makes it possible to reuse forms from different databases. First, the forms must be designed and exported in order to be imported into another database.
See how to export and import forms:
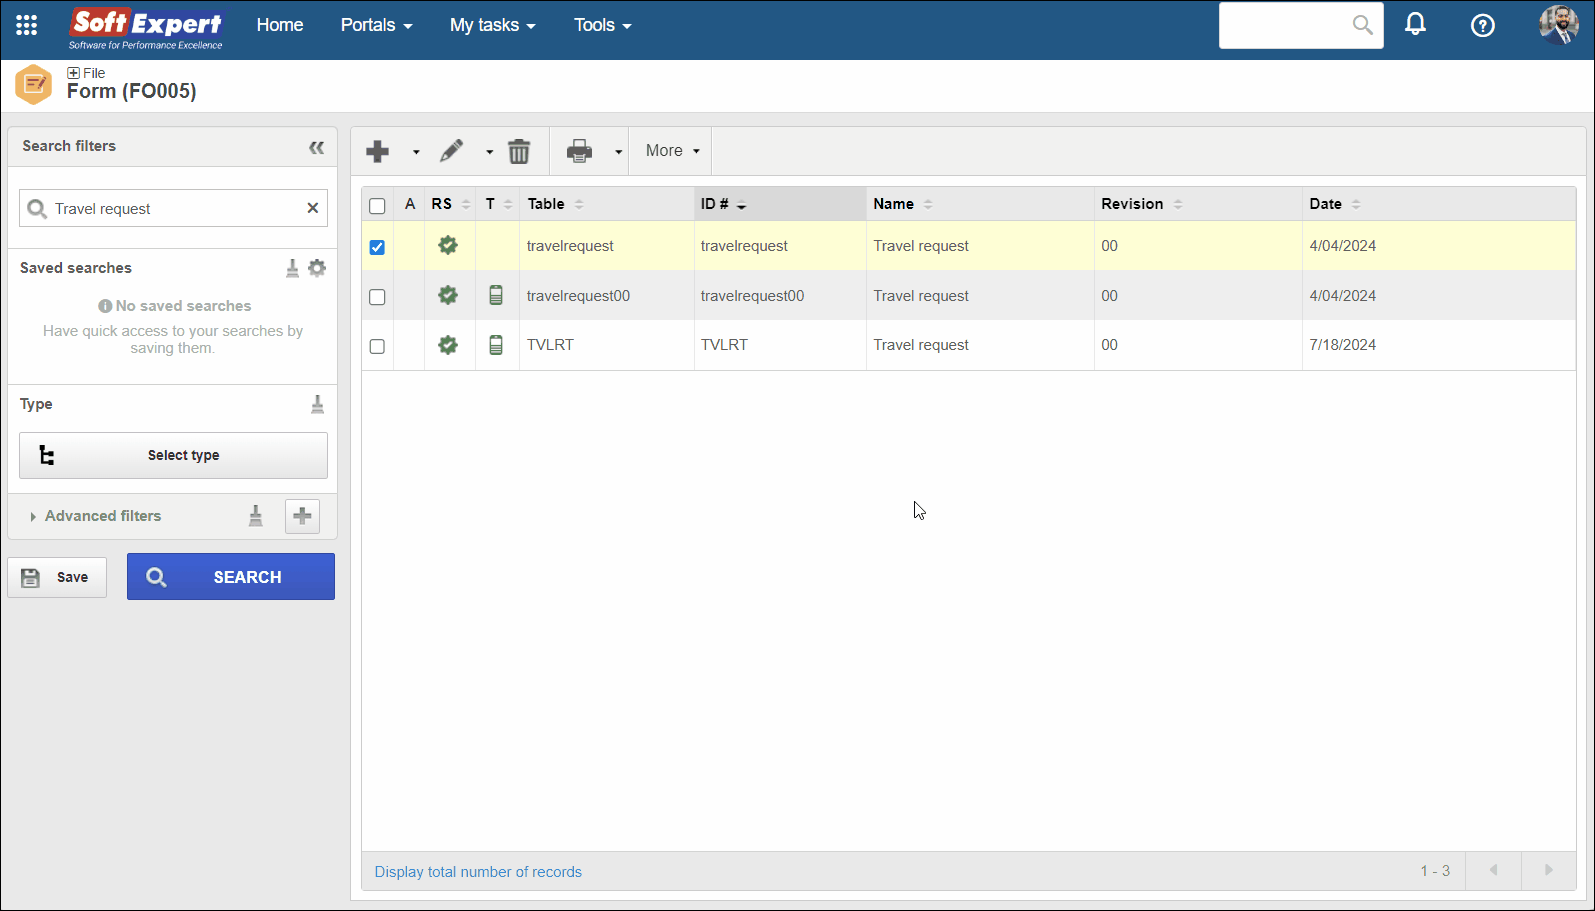
Exporting a form
1. Access the File > Form (FO005) menu.
2. Select the form you wish to export.
3. Click on More from the toolbar.
4. Select the Export option.
The system will generate a file with .seform extension for web forms, and a .formx file for responsive forms.
The data related to the form will be exported into the file, namely: table type, form type, table, attributes, relationships, formulas, and the form design containing the relationships of the items with the fields of the tables.
Importing a web form
1. Access the File > Form (FO005) menu.
2. Click on the More button and then on Import.
3. Select the Form option and click on the Continue button.
4. On the form import Wizard screen, click on the Start button.

4. Follow the steps described below:
Step 1 - File
Select the file with .seform extension of the form that will be imported.
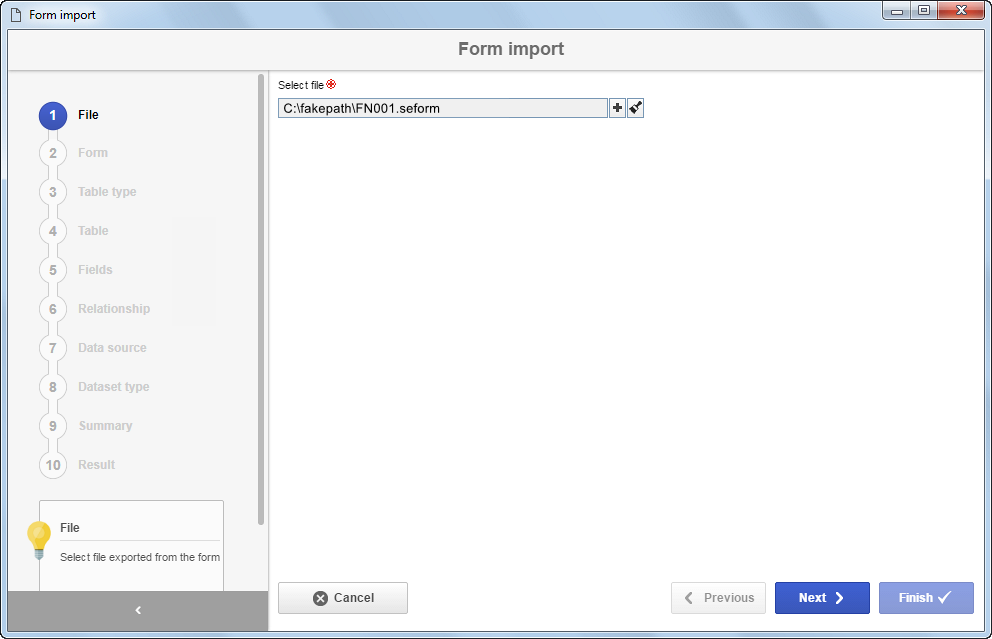
After selecting the file, click on the Next button to proceed with the import.
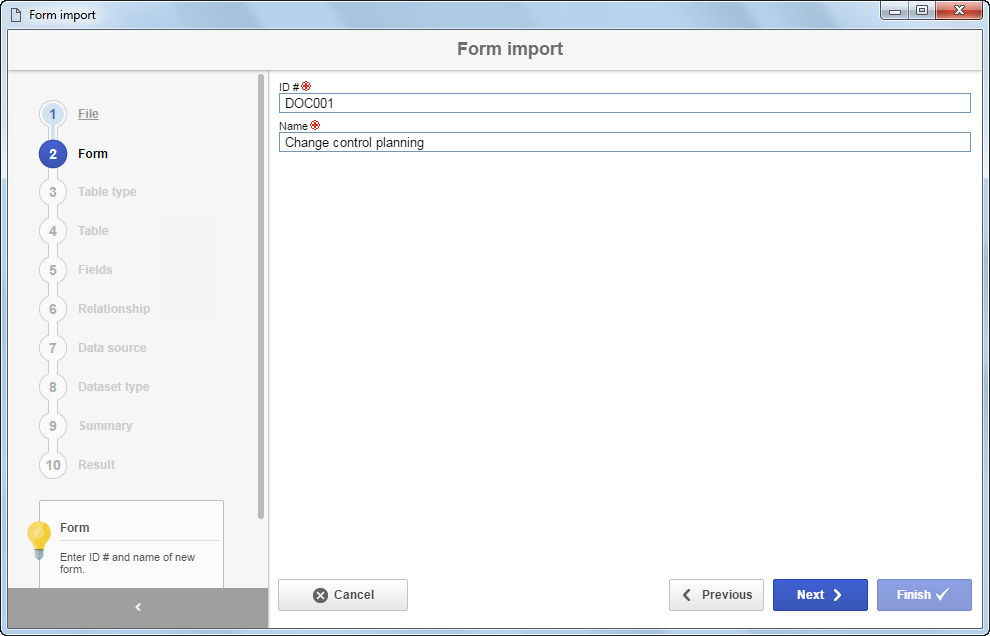
Step 2 - Form
Select one of the following options:
| Creating a new form | Enter an ID # and a name for the form that is being imported. After filling in the required fields, click on the Next button to continue with the import. |
| Using an existing form | Select the previously created form that will be used in the import. Remember that the import cannot be performed for a form with items already created. The system will clear the form before starting the import. After filling in the required fields and clicking on the Next button, the user will be shown a message in order to confirm the deletion of the items. |
• If the Import new datasets only option is selected, only the new datasets will be imported. Existing datasets must be maintained and used in the form.
For existing datasets that will be reused in the form, the system checks for inconsistencies, such as missing fields, and displays a message in the import result indicating which fields were inconsistent, thus preventing the creation of duplicated datasets.
Step 3 - Table type
Select the type that classifies the table that will be used by the form being imported. The system will check if the table type exists already; if it does, it will be selected automatically, but this information can be changed.
If the table type identified in the import file does not exist, the field will be shown blank and must be filled in manually.
If a previously created table type is selected, the type identified in the file will not be imported.
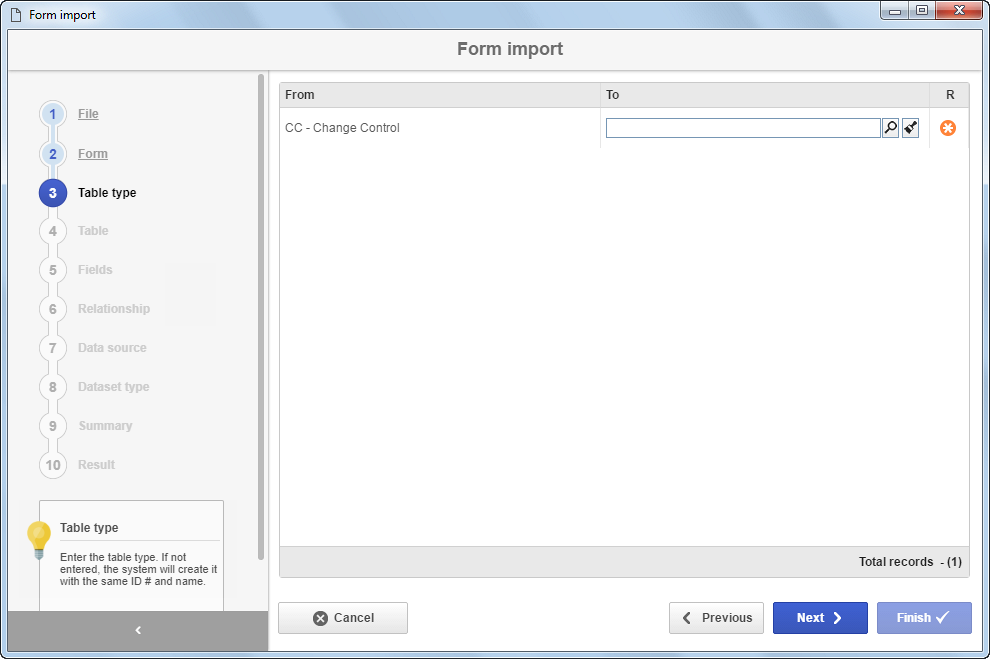
Click on the Next button to continue with the import.
Step 4 - Table
Select the table that will be used by the form that is being imported. The system will check if the table exists already; if it does, it will be selected automatically, but this information can be changed.
If the table identified in the import file does not exist, the field will be shown blank and must be filled in manually.
If a previously created table is selected, the table identified in the file will not be imported.
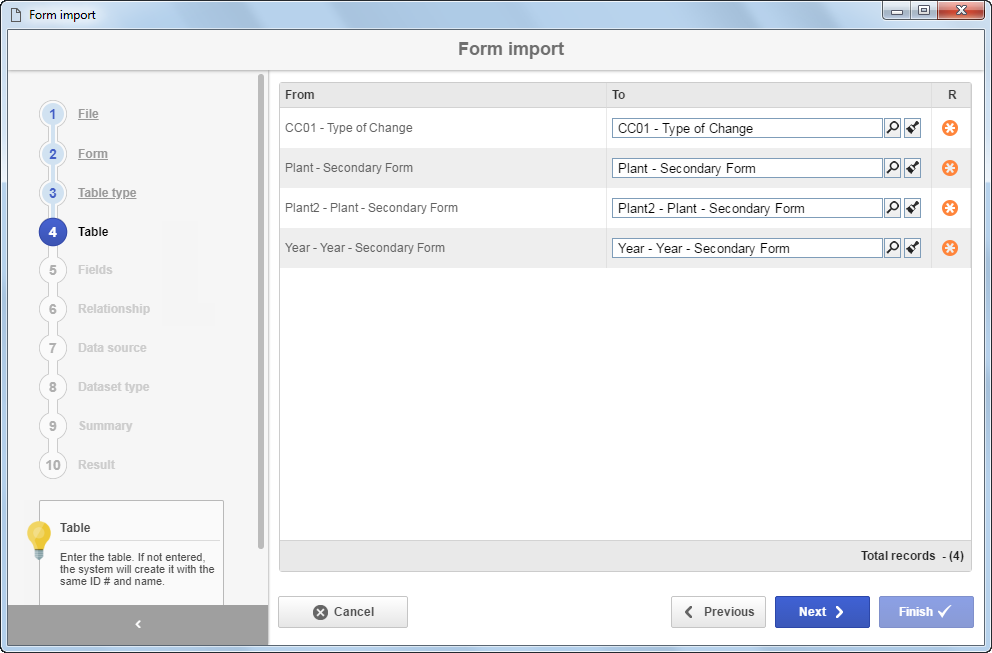
Click on the Next button to continue with the import.
Step 5 - Fields
In this step, the fields of the form that is being imported will be displayed. The system will check if the fields exist in the table selected in the previous step; if they do, the system will select them automatically. Otherwise, the field will stay blank in order for fields to be inserted in the table.
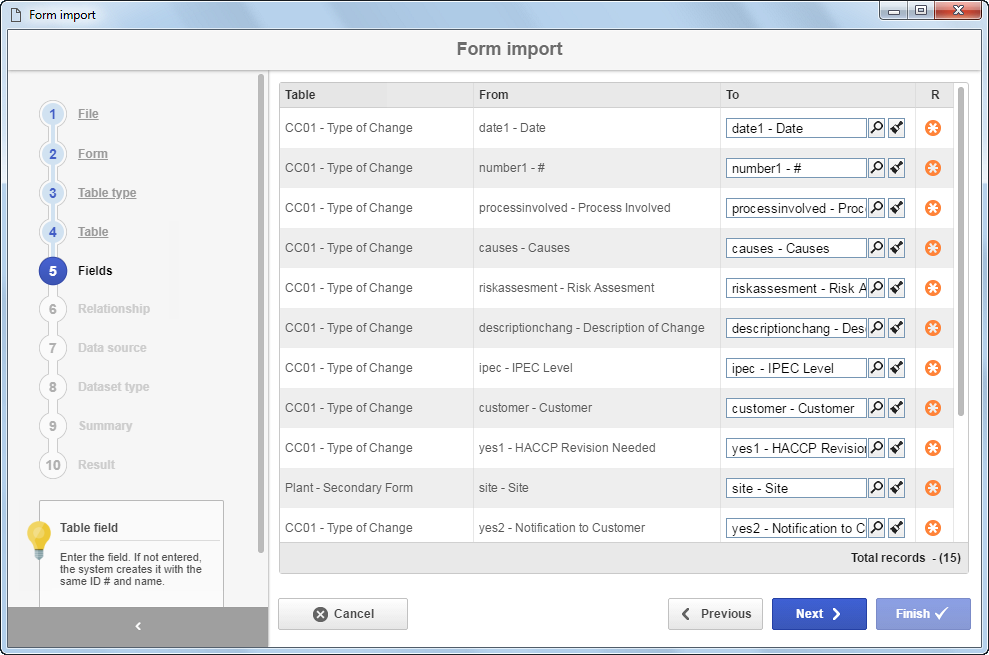
Click on the Next button to continue with the import.
Step 6 - Relationship
In this step, the relationships of the form that is being imported will be displayed. The system will check if the relationships exist in the table; if they do, it will select them automatically. Otherwise, the field will stay blank in order for relationships to be inserted in the table.

Click on the Next button to continue with the import.
Step 7 - Data source
In this step, the data sources of the form that is being imported will be displayed. The system will check if the data sources exist already; if they do, the system will select them automatically, but this information can be changed.
If there are no data sources, the fields will stay blank.
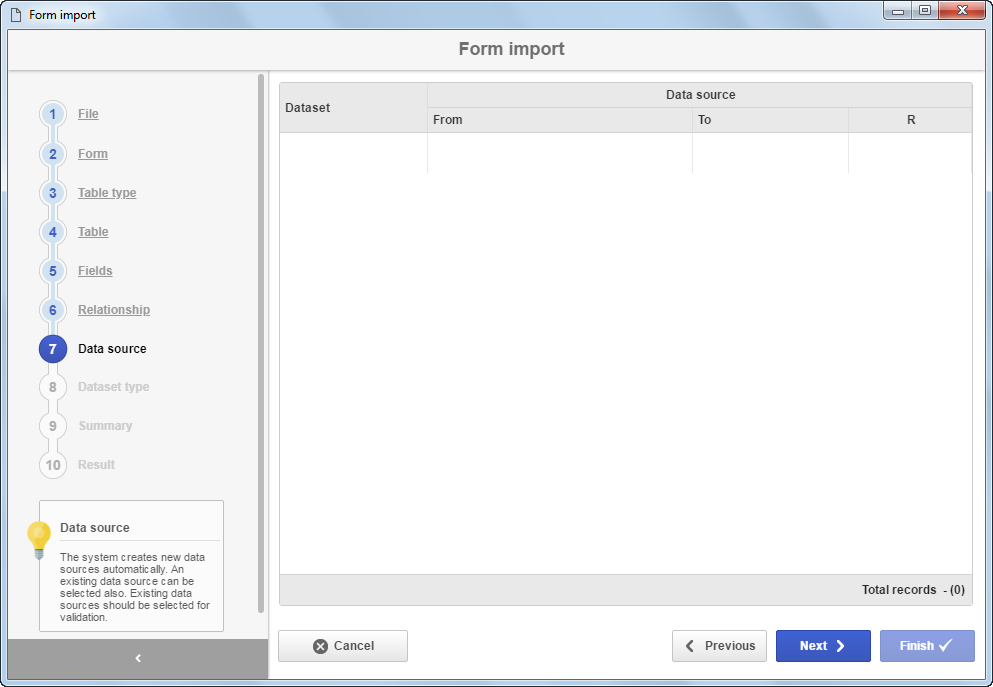
Click on the Next button to continue with the import.
Step 8 - Dataset type
In this step, the dataset types of the data sources of the form that is being imported will be displayed. The system will check if the dataset type exists already; if it does, the system will select it automatically, but this information can be changed.
If there are no dataset types, the fields will stay blank.

Click on the Next button to continue with the import.
Step 9 - Summary
In this step, a summary of all information to be imported will be displayed.
If you need to change any information, click on the Previous button until reaching the step in which the data will be edited, then click on the Next button until coming back to this step again.
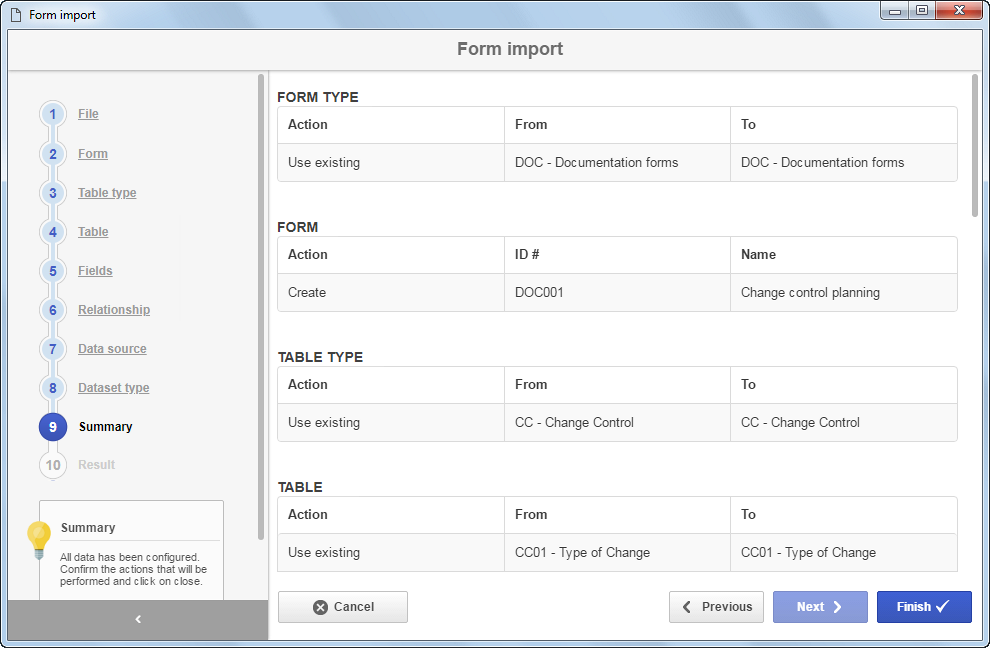
With all information provided correctly, click on the Import button.
Step 10 - Result
In this step, the system will display a message informing whether the import was successful or not.
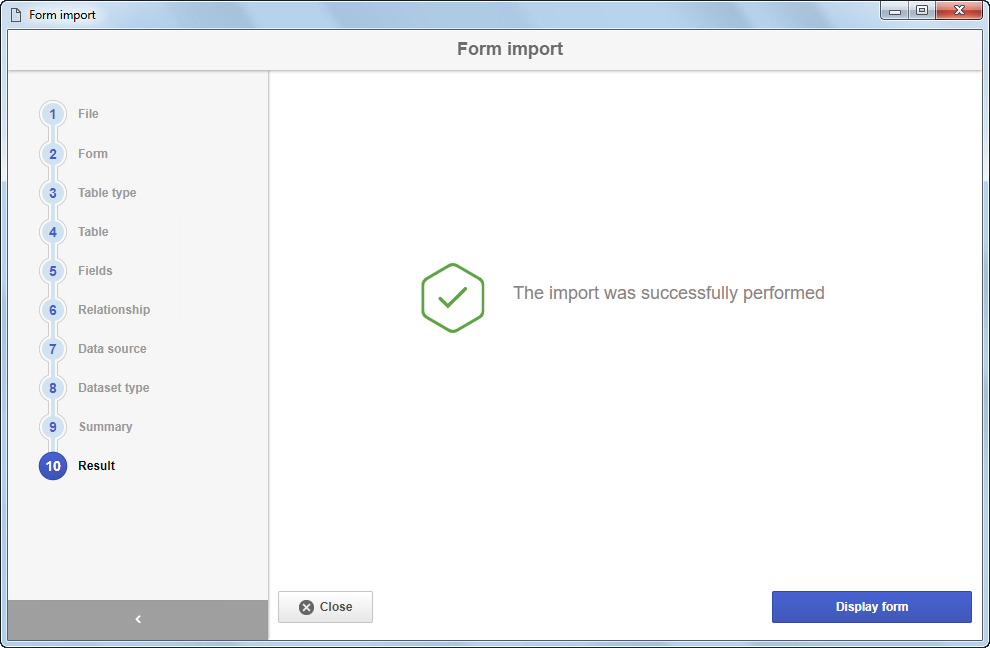
Click on the Display form button to view the imported form or click on Close to exit the import screen.
• The form import steps vary depending on the design of the form being imported.
• If the form being imported has a dataset associated, the Dataset step will be shown. Enter the dataset that will be used in the Destination field.
• In addition to fields, the rules, variables, expressions, and functions associated with the forms are imported as well.
Importing a responsive form
1. Access the File > Form (FO005) menu.
2. Click on the More button and then on Import.
3. Select the Responsive form option and click on the Continue button.
4. Drag the file with .formx extension to the specified location, or click on the select option to search for the file on your computer.
5. Click on the Import button.
6. Click on the Finish button.

• The import can be used to create a responsive form or update an existing form. In this case, the system will create a new revision for the record.
• In addition to fields, the rules, variables, expressions, and functions associated with the forms are imported as well.
If the import is used to update an existing form, it will not be possible to complete it if the form is under revision. Release the form before continuing the import.
The system allows for changing the identification of the responsive form and the linked tables during the import process.
This feature offers greater flexibility, allowing the imported form to be adapted to different contexts, without restrictions as to original configurations. It is possible to reuse a training evaluation form and adapt it for a movie review record, without the need to build everything from scratch, for example.
To use this feature, at the time of import, the Edit table and Edit form options must be enabled.

After moving on with the import, it is necessary to enable the Edit data field. Then, simply add the new desired data.

With the import finished, the new record will be available, with the new data filled out. Simply adjust the fields in the form editor to complete the adaptation to the new purpose.
Enable the Create released revision option so that the form is imported with a new revision already released. This feature is useful for the purpose of importing forms that have already been validated in another environment.
Conclusion
All done! Now you know how to reuse previously designed forms via import.