Creating a simplified revision
 |
 |
 |
Prerequisite
- Access to the File > Document menu.
Introduction
After the configuration step, the next step is to create the revision.
For this specific example, we will create a simplified revision for a document that requires a simpler revision process.
See below how to perform the mentioned operations by using a simple revision.
Creating a simple revision
1. Access the File > Document menu and click on the  button.
2. On the screen that will be opened, select a category configured with a simplified revision.
3. For this example, keep the ID # generated automatically by the system and name the title as desired.
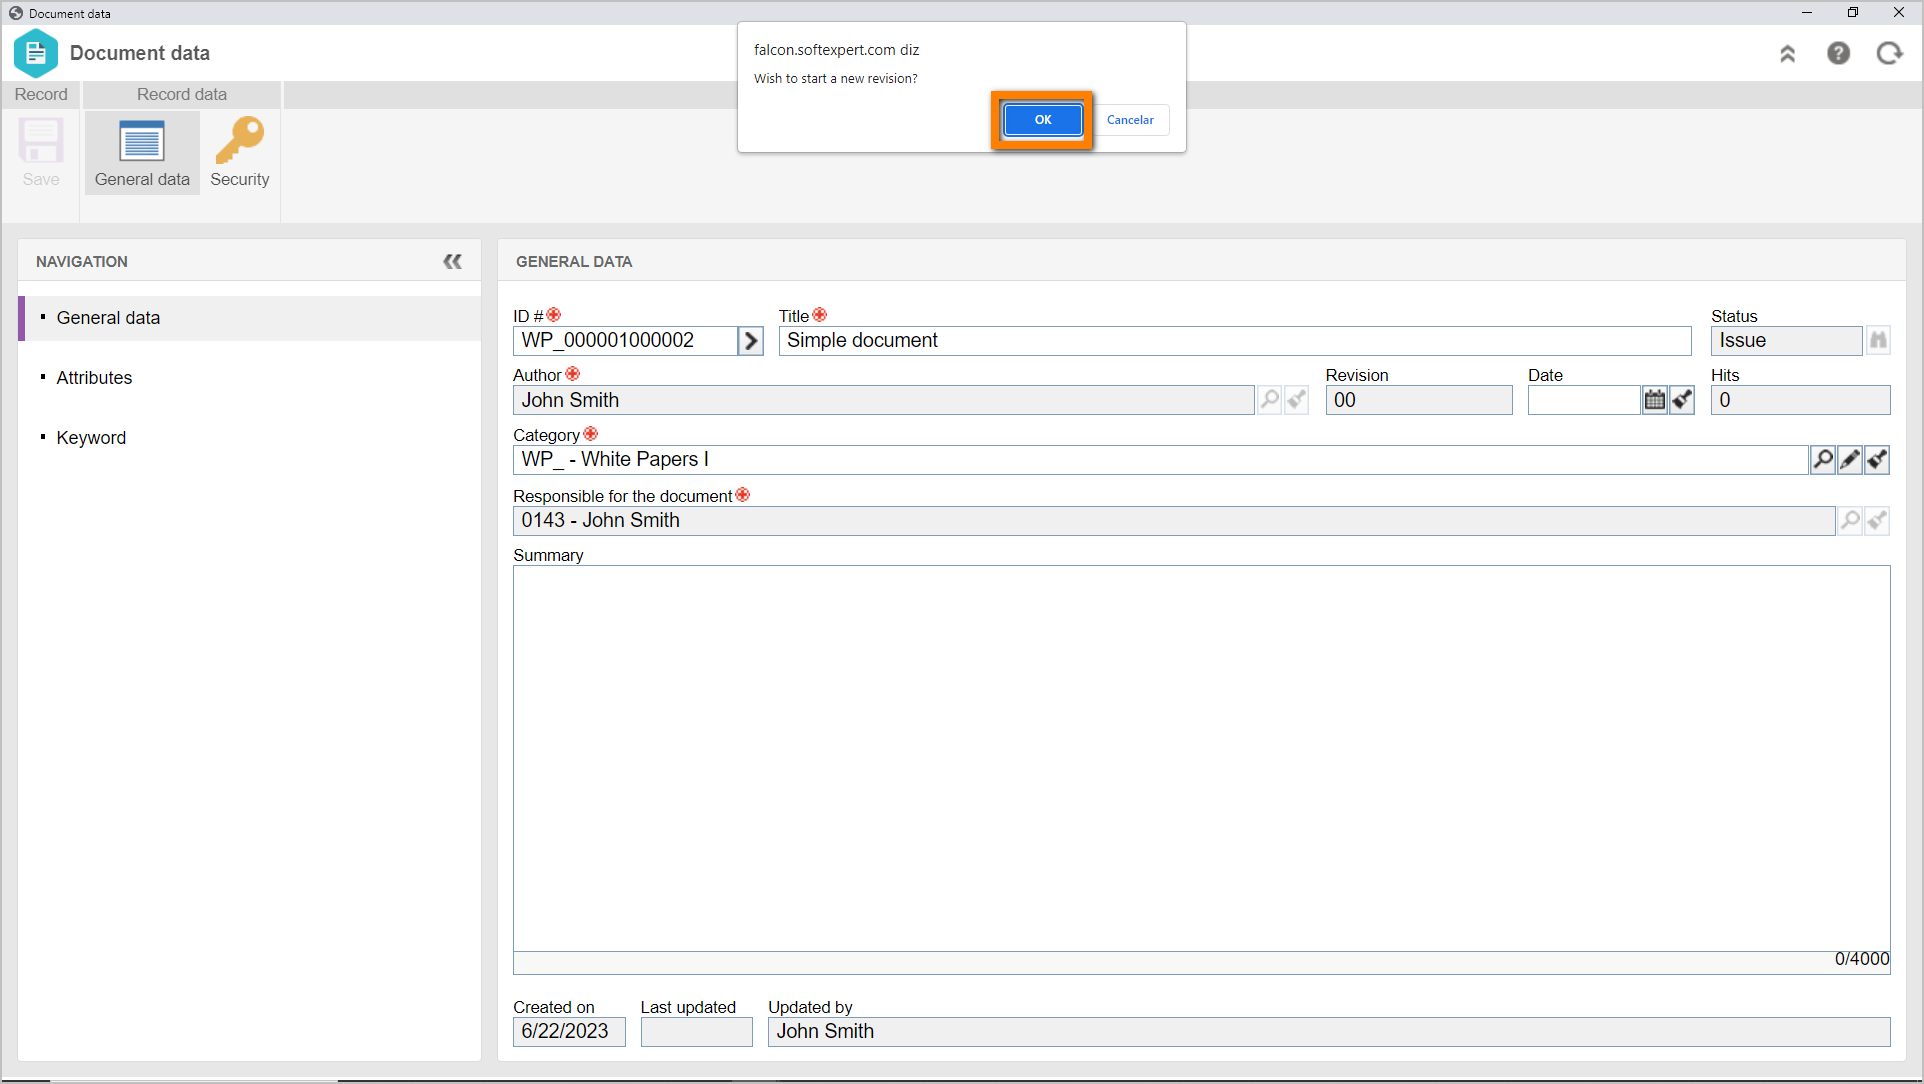
4. Click on the Save button and accept the system request to create a new revision.
Thus, the system informs that a new version will be created, allowing the user to perform the changes without affecting the current version. Confirm the message to enable editing.
Conclusion
This article has taught you to create a simplified revision. Now, to finish the action flow, it is necessary to execute the revision. See further details in the Executing a simplified revision article.