Configuring the SLA
Prerequisite
- Access to the SoftExpert Process > File > Process (PM022) menu.
Introduction
SLA (Service Level Agreement) consists of an agreement between two parties: the entity willing to render the service and the customer who will benefit from it.
It is based on the process activity statuses; thus, this article will show how to create an attribute and associate it with the process and the activity, and how to define the activity incident status, to later apply them to the SLA.
See how to perform these operations:
Creating an indeterminate attribute
For our example, we will use an indeterminate-type attribute. Thus, the first step is to create the "My attribute" attribute.
For further details on attributes and their creation, refer to the What is an attribute? article.
Associating the attribute with the process and the incident process activity
Once the attribute has been created, we must associate it with the process and the process activity.
1. Access the SoftExpert Process > File > Process (PM022) menu.
2. Search for and select the process created in the General configurations article and click on the  button.
3. Then, click on the Process option on the toolbar.
4. On the screen that will be opened, access the Configurations > Attribute tab.
5. Associate the indeterminate attribute and click on the Save and exit button.
For further details on attribute association, refer to the Attribute association article.
6. Back to the flowchart, double-click on the "Request" activity to access its data screen.
7. Access the Configurations > Attribute tab and associate the indeterminate attribute.
8. Click on the Save and exit button to close the activity data.
9. Repeat the steps to associate the attribute with the "Approval" activity.
10. Once the attribute is associated with the activity data, click on the Save and exit button on the flowchart screen.
Sorting SLA triggers
1. Access the SoftExpert Process > File > Process (PM022) menu.
2. Search for and select the process and click on the  button.
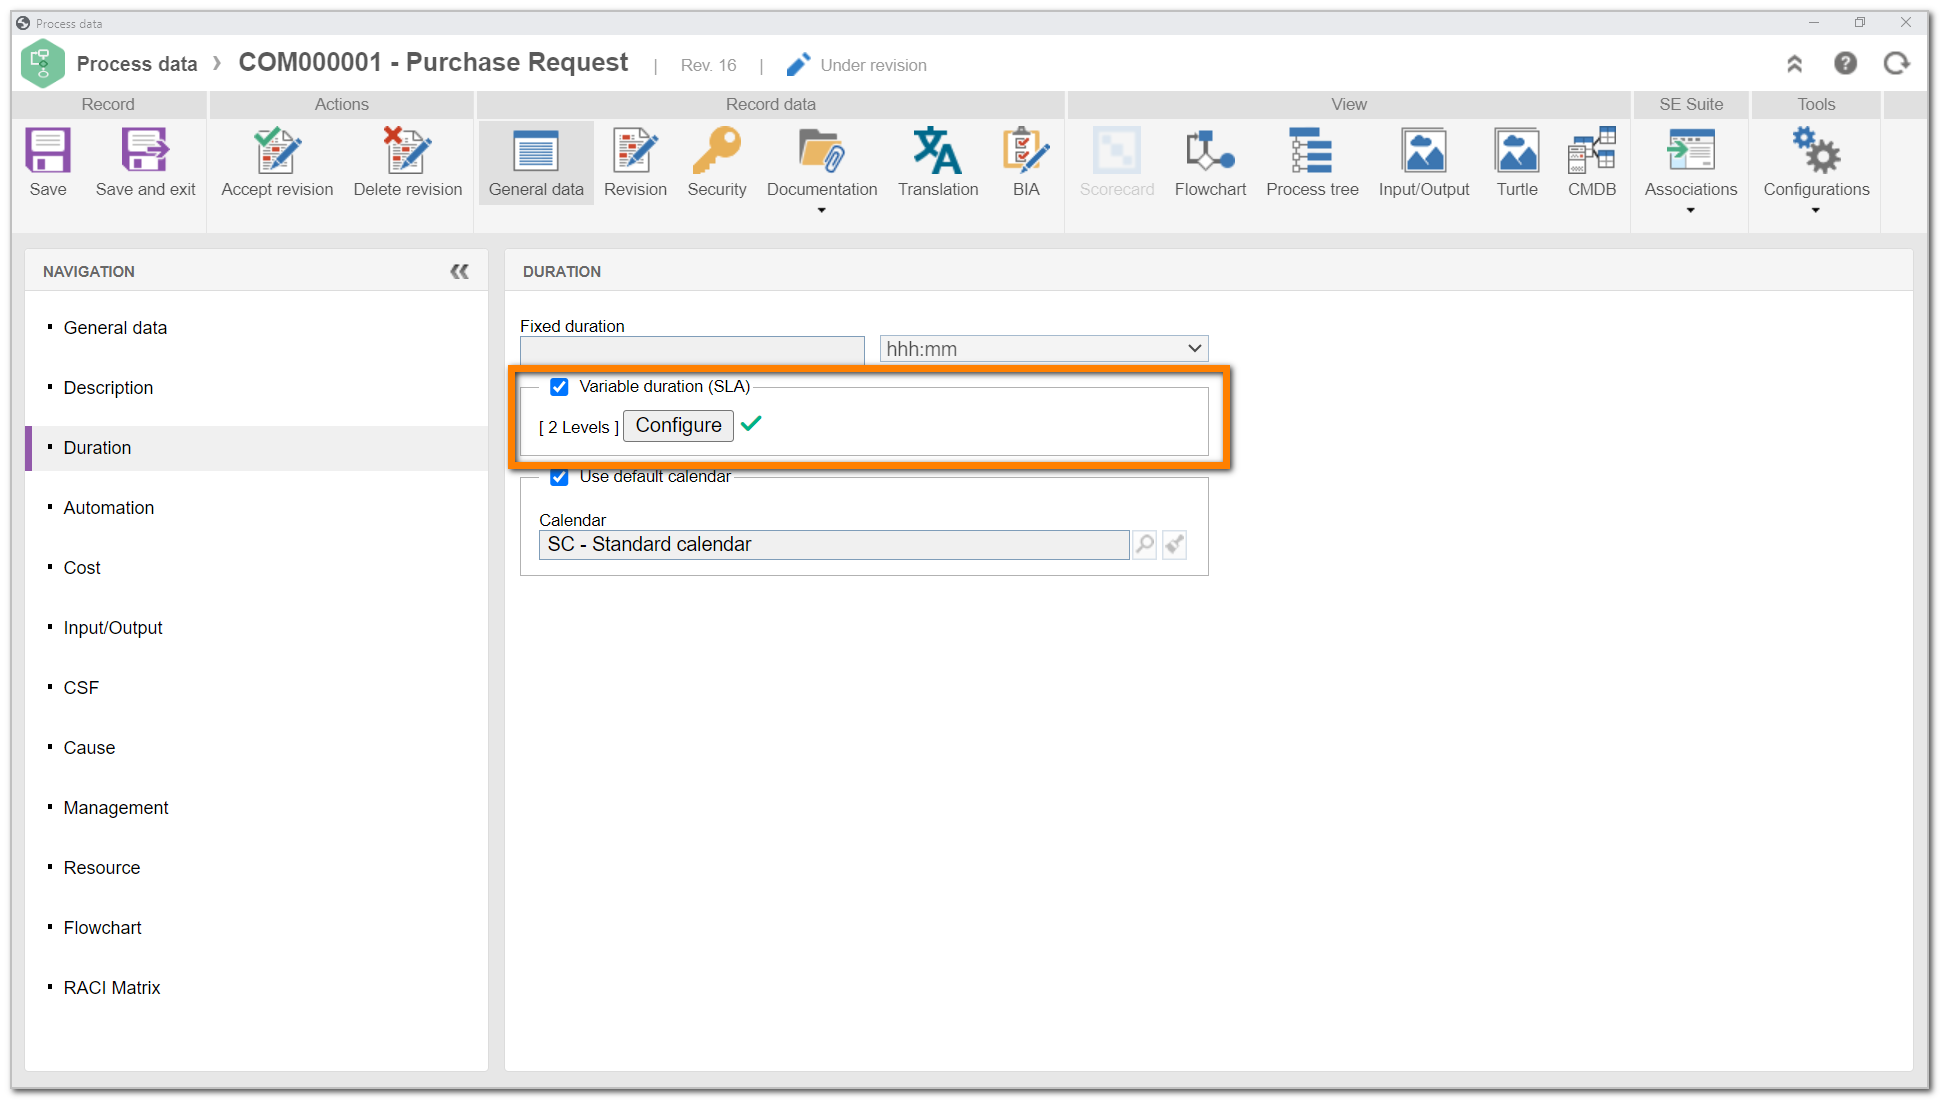
3. Access the Duration tab, check the "Variable" duration, and click on the Configure button.
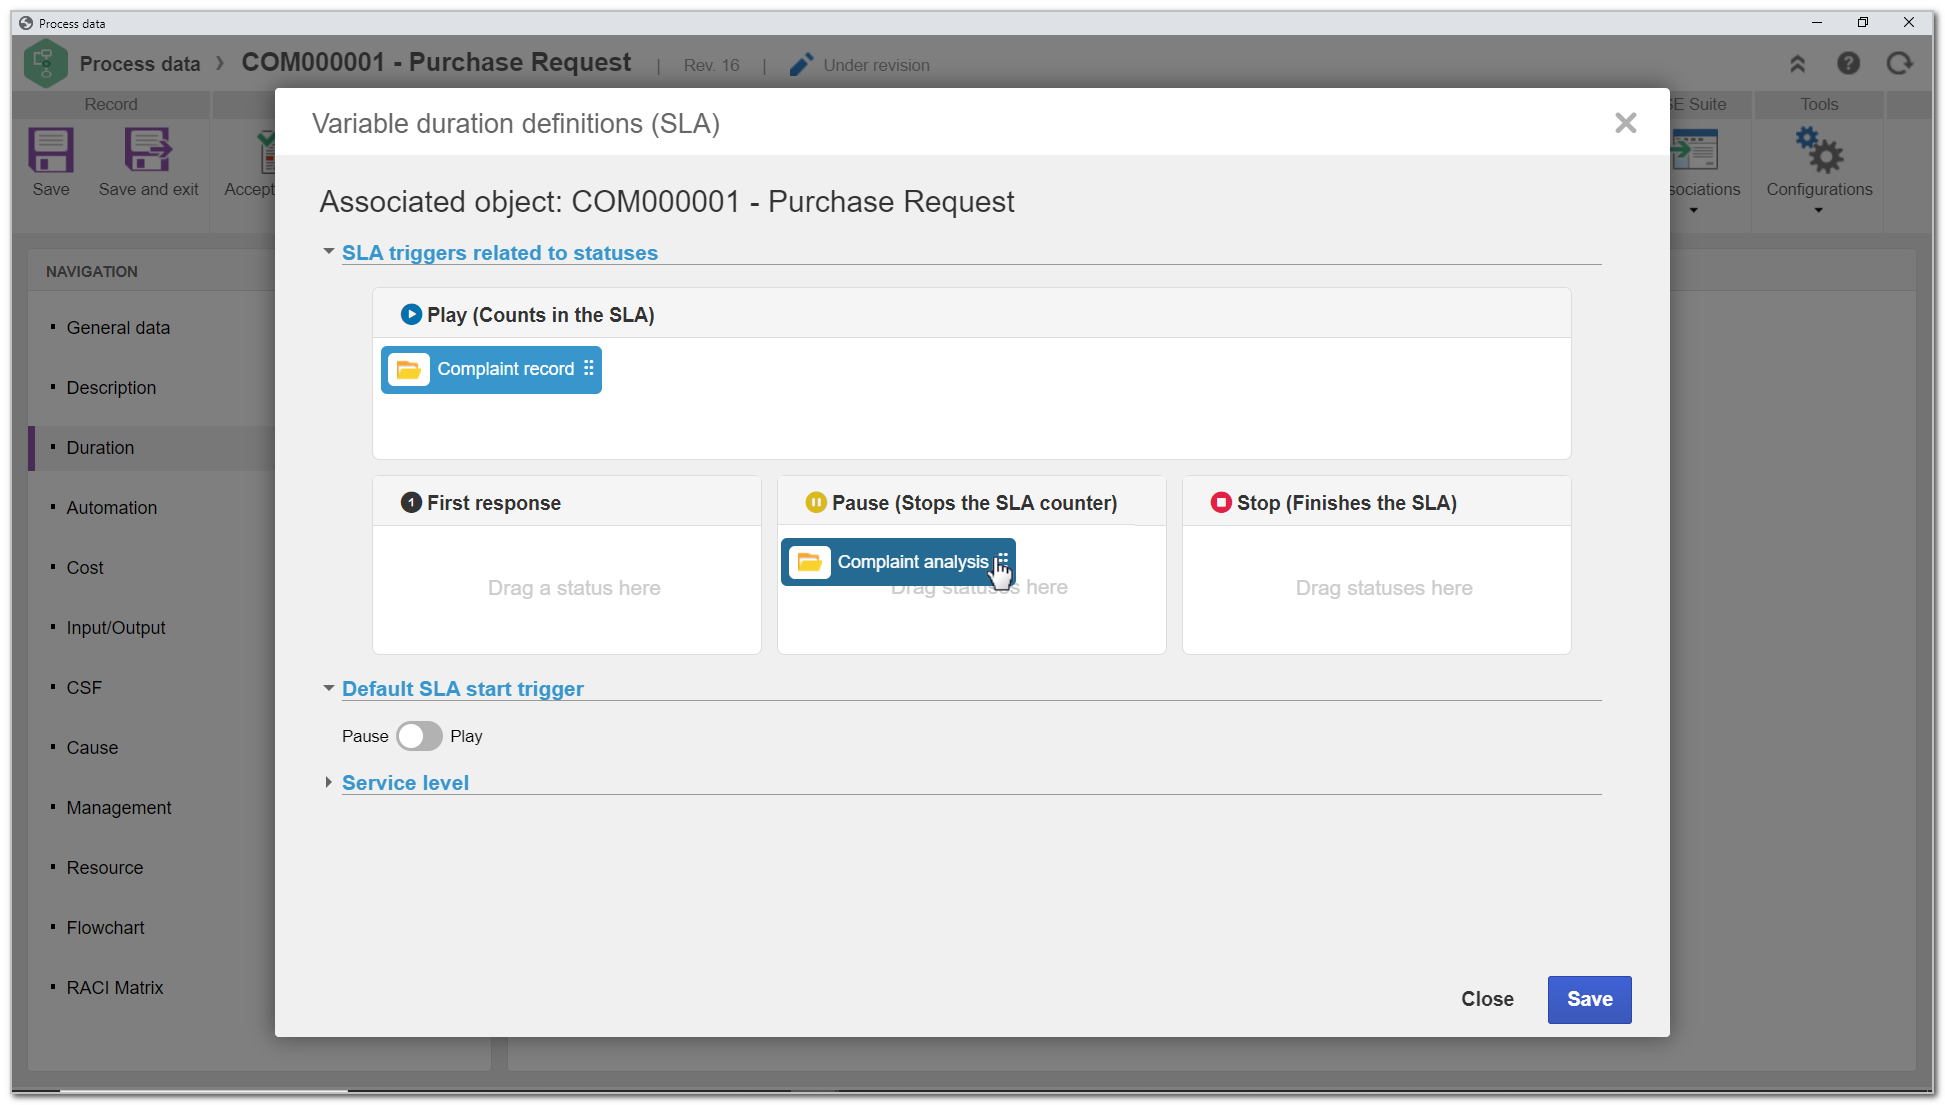
4. On the SLA configuration screen, select and drag the Complaint record activity status to the Play field, and leave the Complaint analysis activity status in the Pause field.
Creating the SLA levels
Once the triggers are sorted, it is necessary to create the service levels.
1. On the Variable duration definitions (SLA) screen, click on the New level button.
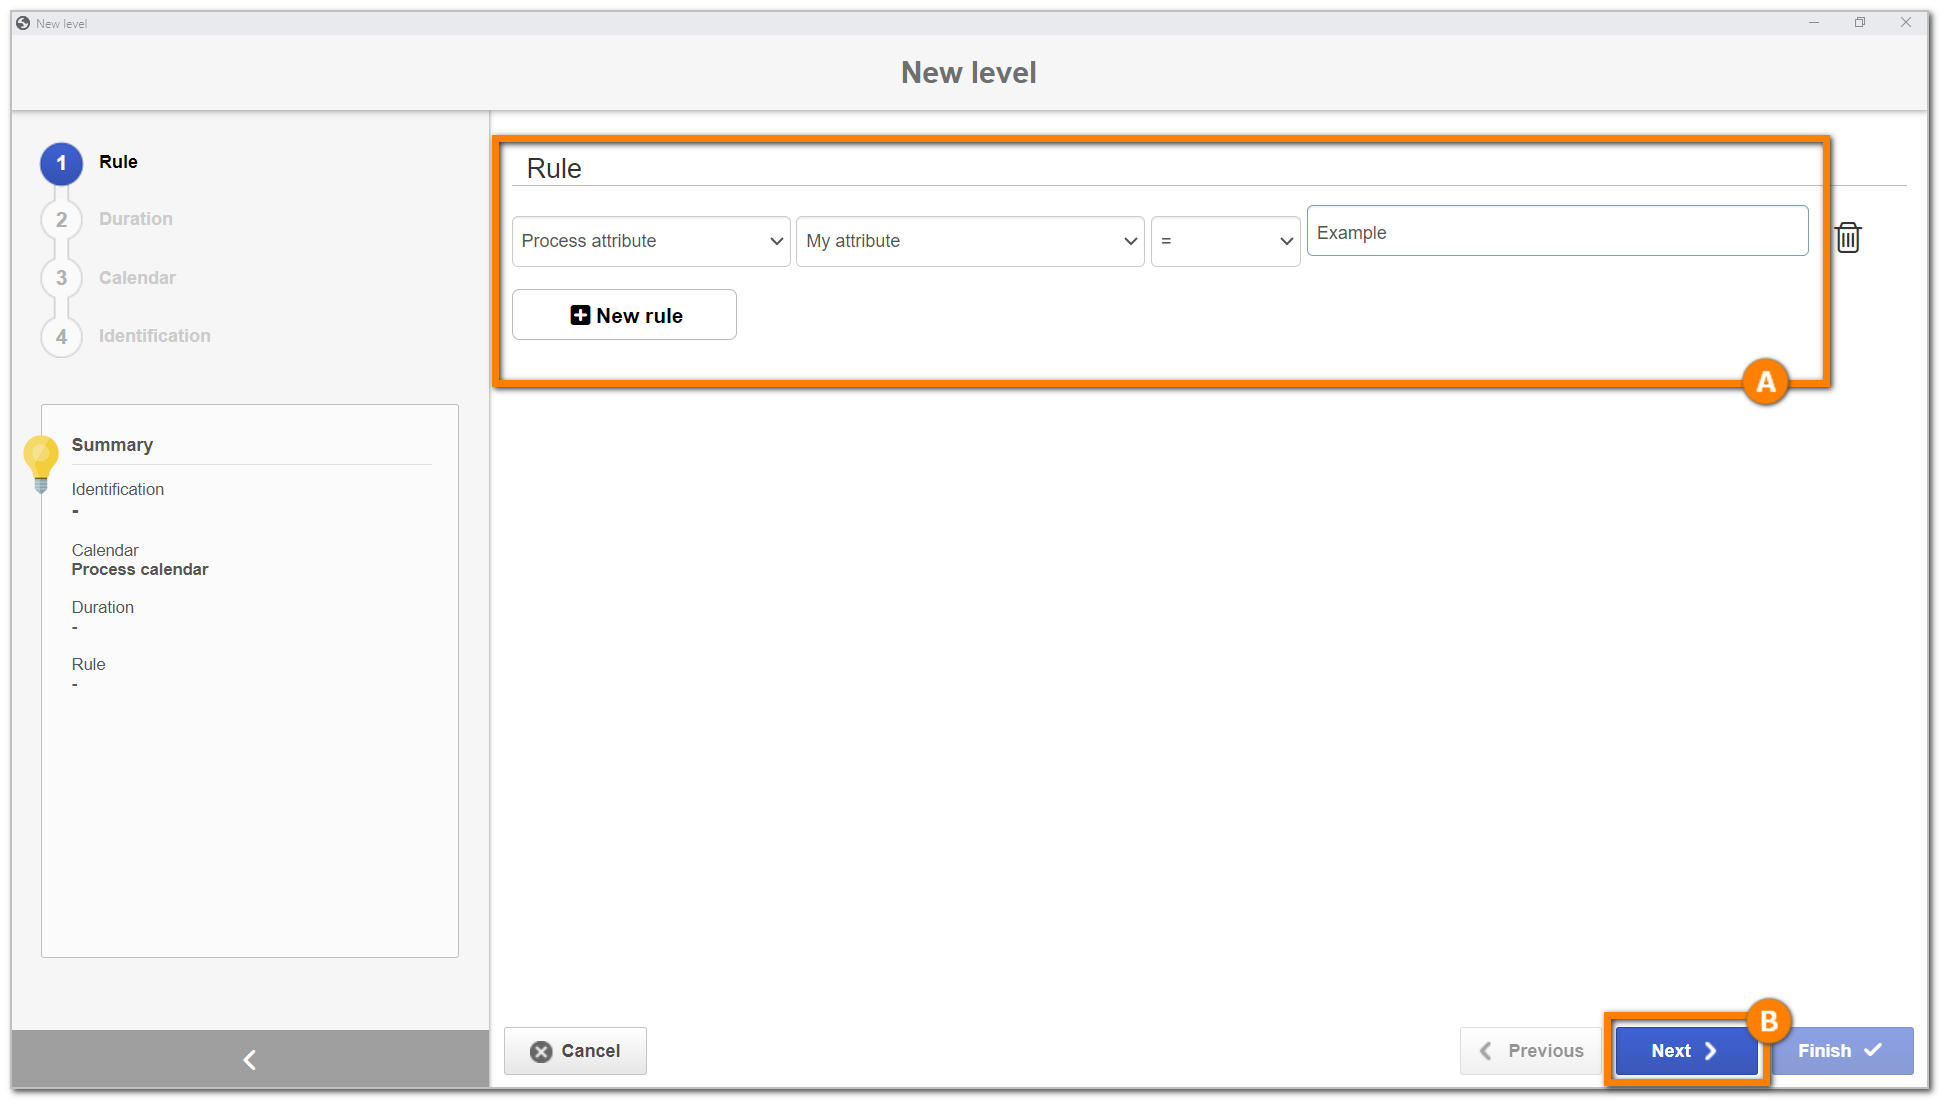
2. On the screen that will be opened, click on the New rule button and select the "Process attribute" option.
3. Select the My attribute attribute, keep the "=" operator, and fill out the last field with "Example".
4. After doing that, click on Next.
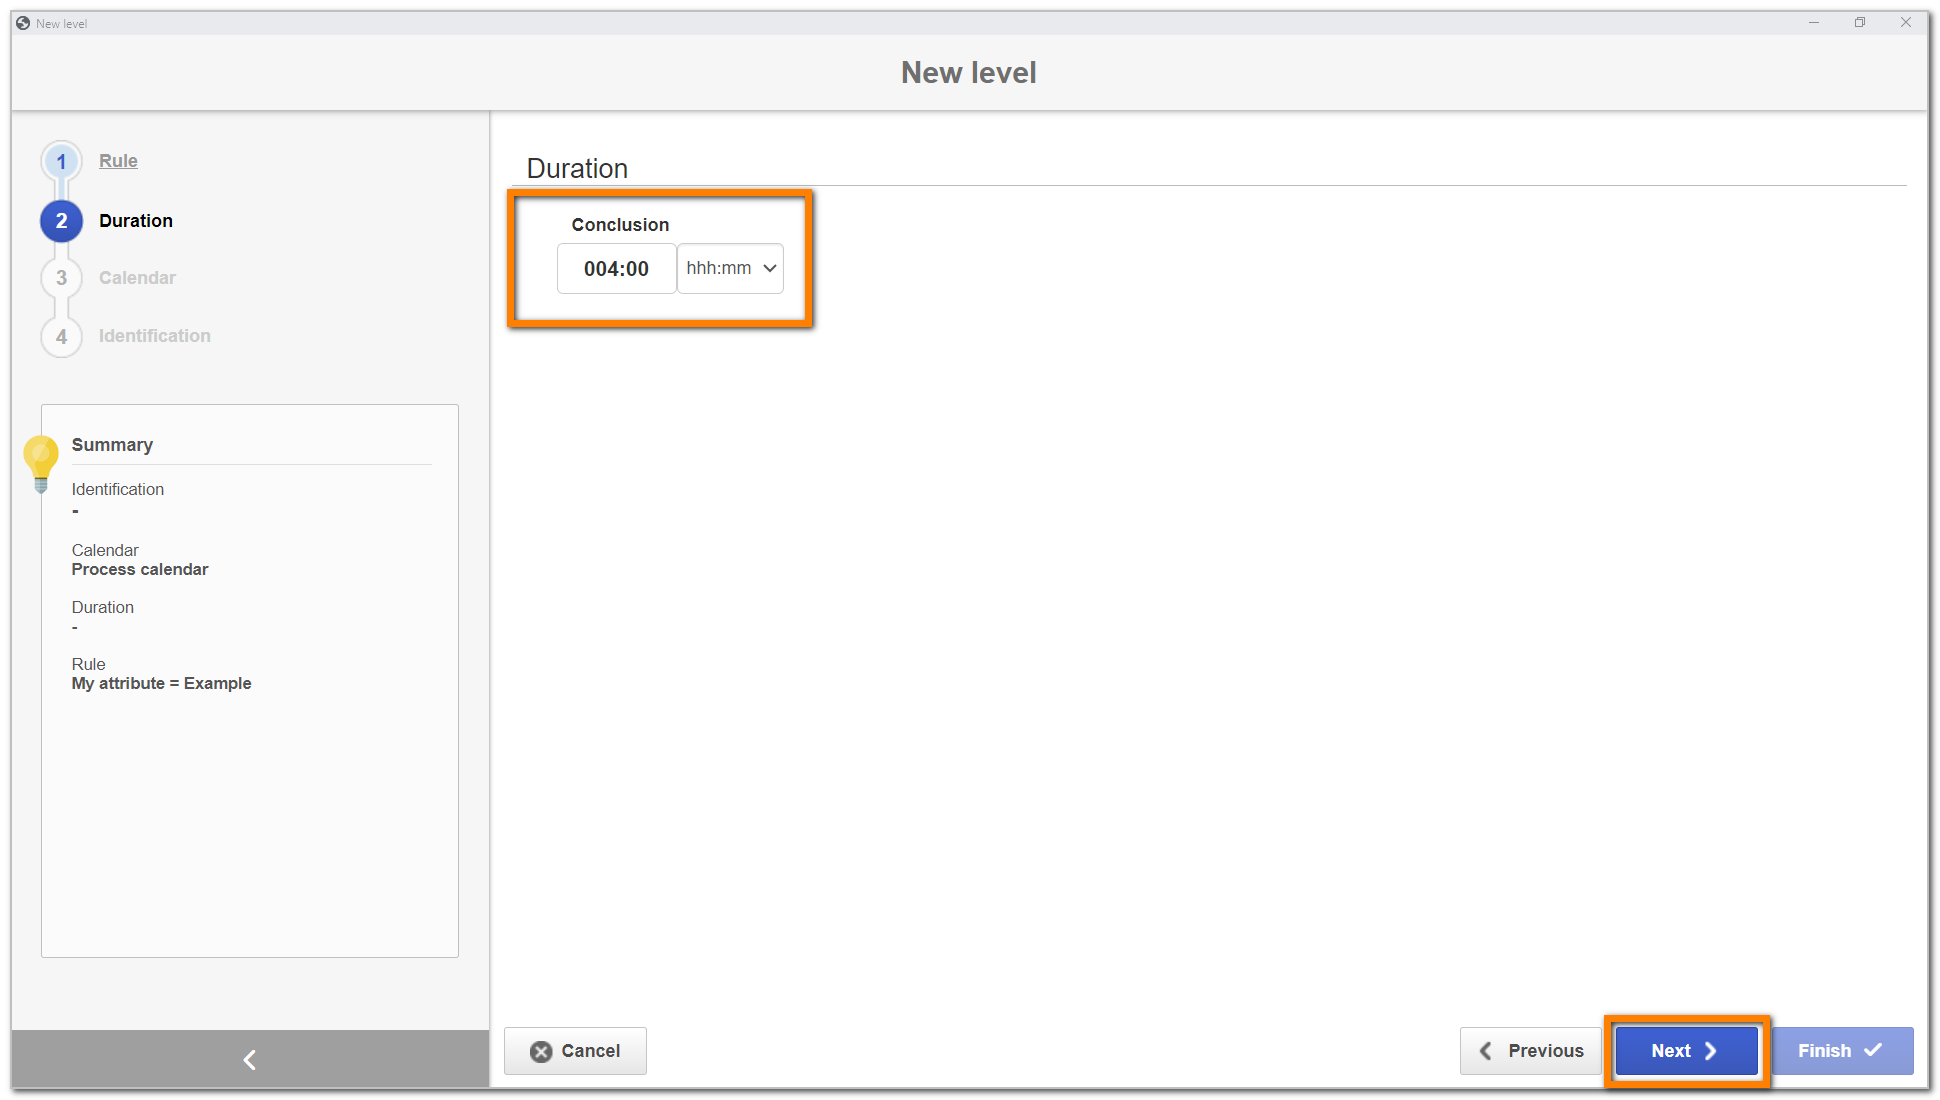
5. In the Conclusion field on the Duration step, fill out the value of "4:00" hours and click on the Next button.
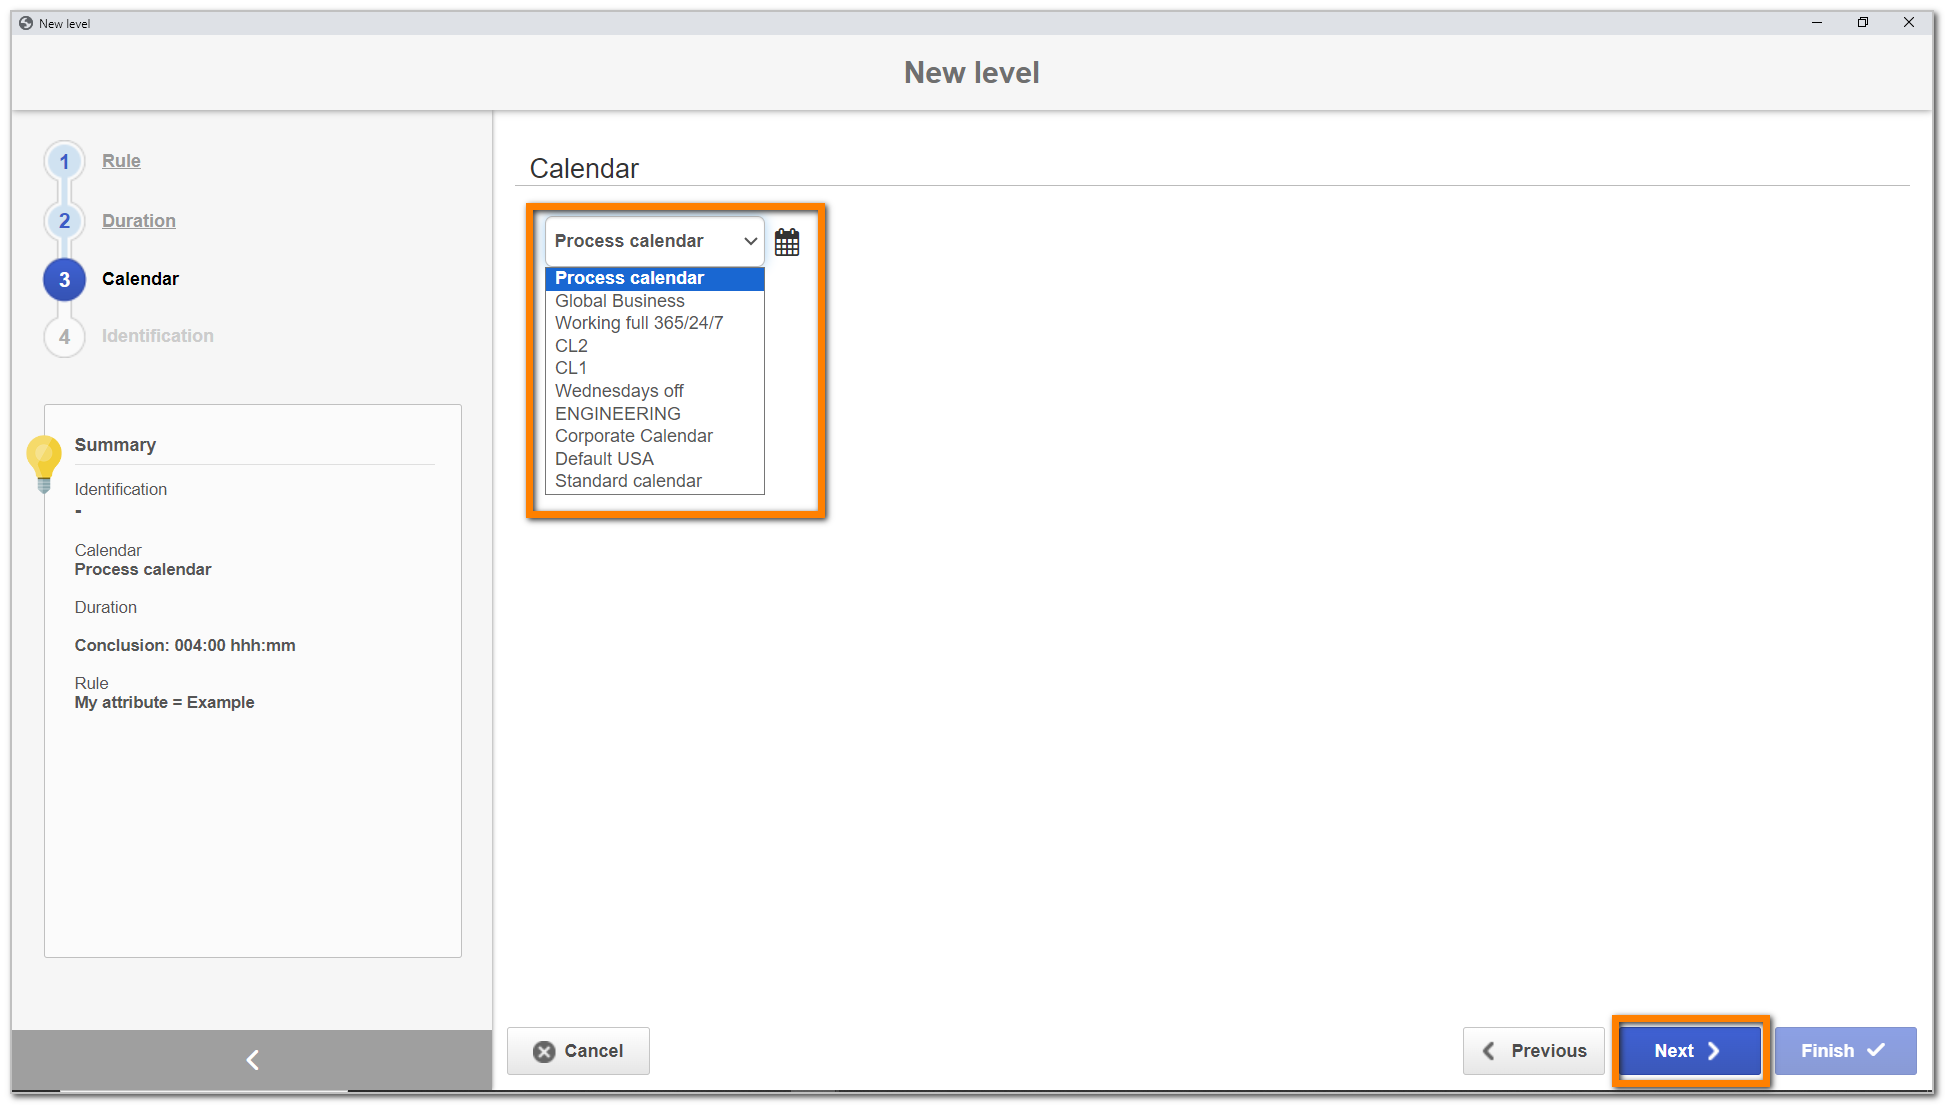
6. On the Calendar step, select the "Process calendar" option and click on the Next button.
7. In the Identification step, select the "1" value for the Sequence field, enter the "Level 1" value in the ID # field, and click on the Finish button.

8. Once done, we have successfully finished level 1!
We will now create level 2. To do so, perform the following steps:
1. Click on the New level button again.
2. We will not add rules to this example; therefore, click on the Next button.
3. On the Duration step, fill out the value of "8:00" hours and click on the Next button.
4. In the Identification step, select the "2" value for the Sequence field, enter the "Level 2" value in the ID # field, and click on the Finish button.
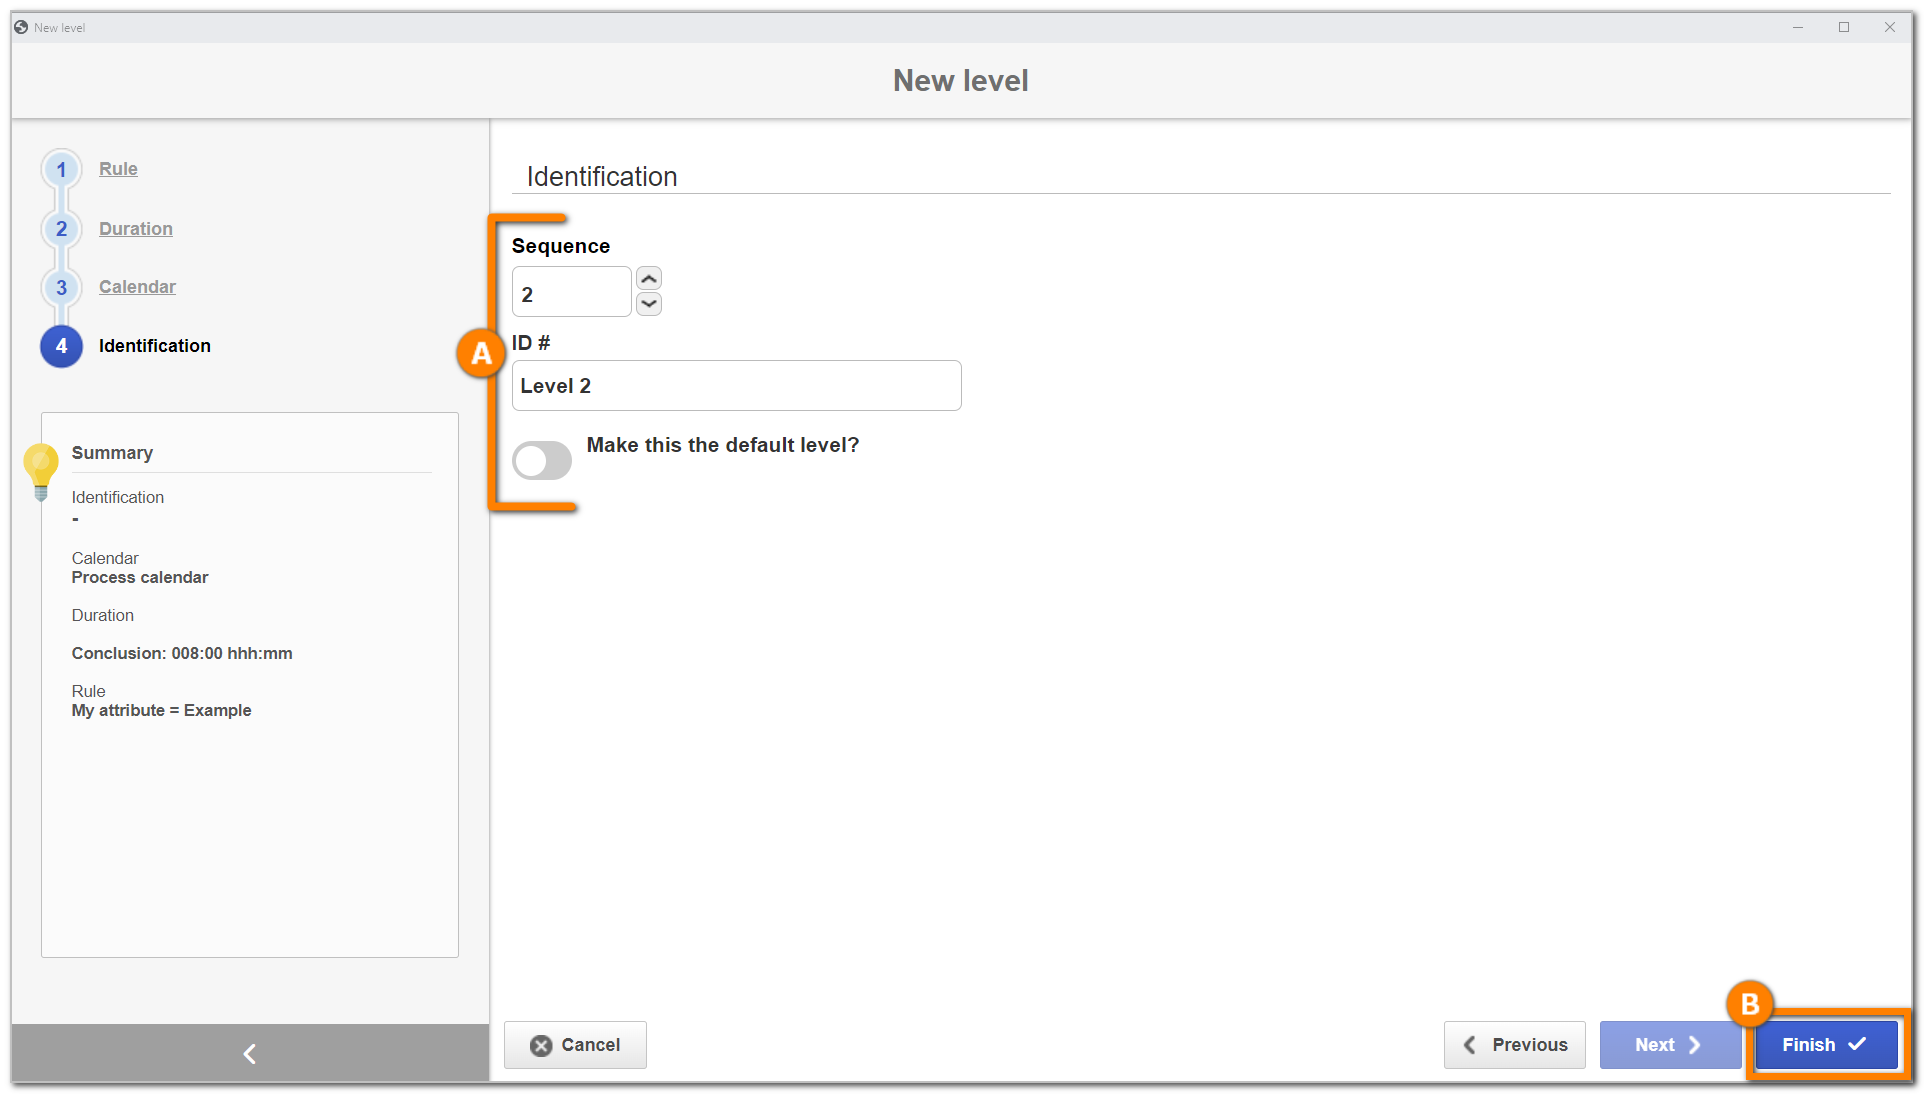
5. Once done, we have successfully finished level 2!
After configuring the levels, save the SLA configuration.
For further details on the process duration configurations, click here.
After setting all configurations, click on the Save button on the process data screen.
Then, click on the Accept revision button.
Conclusion
Once the configurations are finished, it is possible to report incidents.