Configure automatic start via scheduling
This topic will teach you how to create a scheduling to start a process.
To do so, your user must have access to SoftExpert Configuration.
In the end, you will know how to create a scheduling, execute it manually for tests, create recurrence and view the history of the executions.
For that, simply follow the steps below:
1st step: Add scheduling
To add a scheduling, go to the Configuration > Scheduling menu (WF006) and click on the  button.
On the scheduling data screen, click on the arrow next to the ID # field to generate the numbering automatically.
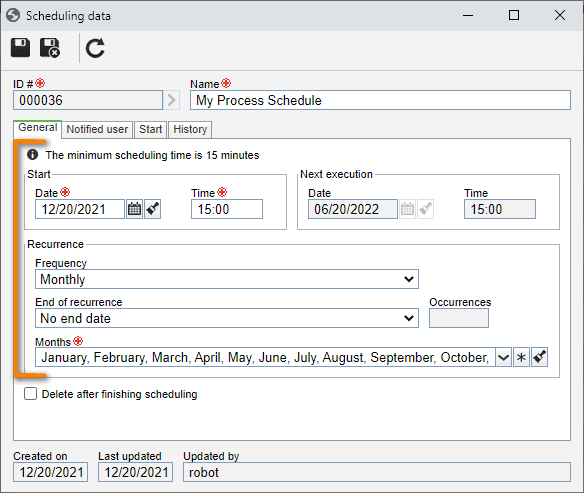
Fill in the Name field with "My process schedule" and enter the start date and time.
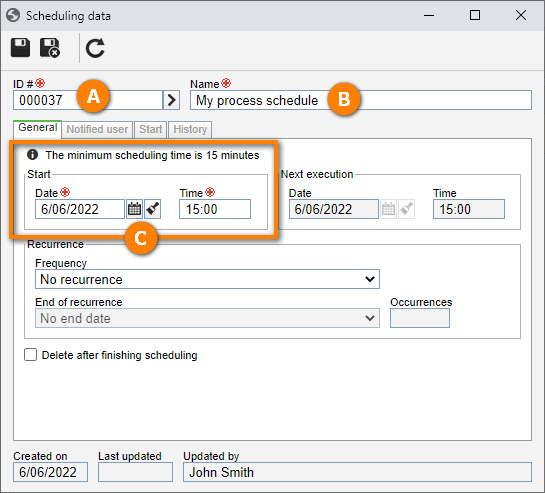
After doing that, click on the  button and keep the screen open for the next step.
2nd step: Associate process to start
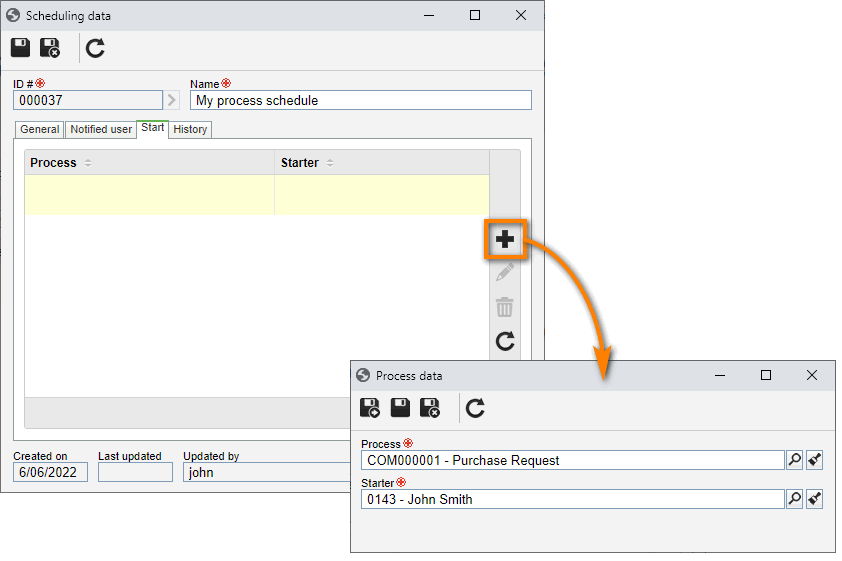
On the scheduling data screen, go to the Start tab and click on the button.
In the Process field, select "Purchase request" and add your user as starter.
All done. The scheduling is created, and a process instance will start when the set deadline is reached.
3rd step: Execute scheduling manually for validation
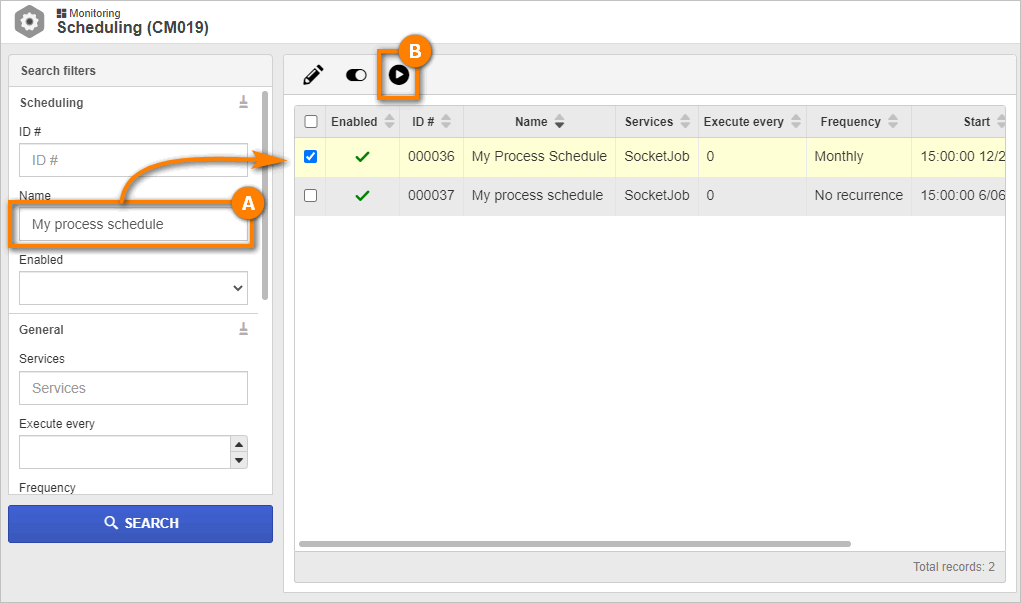
To execute the scheduling manually, go to the Monitoring > Scheduling menu (CM019).
In the left panel, search for the scheduling ID #, select the record and click on the  button.
All done. We have successfully executed the scheduling manually for validation!
4th step: Configure recurrence
In a scheduling with recurrence, it is possible, for example, to start a process instance every month, allowing monthly processes to start automatically,
To this end, go to the Configuration > Scheduling menu (WF006) and click on the button.
On the scheduling data screen, go to the Start tab and click on the button.
In the General tab, select the desired date and time for recurrence.
Then, select the "Monthly" option for the Frequency field and, in the End of recurrence field, select the "No end date" option.
Finally, in the "Month" field, click on the  button to select all months of the year.
After doing that, click on the  button.
In this way, we have successfully configured a recurrence!
5th step: View scheduling history
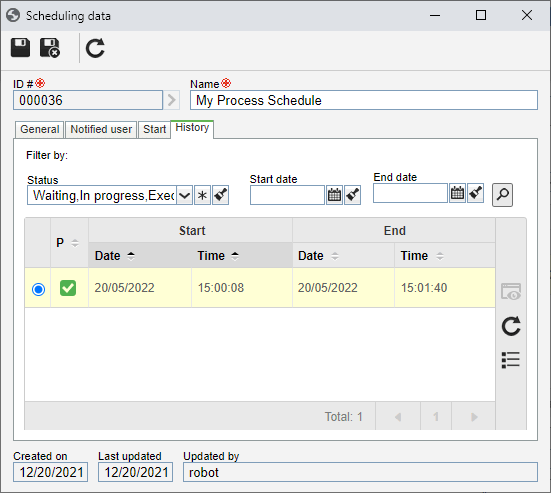
Still on the scheduling data screen, select the History tab.
On this screen, you can view, in chronological order, the executed schedulings.
All done. We have successfully viewed the scheduling history!