Adding and configuring lanes
 |
 |
 |
 |
Prerequisites
- Access to the File > Process (PM022) menu;
- Previously created process.
Introduction
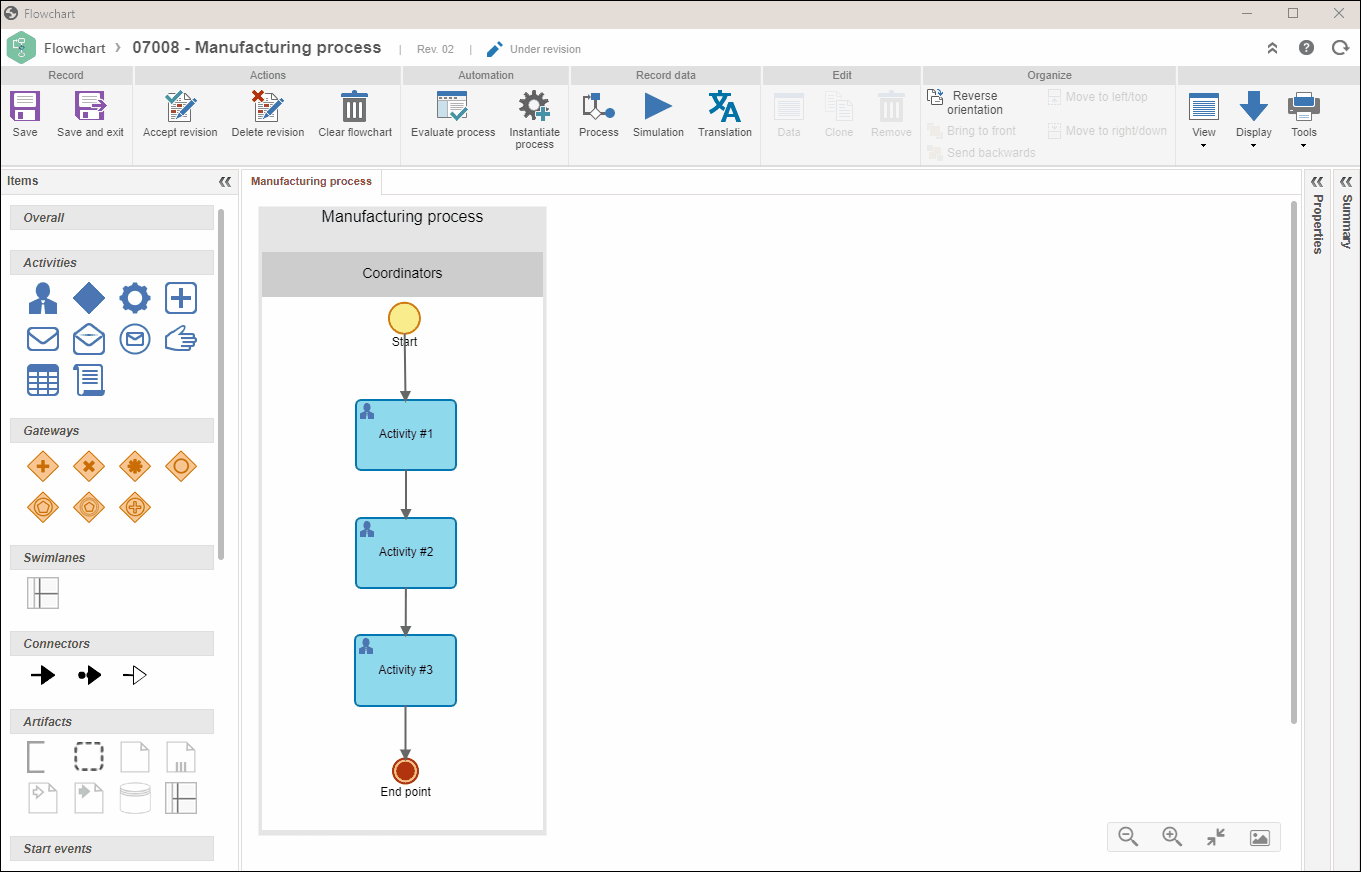
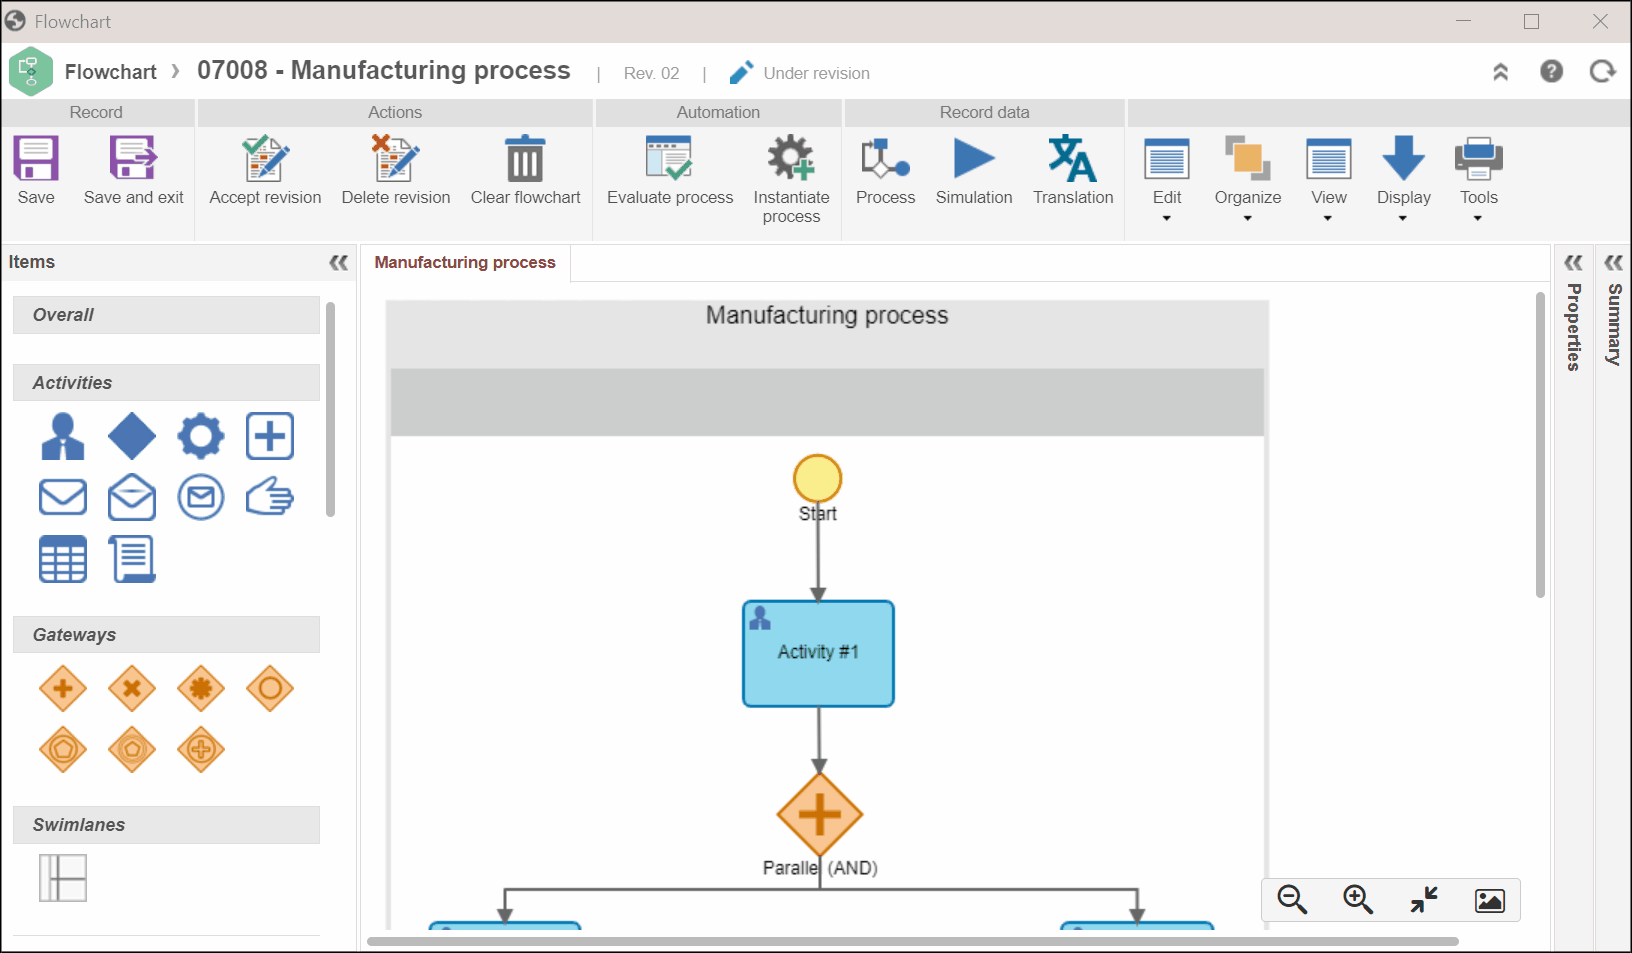
In BPMN processes, Lanes allow a graphical representation of the responsible user for the execution of the activities, decisions and sub-processes that are within their perimeters. Lanes may be drawn horizontally or vertically.
See how to configure a Lane:
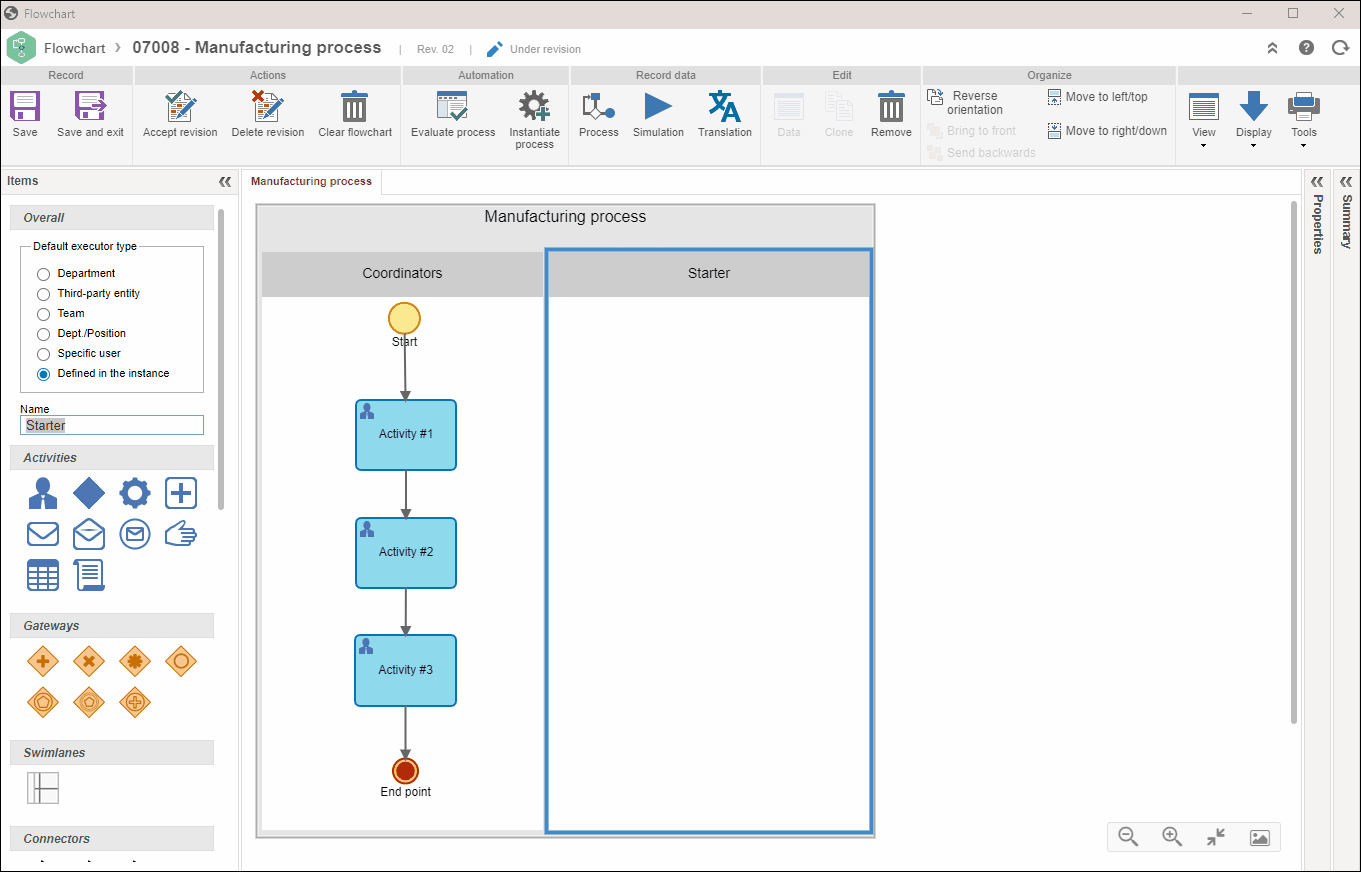
Adding lanes to the flowchart
To add a new lane in the flowchart, click on the lane element and drag it to the flowchart area. At this point, a new lane will be displayed in the flowchart:
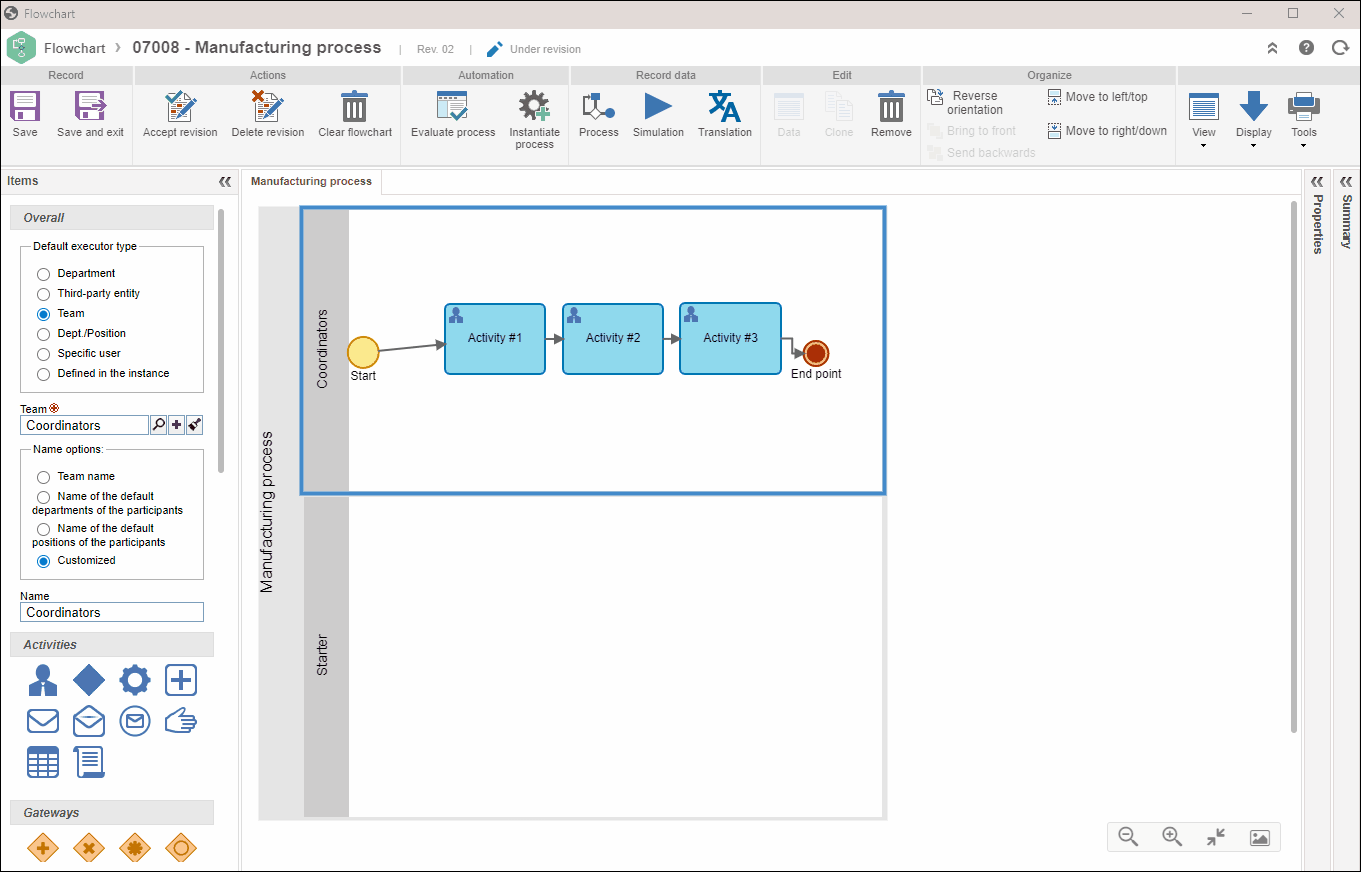
Editing lanes arrangement (Vertically/Horizontally)
By default, BPMN process pools and lanes should be arranged horizontally. However, they can also be arranged vertically. For that, simply click on the Reverse orientation button in the buttons panel. At this point, the process and its lanes will be displayed vertically:
Upon clicking on the Reverse orientation button again, the process and its lanes will be redisplayed horizontally.
Moving lanes (left/right or up/down)
If you need to move a lane from top to bottom (in case of vertical orientation) or from left to right (in case of horizontal orientation), select the lane that will be moved and click on the button that corresponds to the move that will be made: Move to left/up or Move to right/down;
It is also possible to use the arrow keys of the keyboard to move the lanes.
Editing the responsible user (Lane name)
To edit the users responsible for executing the activities, decisions, and sub-processes that are within a lane, just select a lane and, in the General section on the item panel, select from the following options:
Available options
Department: by selecting this option, the users responsible for the execution of items within the selected lane will be the users from a specific department. To do so, enter the desired department in the respective field.
Third-party entity: by selecting this option, the user responsible for the execution of items will be a third-party entity. To do so, enter the desired third-party entity in the respective field.
Functional role: by selecting this option, the users responsible for the execution of items within the selected lane will be the users who hold a specific position in the organization. In the respective field, enter the functional role. The Name options section displays some options to define the name of the lane.
Dept./Position: by selecting this option, the users responsible for the execution of items within the selected lane are the users who hold a position in a specific department of the organization. To do so, enter the desired position and department in the respective field.
Specific user: by selecting this option, the user responsible for the execution of items within the selected lane will be a specific user. In order to do it, enter the desired user in the respective field.
Defined in the instance: by selecting this option, the user responsible for the execution of items within the selected lane will be the user who starts the process. However, it is possible to perform specific configurations for each activity/decision of the lane, allowing, in addition to the process starter, to define the executor as Process starter leader, Specific activity executor, or Specific activity executor leader. The details of this configuration are described in the Activity/Decision configuration sections.
Name: use this field to define a specific name for the lane, if you do not wish to use the name automatically filled out by the system.
Conclusion
Thus, you have successfully used the resources related to the lanes!