Recording a meeting
Prerequisite
- Access to the Management > Meeting (MM017) menu.
Introduction
SoftExpert Meeting allows for recording meetings that have not been scheduled, last-minute meetings, or those that have taken place already, keeping a history of addressed subjects and decisions made.
See below how to record a meeting:
Recording a meeting
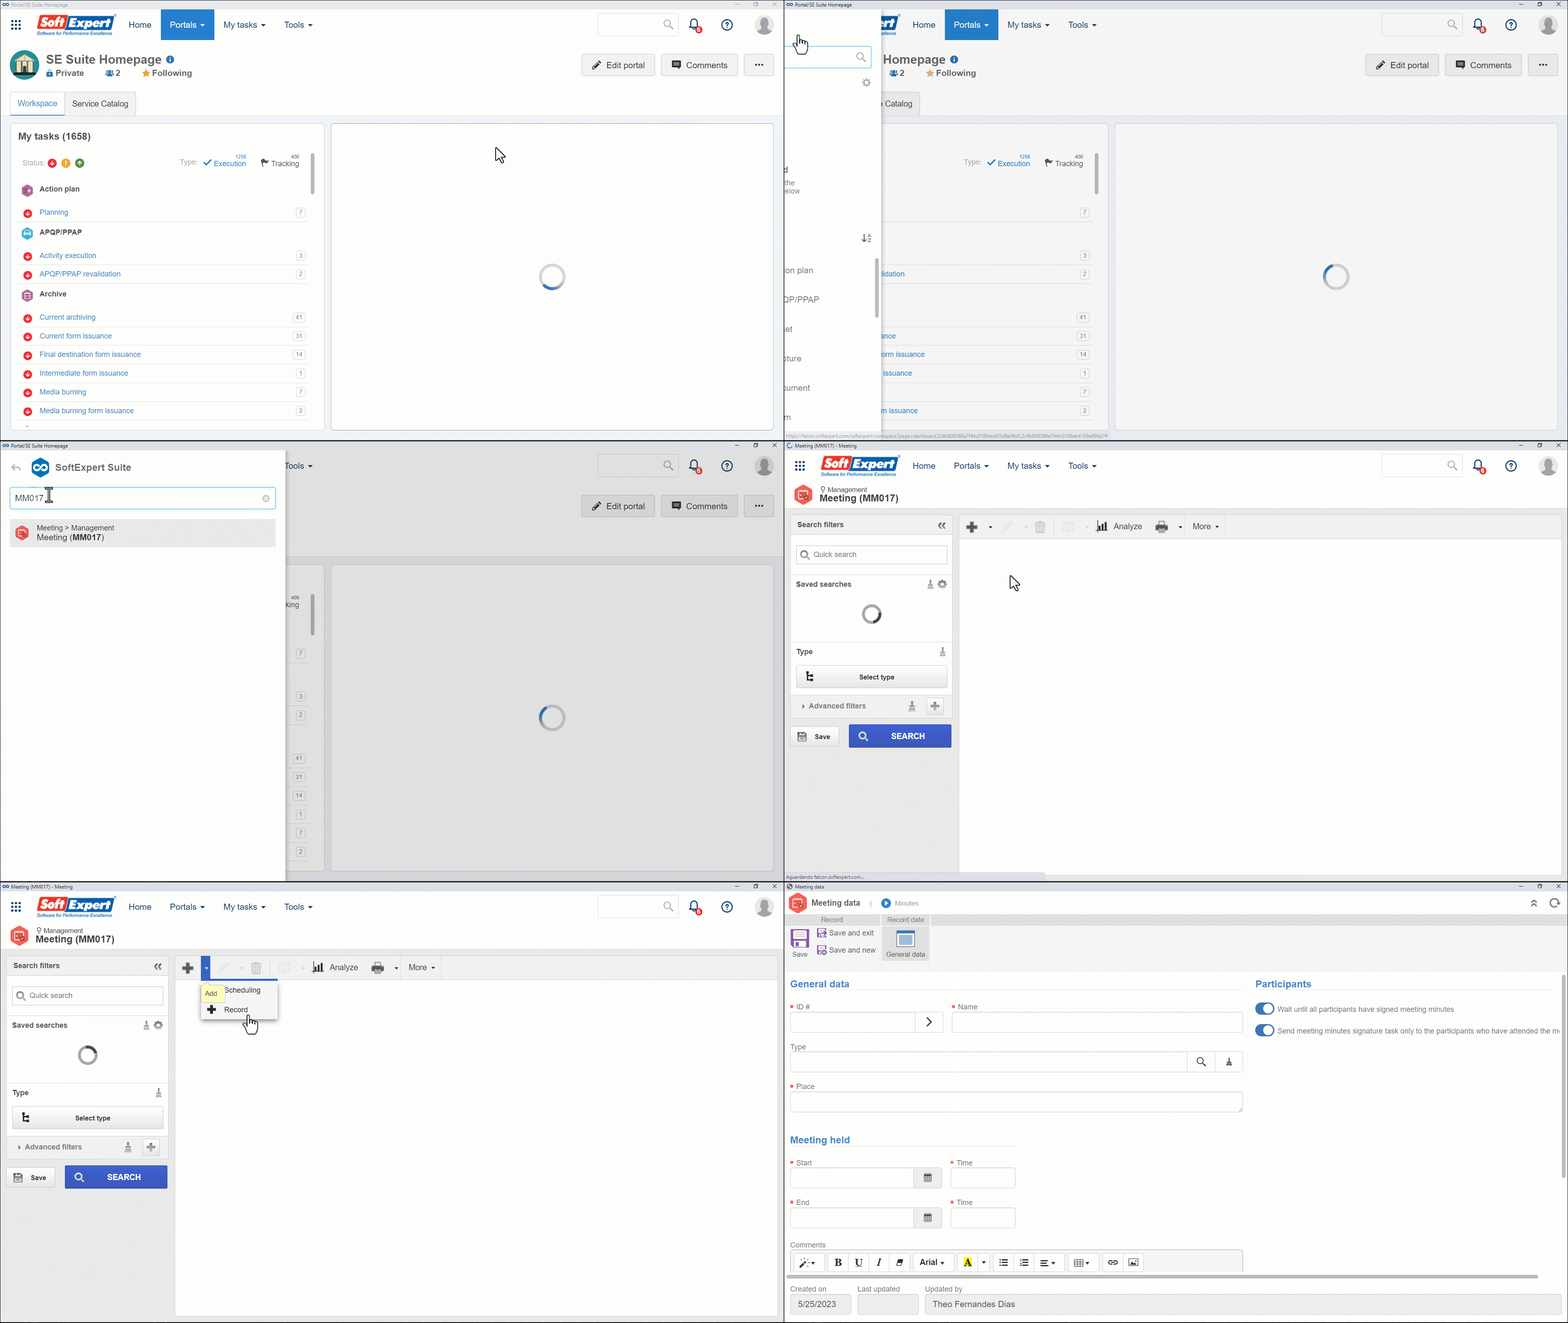
1. Access the Management > Meeting (MM017) menu, expand the  button and click on the Record option.

2. On the screen that will open, enter the name and the ID # of the meeting, as well as the place where it was held.
3. Fill in the Start and End fields with the dates. The fields named as Time must be filled in with the meeting time.
4. Click on Save.
For unscheduled meetings, the start and end dates cannot be later than the current date.
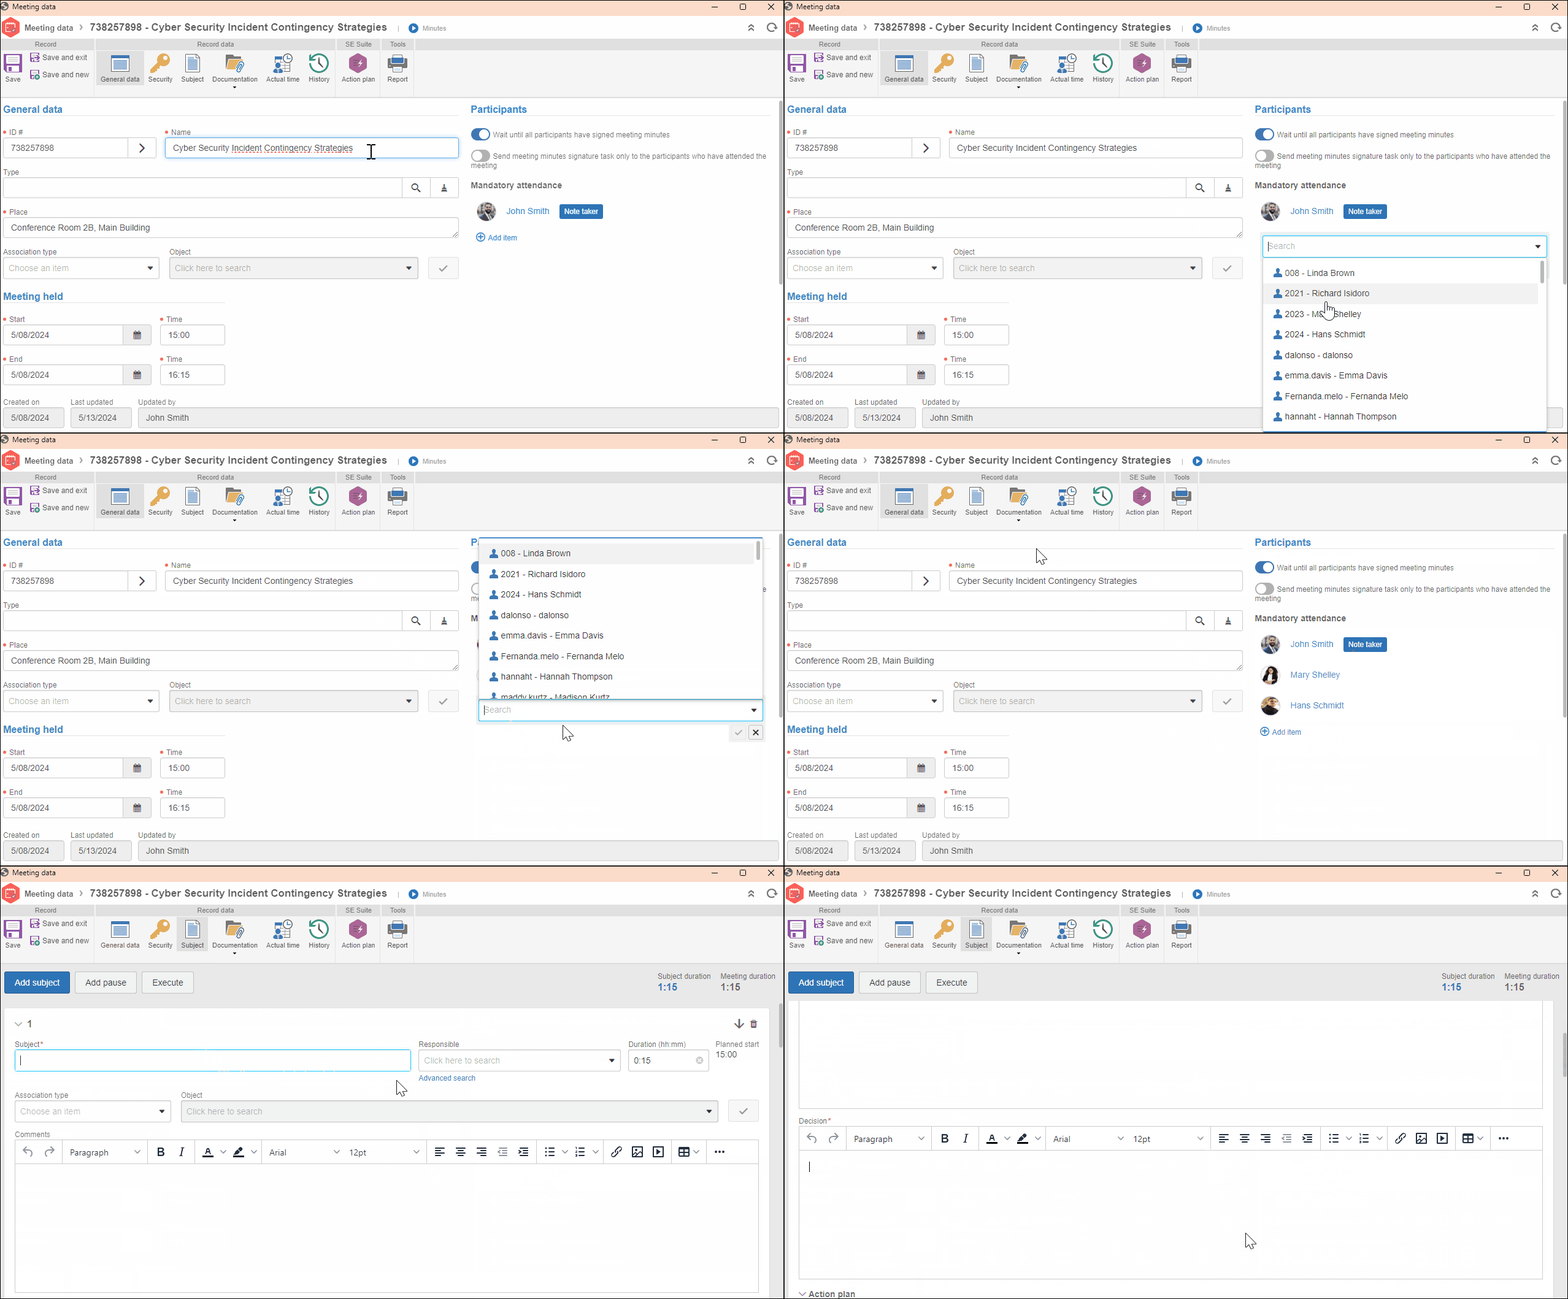
5. In the Mandatory attendance section, add the users who attended the meeting.
6. Then, go to the Subject toolbar tab.
7. Click on the Edit button, and then on Add subject. In the displayed fields, enter the subject and the decision made during the meeting.

8. Once done, click on Save and exit.
9. Confirm the participants using the available buttons and send the meeting to the next step.
Using the Meeting type for recording is not mandatory, but it is a good practice that makes it easier to parameterize the meetings. For more information on type configuration, access the Configuring a meeting type article.
Conclusion
All done! The meeting has been created successfully. Thus, it will be possible to follow the flow to record the meeting minutes.

