Configuring a sub-process
Prerequisites
- Access to the File > Process (PM022) menu.
- Process defined as a sub-process.
Introduction
The system allows associating a process within a flowchart, turning it into a sub-process.
The creation of sub-processes helps reduce the complexity of the main flow and makes it easier to understand the process logic.
For example, in a production process, instead of keeping all activities in a single flow, it is possible to gather all activities related to material purchase in a secondary flow. That is, the sub-process flowchart is the representation of an activity with a series of tasks.
In SoftExpert Suite, when a process is defined as a sub-process, an extra screen is displayed for the configurations related to its instance.
The Sub-process tab is only displayed when accessing the sub-process data through the main process flowchart.
For further details on how to associate a sub-process with the flowchart, click here.
Sub-process configurations
1. Access the File > Process menu (PM022).
2. Search for and select the process with which the sub-process was associated.
3. Click on the  button to access the flowchart.
4. Select the sub-process and click on Data. The Process data screen will be opened in the Sub-process tab.
5. Perform the necessary configurations:
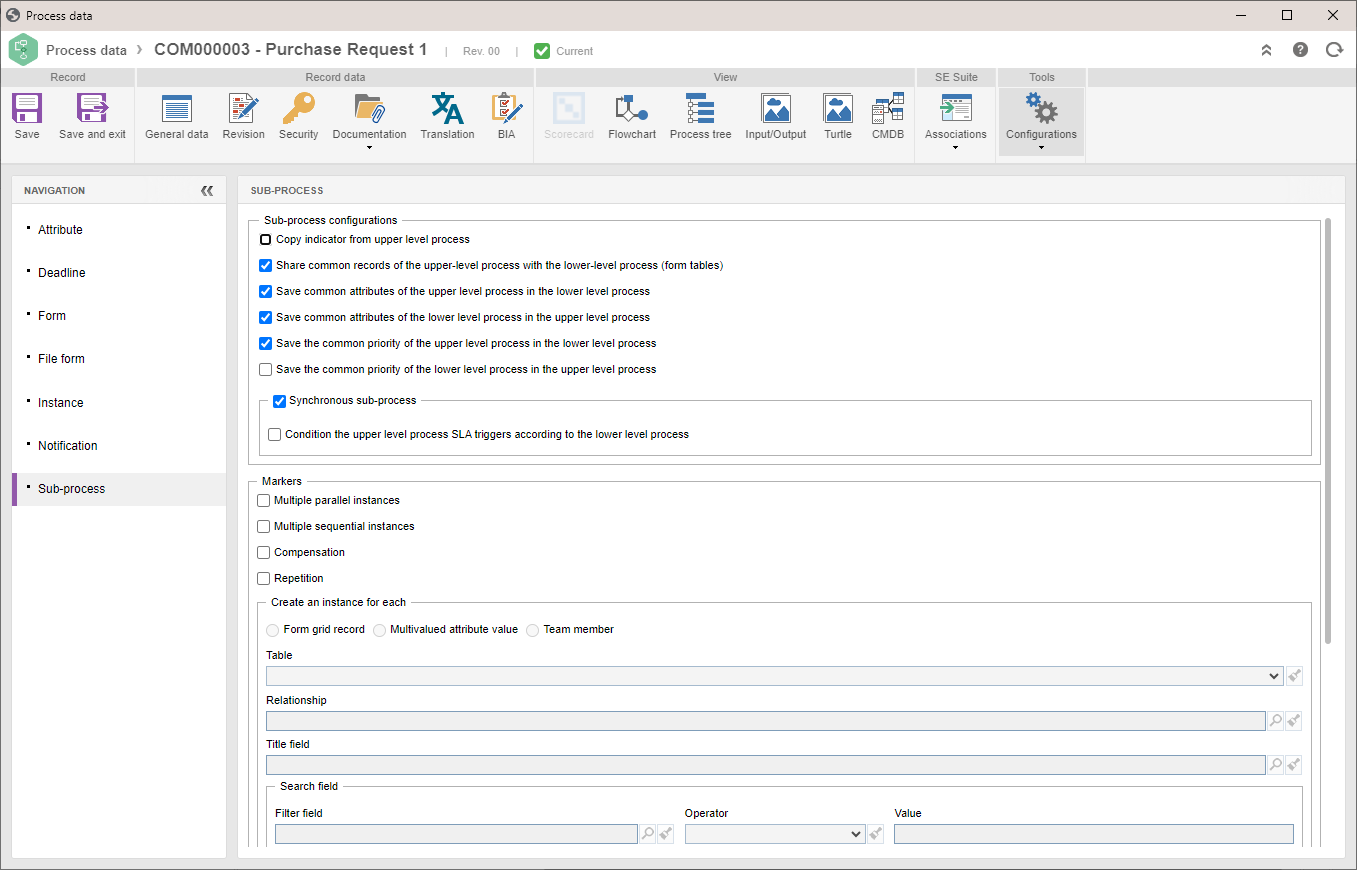
Sub-process configurations
Define the operations that will be performed when executing the sub-process:
• Copy security list and starter from upper level process: check this option for the sub-process to import the security configuration from the upper level process.
• Share common records of the upper-level process with the lower-level process (form tables): check this option for the tables of the upper level process forms to be imported into the sub-process.
• Save common attributes of the upper level process in the lower level process: check this option for the attributes of the upper level process to be imported into the sub-process.
• Save common attributes of the lower level process in the upper level process: check this option for the attributes and forms of the sub-process to be imported into the upper level process.
• Save the common priority of the upper level process in the lower level process: check this option for the process priority of the upper level process to be imported into the sub-process.
• Save the common priority of the lower level process in the upper level process: check this option for the sub-process priority to be imported into the upper level process.
Synchronous sub-process: check this option to keep up the synchrony of the instances triggered by the sub-process, when it is configured with multiple instances.
To apply the sub-process SLA triggers to the upper level process, check the "Condition the upper level process SLA triggers according to the lower level process" option. That way, when the sub-process activates an SLA trigger, the same trigger will also be activated in the upper level process, for example, "Pause".
Markers
Markers aim at indicating the specific behavior of a sub-process during its execution.
Select the desired options for the sub-process: Multiple parallel instances, Multiple sequential instances, Compensation, and Repetition. Note that the last two mentioned options do not have automation and are only symbolic.
Create an instance for each
The fields in this section will be enabled when selecting the Multiple parallel instances or Multiple sequential instances marker options.
• Form grid record: when checking this option, the Table, Relationship, and Title field fields will be enabled for completion. Fill out these fields with the data of the grid you wish to use to generate the sub-processes. By filling out the Relationship field, the Filter field will be enabled without mandatory completion, that is, it can be used only in cases in which the user wishes to filter the grid records to be used in the creation of the sub-process.
• Multivalued attribute value: when checking this option, the Attribute field will be enabled for completion. In it, select the multivalued attribute that was previously associated with the main process.
Note: remember that, by selecting this option, the use of the AND gateway after the sub-process is no longer necessary to keep the timing of the instances. When executing the activity through the SoftExpert Workflow component, in the list of attributes, enter the values of the sub-processes to which they will be triggered, that is, for each selected value, the system will trigger a sub-process.
• Functional role member: when checking this option, the Functional role field will be enabled for completion. In it, select the functional role whose members will receive an instance of the sub-process.
If the Multiple parallel instances option is selected, all instances of the sub-process (one for each member of the functional role) will be created at the same time. For example, when selecting a functional role containing 3 members, 3 instances of the sub-process will be created.
If the Multiple sequential instances option is selected, the instances will be created sequentially according to the alphabetical order of the name of the members of the functional role, that is, once a member finishes executing the sub-process, a new instance will be created. In that case, the Formula for stop criterion field will be available for the configuration of a formula that allows stopping the creation of instances if any criteria are met.
Status: select the status that will apply the instance of the upper level process as soon as the sub-process is installed. The system will only display the statuses configured with the "Instance" operation for the SoftExpert Workflow component.
6. Click on the Save and exit button.
Conclusion
The sub-process instance configurations will be finished.