Adding an identification mask
 |
 |
 |
Prerequisite
- Access to the Configuration > Identification mask menu.
Introduction
This article will teach you to add an identification mask to the system. The menu to create a mask can always be found in the Configuration tab of the components.
Adding an identification mask
1. To add an identification mask, access the Configuration > Identification mask menu of the component.
2. Click on the  button.
3. On the screen that will be opened, enter an ID # and a name.
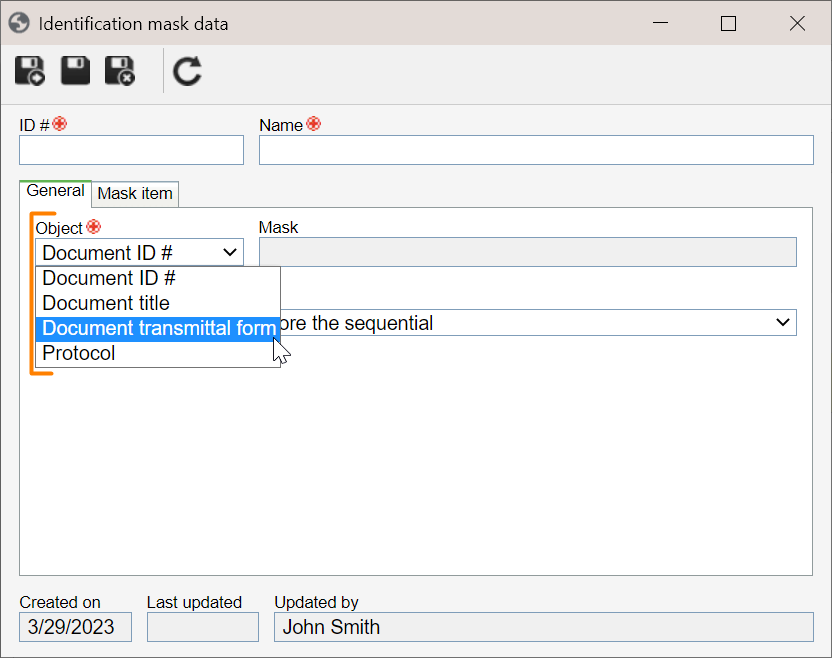
4. In the General tab, enter the object or field to which the mask will be applied.
Available options
Choosing an object is reflected in the location in which the identification mask will be used.
The field options change according to each component.
For example: for SoftExpert Document, we can choose the following objects:
- Document transmittal form
- Document ID #
- Protocol
- Document title
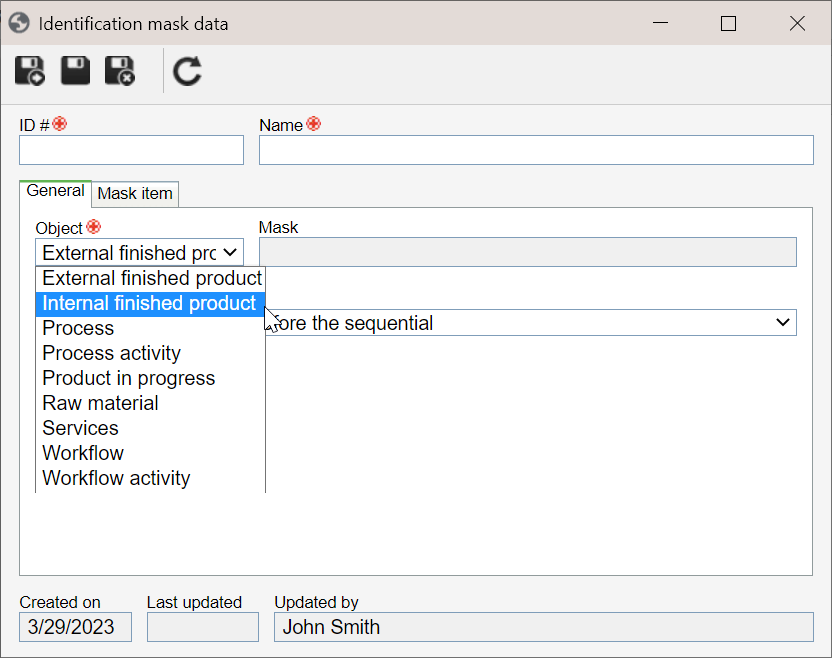
SoftExpert Inspection has other object options:
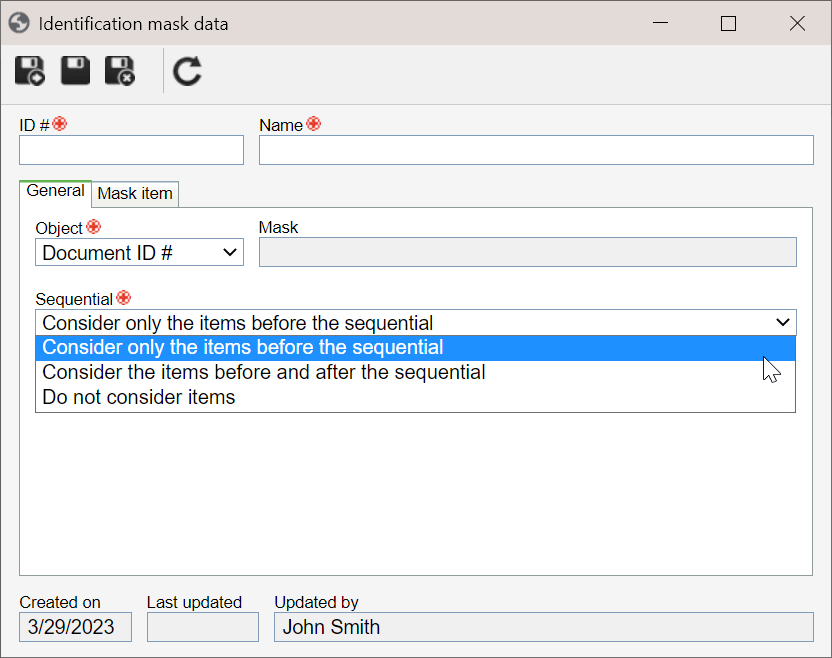
5. Then, in the Sequential field, define the mask sequencing according to the image below:
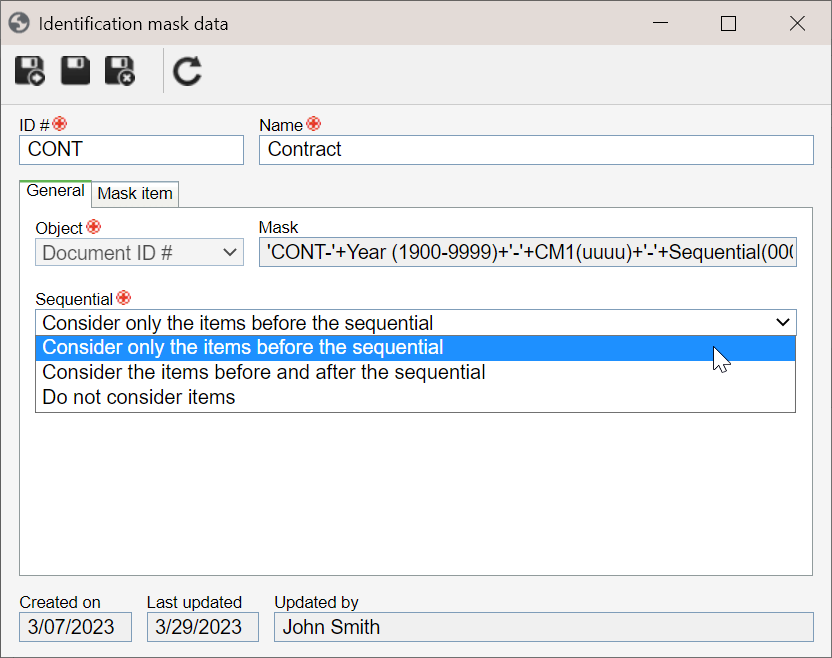
Example of the application of a sequential
For this example, we will focus on the functionality of the sequential and configure it to be restarted when the year changes.
That is, considering the mask "CONT-2023-000", if the last mask sequential in that year is "CONT-2023-100", the next year will start with the sequential "CONT-2024-000".
To configure the sequential, we must understand the function of each option:
1. Consider only the items before the sequential
The system will sequence values from the prefix of the item, that is, if a variable-valued item is configured before the sequential, then the sequential will be restarted every time the prefix value changes.
2. Consider the items before and after the sequential
The system will also sequence the items that are after the sequential. In this case, the sequential will be restarted when the item values that are after it are edited.
3. Do not consider items
The system will always sequence from the previous sequence, without restarting its value in case a prefix or suffix value is edited.
Follow the steps below to configure the sequential:
1. In the Sequential field on the identification mask data screen, select the "Consider only the items before the sequential" option.
2. In the Mask item tab, click on the button to add an item of the Date and time type.
3. Then, select the format for the year and adjust the sequence according to the example below:
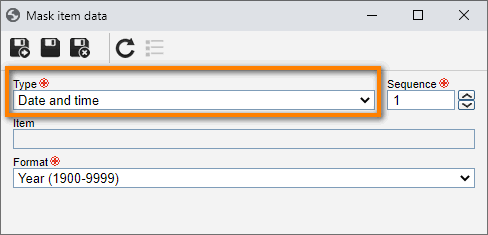
4. After doing that, click on the  button.
Thus, since the only variable value before the sequential is the year, all records configured with this identification mask will have their sequentials restarted after each year.
The Mask field will automatically be filled out with the mask format once it is configured.
Conclusion
After saving the Item tab, the mask will be enabled, allowing the user to configure the generation of the ID #.