Configurar tipo de item na máscara de identificação
Pré-requisito
- Acesso ao menu Configuração > Máscara de identificação.
Apresentação
Os itens formam os identificadores gerados por meio da máscara. Eles se subdividem em 4 tipos, que devem ser selecionados no momento da configuração, sendo eles:
- Propriedade do objeto: a propriedade está diretamente ligada ao objeto e será responsável pela definição das suas características. Ao selecionar este tipo, o sistema insere as opções disponíveis para o componente em que se encontra, no campo Item.
- Atributo: atributos são campos que complementam as informações dos objetos do SoftExpert Suite, eles devem ser cadastrados no sistema. Veja mais detalhes no artigo O que é um atributo.
- Valor fixo: este tipo é um objeto definido pelo usuário e nunca sofrerá alterações. É importante salientar que ao escolher este tipo o campo Item não ficará disponível.
- Data e hora: como o próprio nome indica, este tipo é utilizado para adicionar um ano, mês, dia ou um horário.
Exemplo de como incluir itens na máscara de identificação
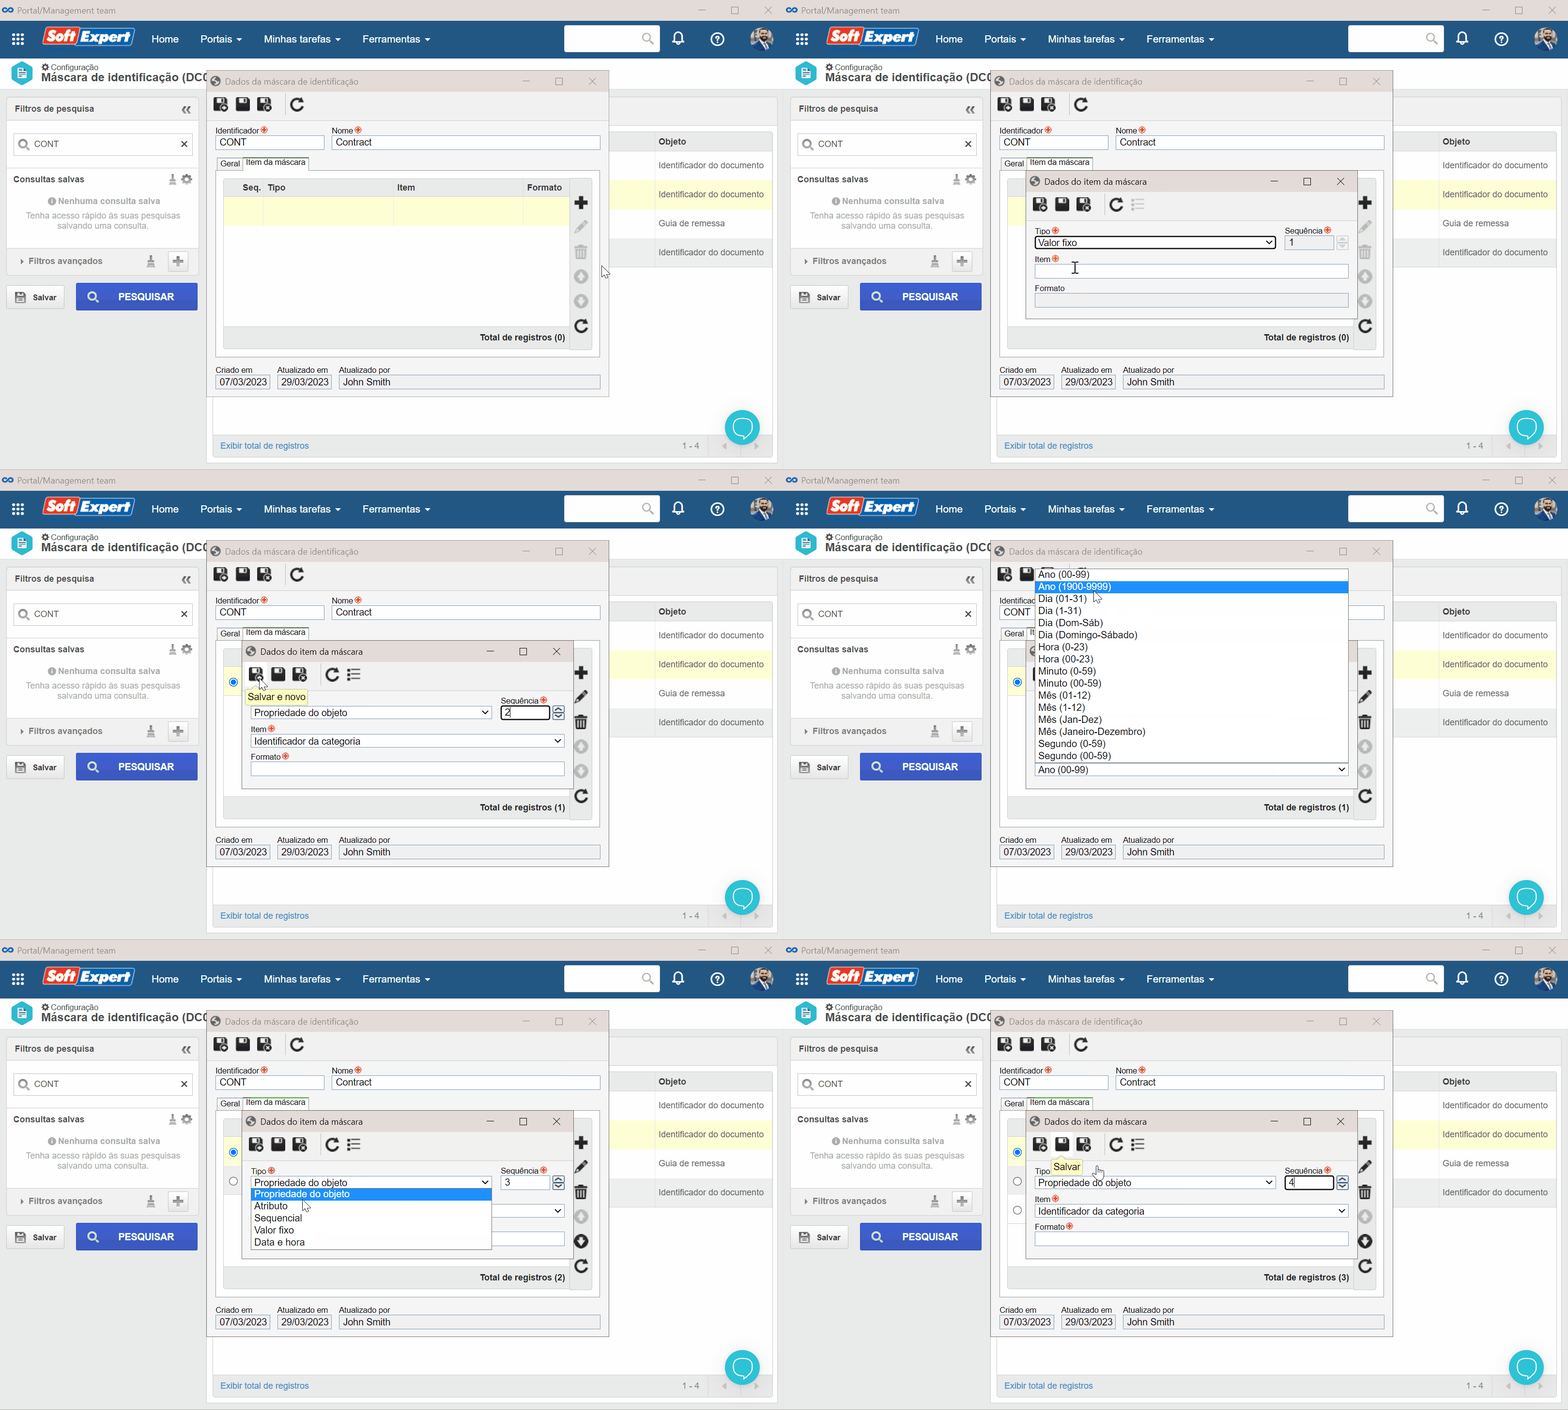
Neste exemplo, vamos elaborar uma máscara de identificação para contratos (Atributo) indicados pelo ano (Data e hora), gerente de contrato (Atributo) e Sequencial “000”.
1. Na tela de dados do item, selecione a aba Item da máscara e clique no botão  .
.
2. Selecione o tipo “Valor fixo”. No campo Item, preencha o valor “CONT-” e escolha a sequência “1”.
3. Feito isso, clique no botão  .
.
4. Inclua novamente o tipo “Valor fixo”. No campo Item, preencha o valor “-” e clique no botão  . Repita o passo 4 para que se tenha dois valores fixos que irão separar os próximos cadastros.
5. Selecione o tipo “Data e hora”, o formato “Ano (1900-1999)” e escolha a sequência “2”.

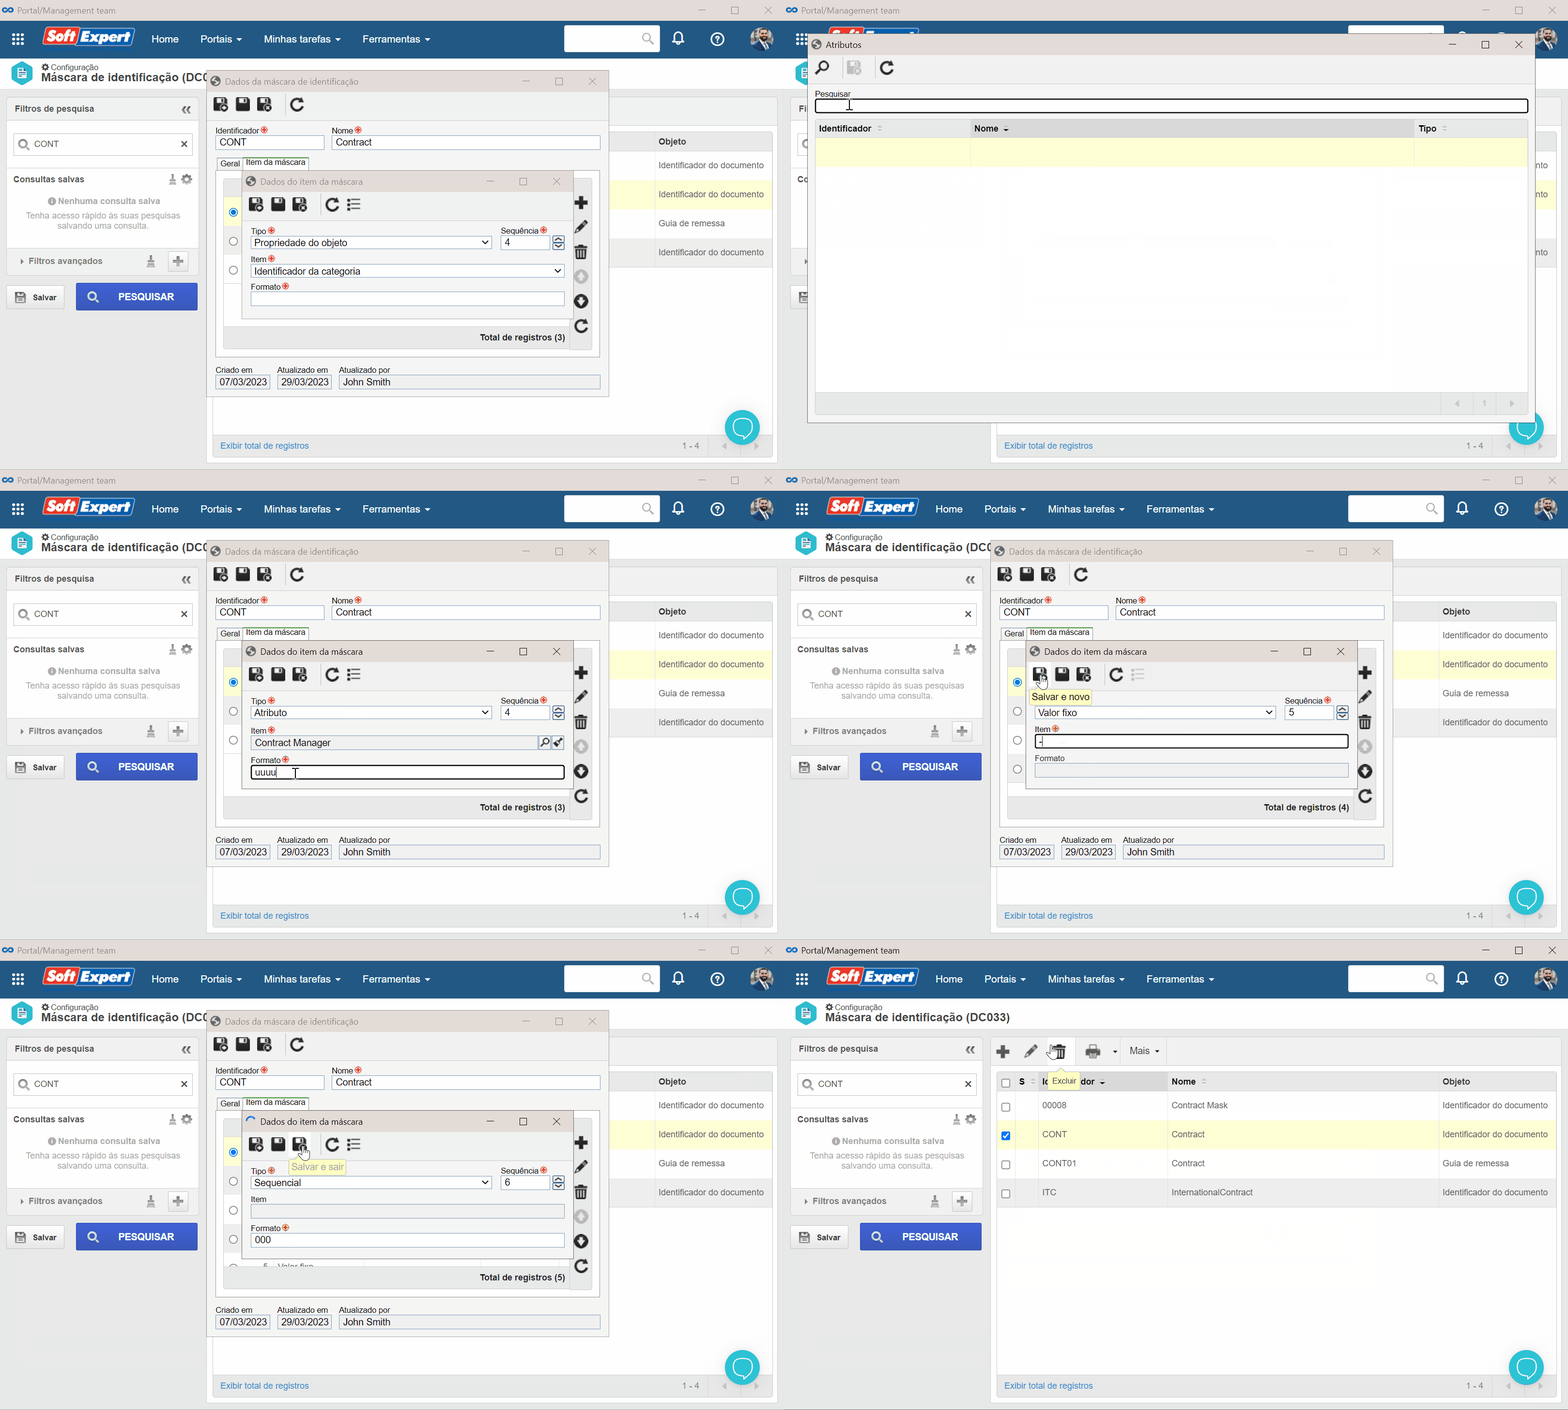
6. Selecione o tipo “Atributo”, o item “Contract Manager”, a sequência “4” e o formato “uuuu”.
7. Feito isso, clique no botão  .
.
8. Selecione o tipo “Sequencial”, o formato “000” e a sequência “6”.
9. Feito isso, clique no botão  .
.

10. Com todos os itens inclusos, é possível visualizar o formato da máscara na aba Geral.
11. Com a máscara configurada, clique no botão  . Com isso, a configuração resulta na máscara “CONT-2023-MARY-000”.
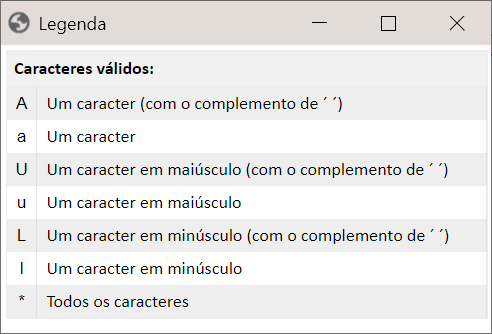
Para os tipos Propriedade do objeto e Atributo será possível utilizar caracteres configurados para efetuar determinadas ações no campo Formato, para visualizar quais são essas ações clique no botão Legendas.

Esses caracteres variam para cada componente. Veja alguns exemplos:
- A: mantém o caractere original e caso o número de caracteres não seja o formato total, esta configuração adiciona um espaço no final.
- a: mantém o caractere original e caso o número de caracteres não seja o formato total, a configuração não complementa com um espaço no final.
- U: transforma todos os caracteres em letras maiúsculas e acrescenta um espaço vazio no final.
- u: transforma todos os caracteres em letras maiúsculas.
Conclusão
Após configurar o tipo de item na máscara de identificação, podemos salvar os dados e, em seguida, associá-la a uma categoria. Veja mais detalhes no artigo Associar máscara à categoria.


