Configuring an item type in the identification mask
 |
 |
 |
Prerequisite
- Access to the Configuration > Identification mask menu.
Introduction
The items compose the ID #s generated through the mask. They are divided into 4 types, which must be selected during the configuration:
- Object property: the property is directly linked to the object and it will be responsible for defining its characteristics. By selecting this type, the system adds the options available for the respective component in the Item field.
- Attribute: attributes are fields that complement the information of SoftExpert Suite objects; they must be recorded in the system. See further details in the What is an attribute? article.
- Fixed value: this type is an object defined by the user that will never be edited. It is important to note that, by choosing this type, the Item field will not be available.
- Date and time: as the name indicates, this type is used to add years, months, days, or specific times.
How to add items to the identification mask
For this example, we will create an identification mask for contracts (Attribute) indicated by the year (Date and time), contract manager (Attribute) and Sequential "000".
1. On the item data screen, select the Mask item tab and click on the button  .
.
2. Select the “Fixed value” type; in the Item field, enter the value "CONT-" and select the "1" sequence.
3. After doing that, click on the button  .
.
4. Select the “Fixed value” type again; in the Item field, enter the value "-" and click on the button . Repeat step 4 to have two fixed values that will separate the next records.
5. Select the “Date and time” type, the "Year (1900-1999)" format, and the "2" sequence.
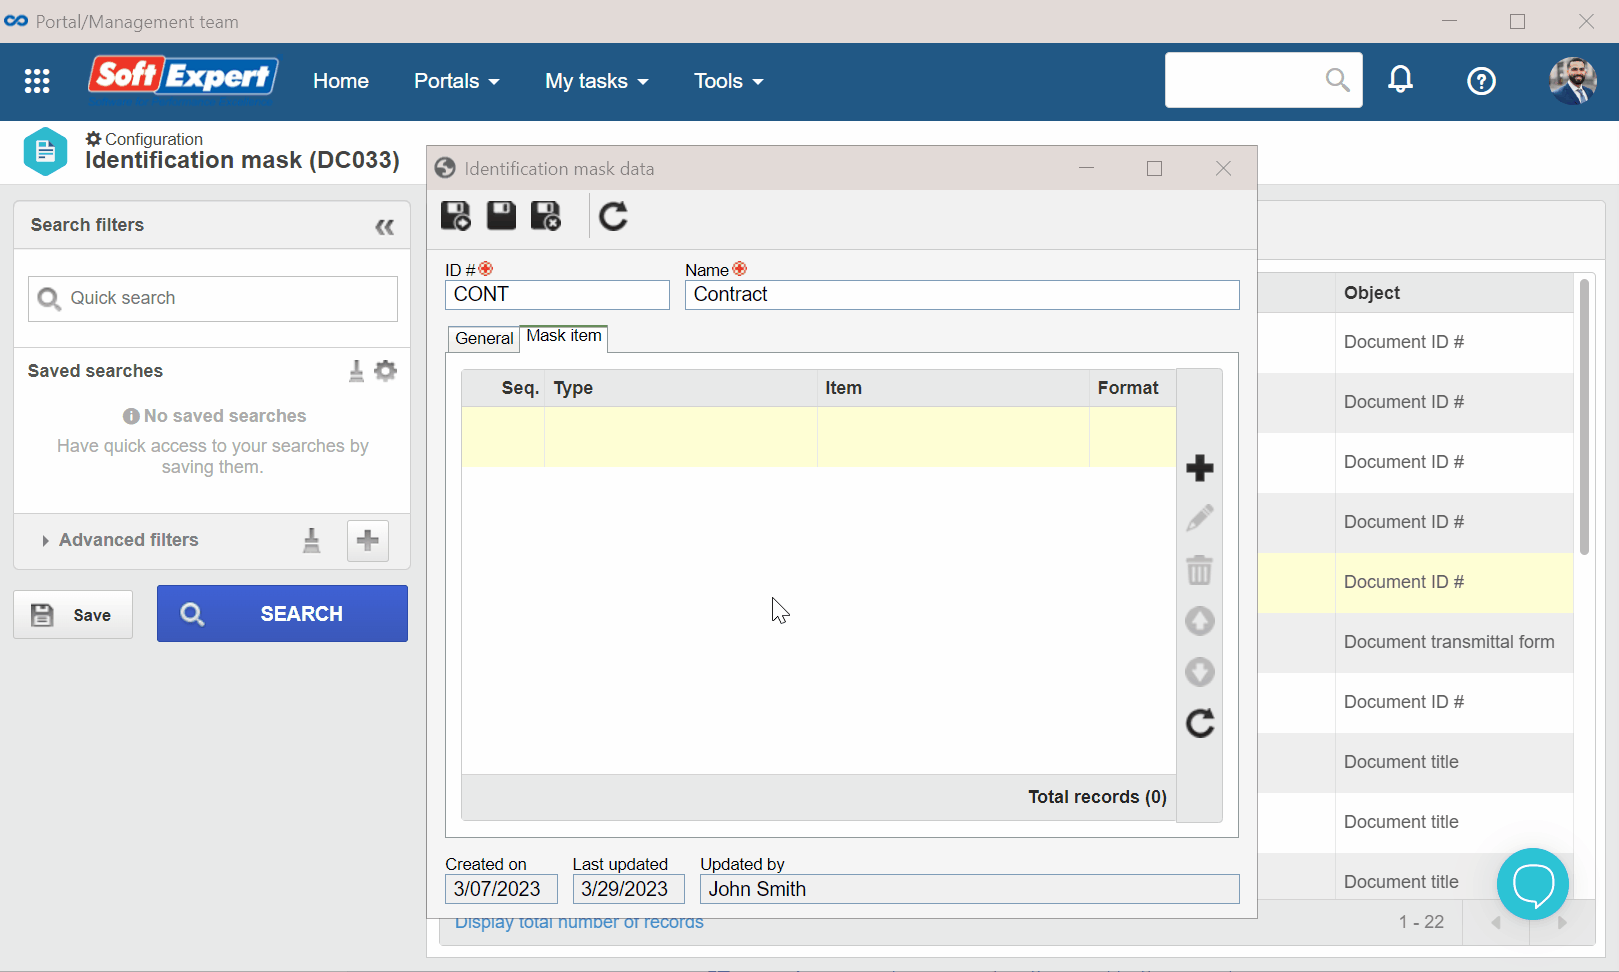
6. Select the “Attribute type”, the "Contract Manager" item, the "4" sequence, and the "uuuu" format.
7. After doing that, click on the button.
8. Select the “Sequential” type, the "000" format, and the "6" sequence.
9. After doing that, click on the button .

10. Once all items are added, it is possible to view the mask format in the General tab.
11. Once the mask is configured, click on the button. Thus, the configuration will create the “CONT-2023-MARY-000” mask.
For the Object property and Attribute types, it will be possible to use characters configured to perform certain actions in the Format field. To view those actions, click on the Legends button.
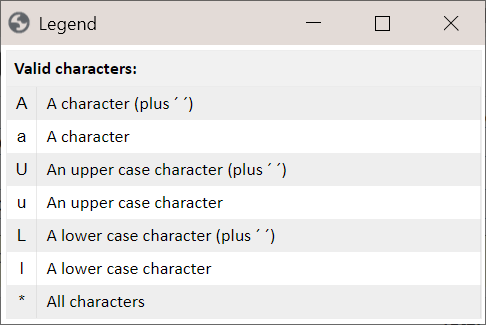
These characters vary for each component. See some examples below:
- A: keeps the original character. If the number of characters is not the full format, this configuration adds a space at the end.
- a: keeps the original character. If the number of characters is not the full format, this configuration does not add a space at the end.
- U: switches all characters to uppercase and adds a blank space at the end.
- u: switches all characters to uppercase.
Conclusion
After configuring the item type in the identification mask, we can save the data and associate it with a category. See further details in the Associating a mask with the category article.