Execute a workflow activity
After duly starting an instance, we will execute a workflow activity.
To this end, simply follow the steps below:
1st step: Execute activity
To execute the activity, follow the steps below.
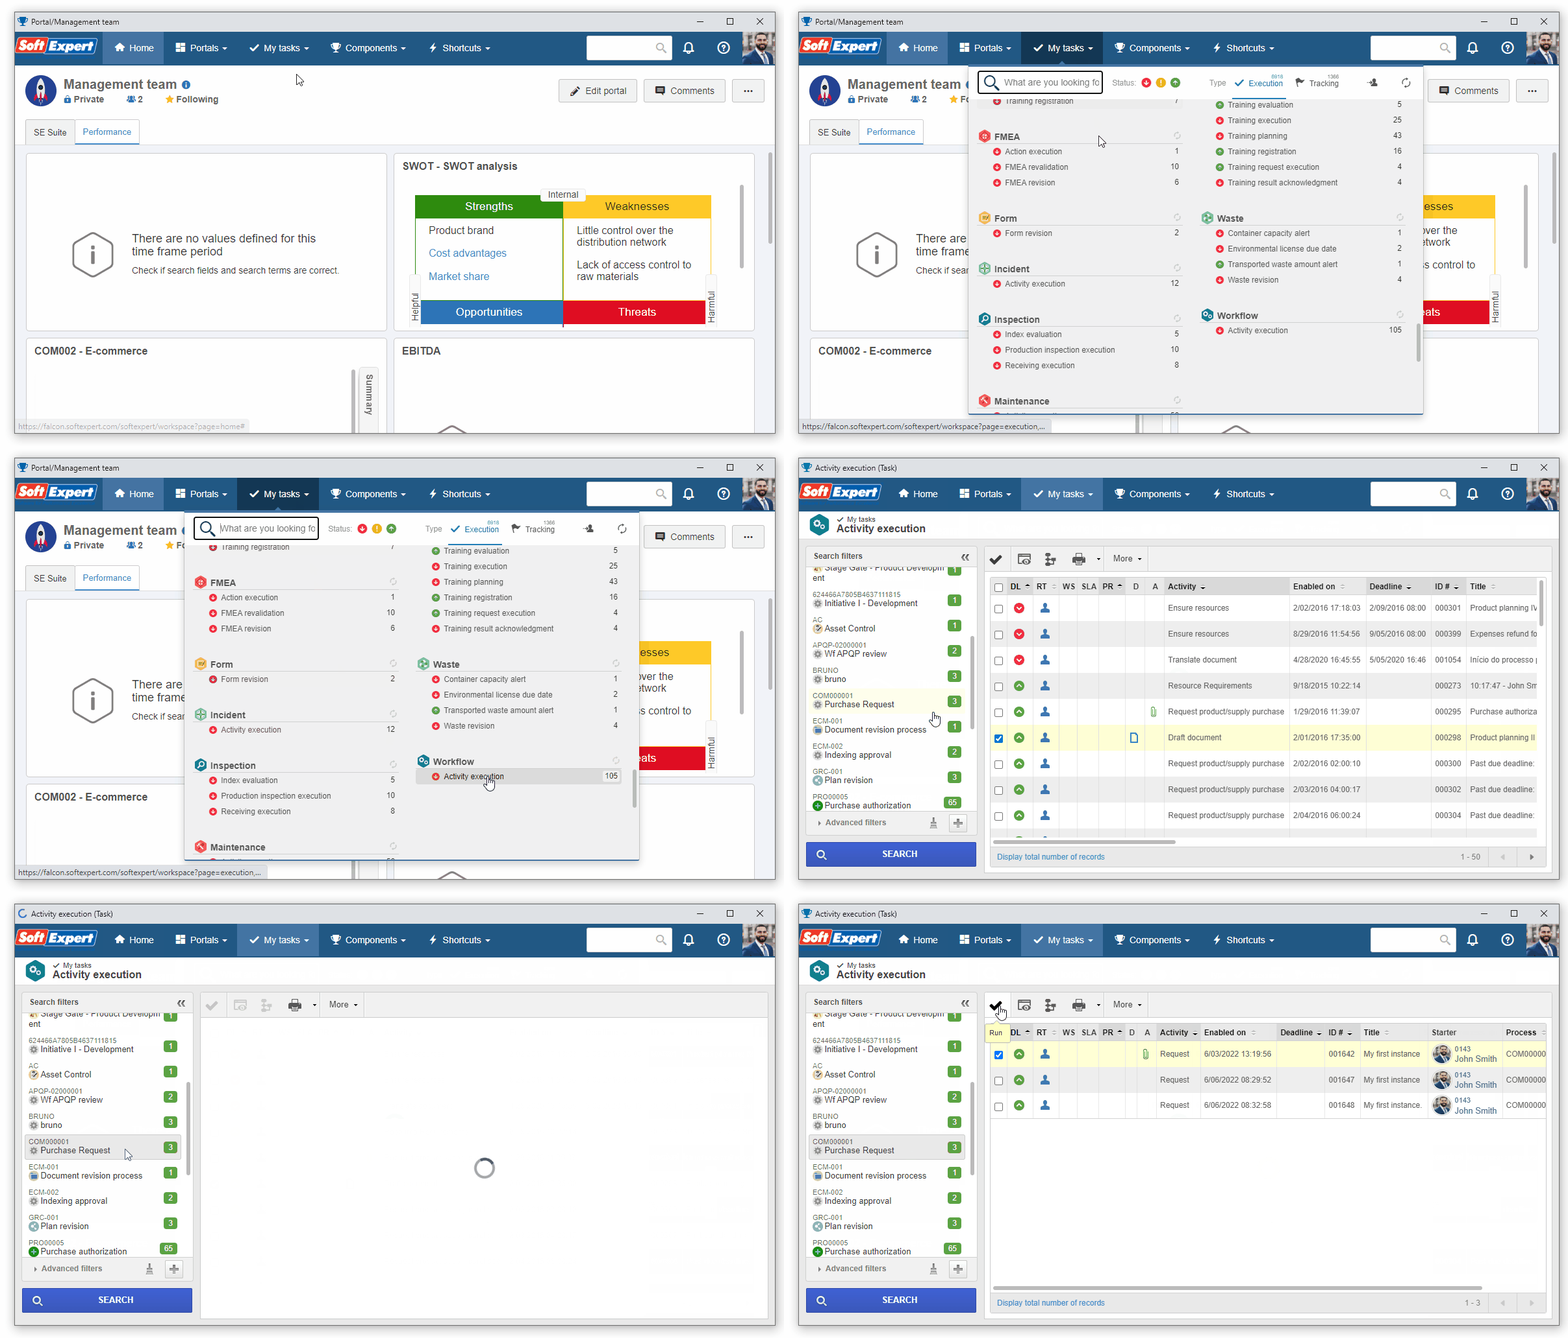
1. Go to the My tasks > Workflow > Activity execution menu.
2 On the screen that will open, select the "Purchase request" process in the left panel and click on the  button.
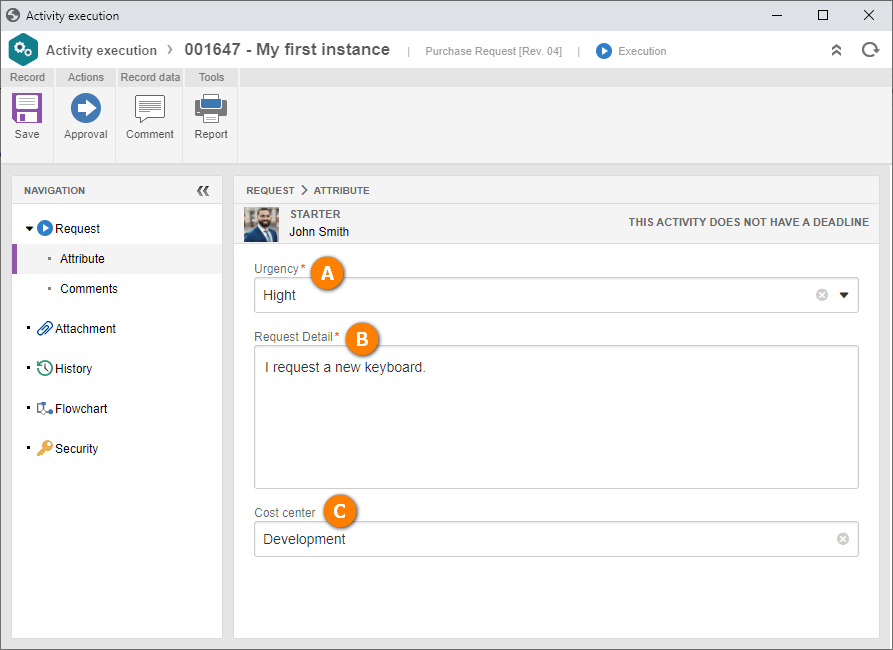
3. On the activity execution screen, fill in the Cost center attribute with the "Development" value.
In the Urgency field, select the "High" option and fill in the Request detail attribute, as shown in the image below.
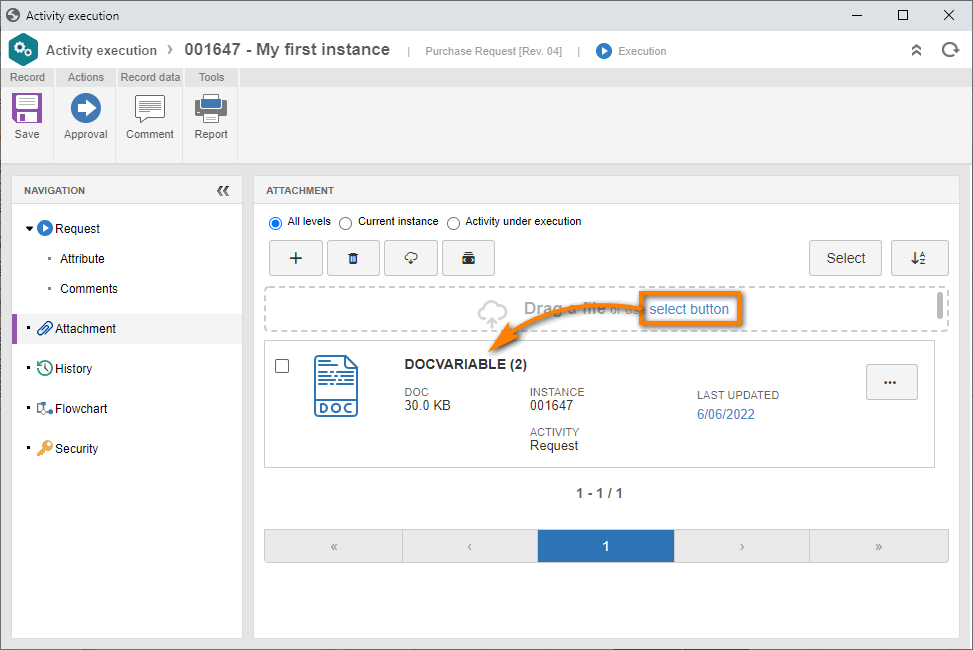
4. Then, in the navigation panel, select the Attachment tab and add the activity document.
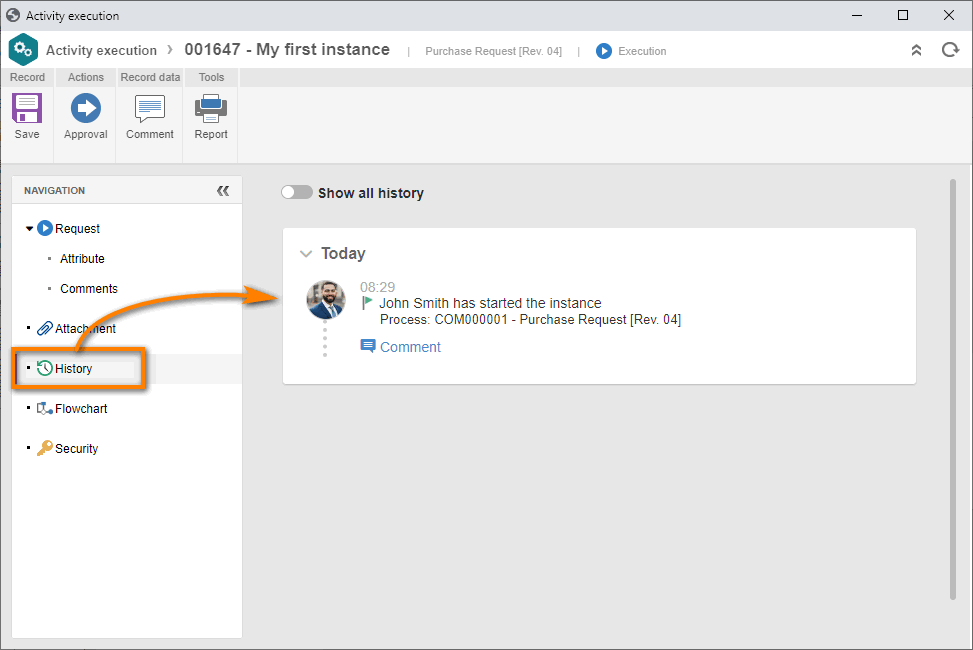
5. Select the History tab to check the actions taken in the instance by each user.
6. Click on the Flowchart tab to view the progress of the instance.
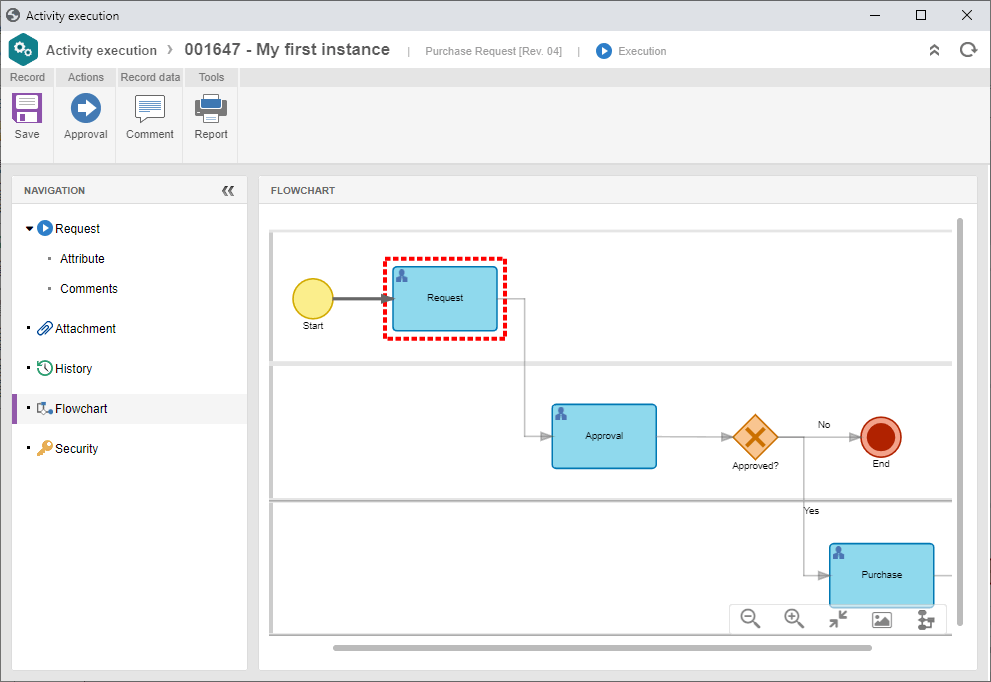
7. Click on the Approval button to execute the activity.
The Approval action button is created in the process mapping; each activity action represents a button.
The process route is configured in the action. In this example, the process will move on to the next activity.
2nd step: Execute group activity
In our example, when the approval activity is reached, the task is assigned to a functional role: Purchase manager.
Thus, all users assigned with said role receive the task so that someone takes it on and execute it.
To associate and execute the task, go to the My tasks > Workflow > Activity execution menu and click on the  button.
Then, confirm the message about associating the activity with your user.
On the activity execution screen, fill in the attributes, as shown in the image below, and execute the task by clicking on the Approved? button.
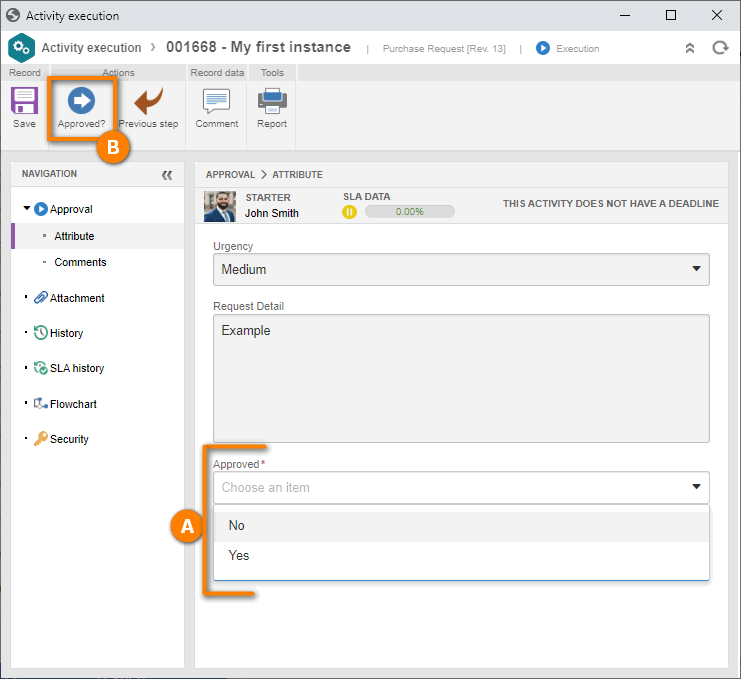
In this way, the process moves on to the next activity.
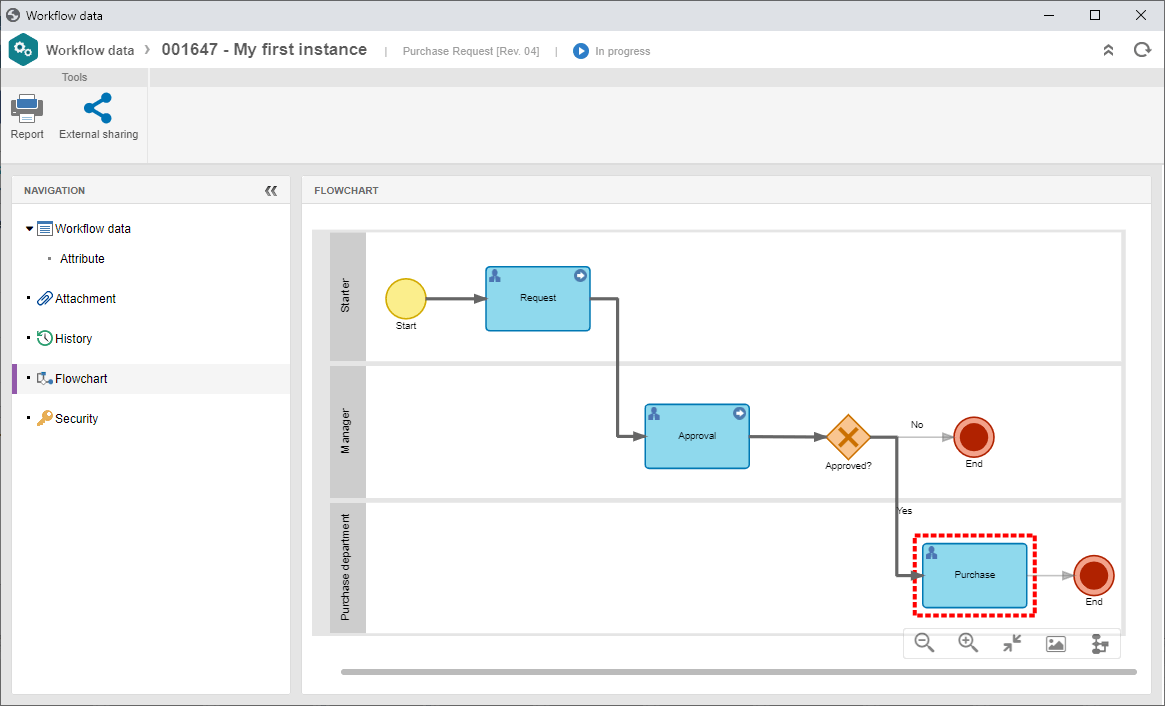
After doing that, click on the  button to view the progress of the process.
In the flowchart, we can see the executed route.
Because the Approved field is completed with "Yes" in the approval activity, the route moved on to the "Purchase" activity.
All done. Now you know how to execute tasks and view the progress of the instance!