Create an activity scheduling
This topic will teach you how to create a scheduling.
To do this, simply follow the steps below:
1st step: Editing a verification plan
To edit a verification plan, access the AS020 menu; in the Quick search field, search for the "Extruder alignment" plan created in the Creating a verification plan step and click on the  button.
On the screen that will be displayed, check the Date-based frequency field and fill out the following fields:
- Frequency type: Select the "Execution date" option.
- Frequency: 1 month.
- Next execution: Add the beginning of the year as a date (01/01).
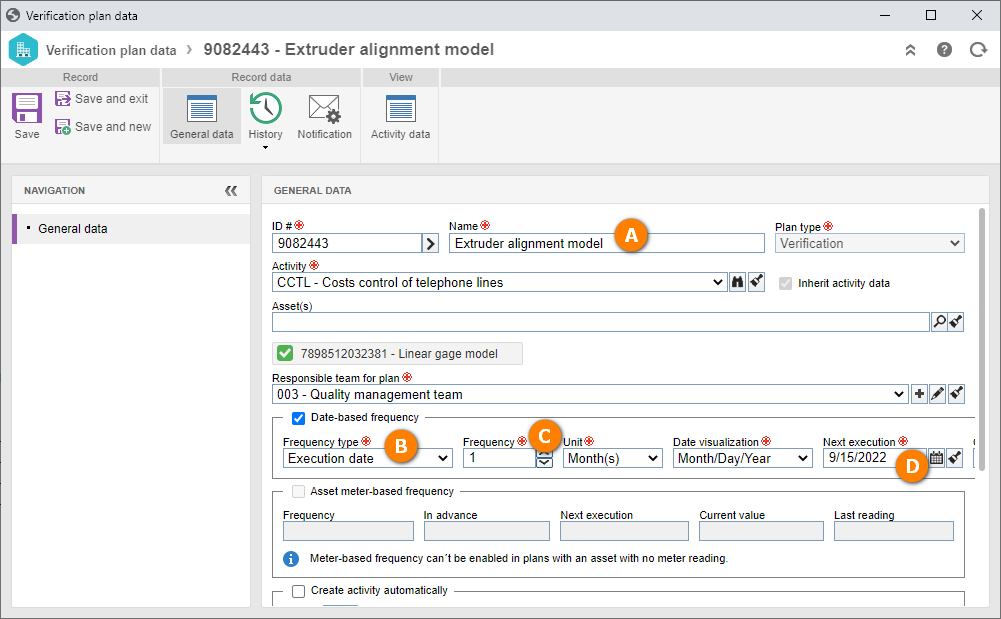
After doing that, click on the Save and exit button.
With this configuration, the plan should have one activity every month.
2nd step: Creating a scheduling
The scheduling allows you to create the plan activities until a preset period.
To create a scheduling, access the AS064 menu; in the Quick search field, search for the "Extruder alignment" plan created in the Creating a verification plan step and click on the  button.
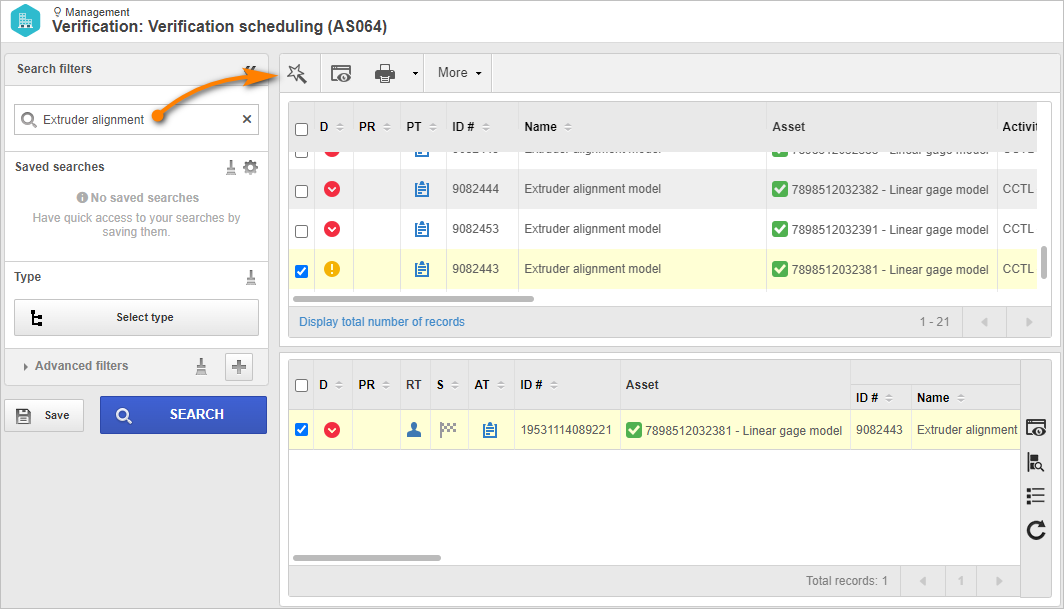
On the screen that will be opened, the system will automatically add the previously selected plan. If necessary, you can add other plans to the record through the  button.
After doing that, click on the Next button.
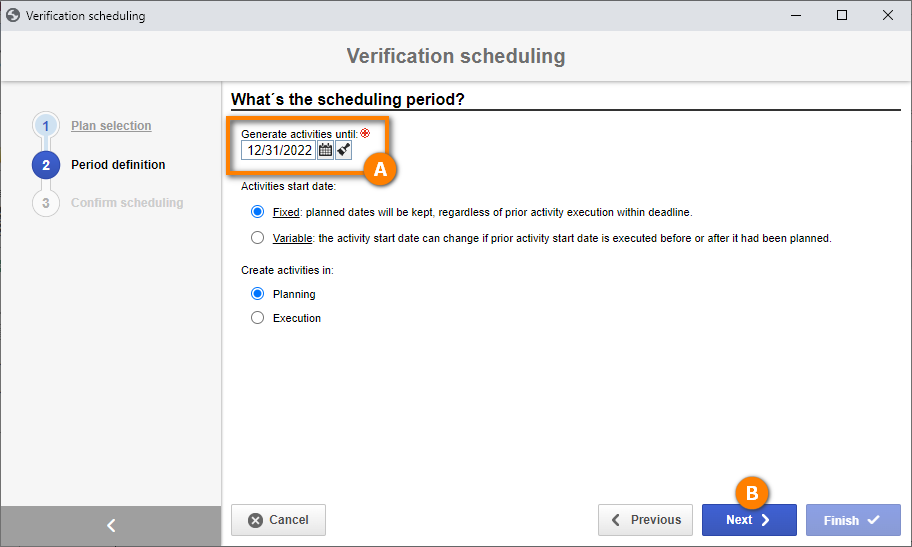
In the "Period definition" step, we will define the date until which the activities should be created.
For this example, select 12/31. After defining the date and configuration, click on the Next button.
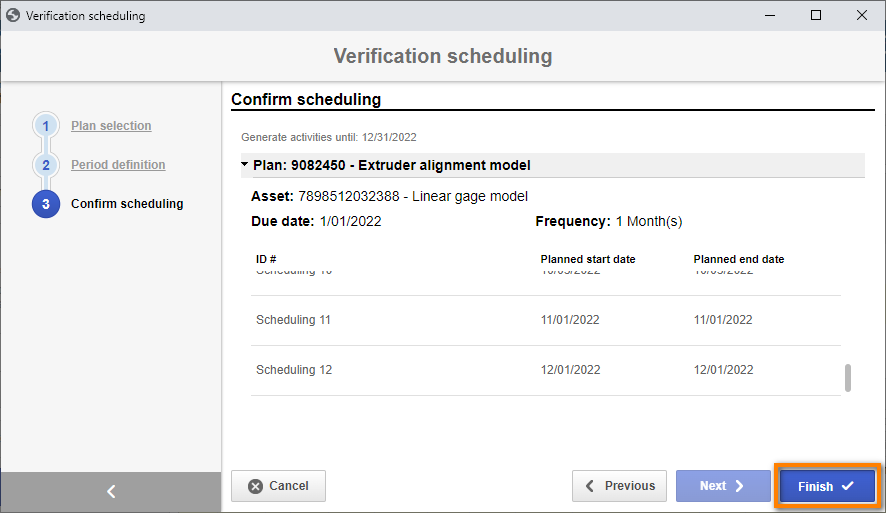
Now, in the "Confirm scheduling" step, the system will calculate how many activities should be created.
To do that, click on the Next button.
For our example, the system should display 12 activities, one for each month according to the plan frequency.
Then, click on the Finish button for the system to start the process.
Once done, we can see all created tasks in the second quadrant of the AS064 menu.
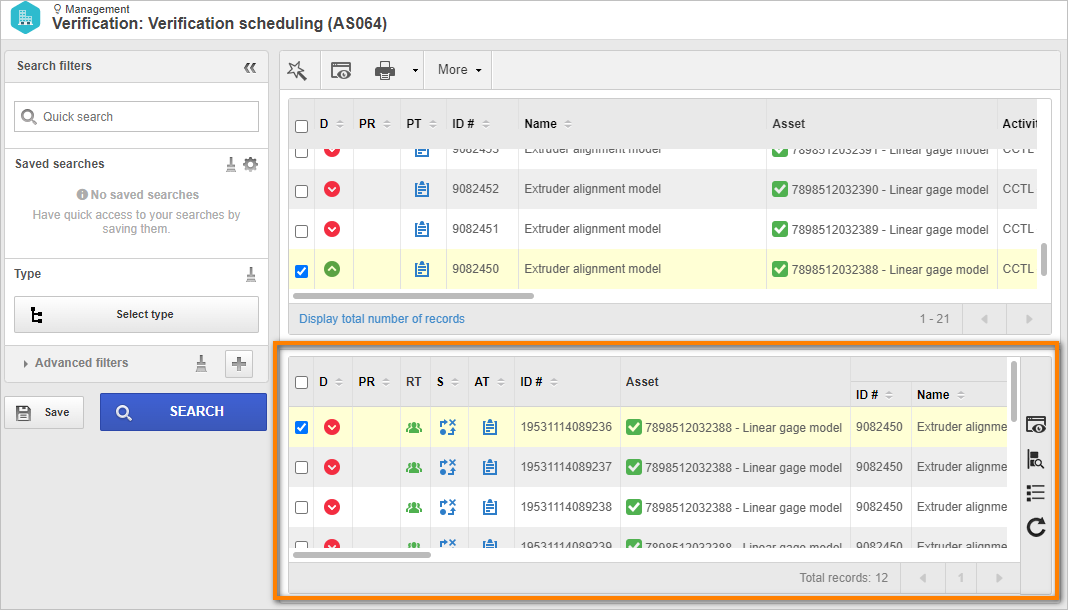
Done. We have successfully created a scheduling!