Create a verification plan
This article is valid until version 2.1.9 of the system. Click here to access the documentation referring to later versions.
This topic will teach you how to create a verification plan.
To do this, simply follow the steps below:
1st step: Creating a standard activity type
The standard activity type classifies the activities that are recorded in the system.
Moreover, it allows performing security configurations that will be used to control the standard activity creation.
To create a standard activity type, access the AS054 menu and click on the  button:
On the screen that will open, fill in the ID # field with "025" and the Name field with "Costs".
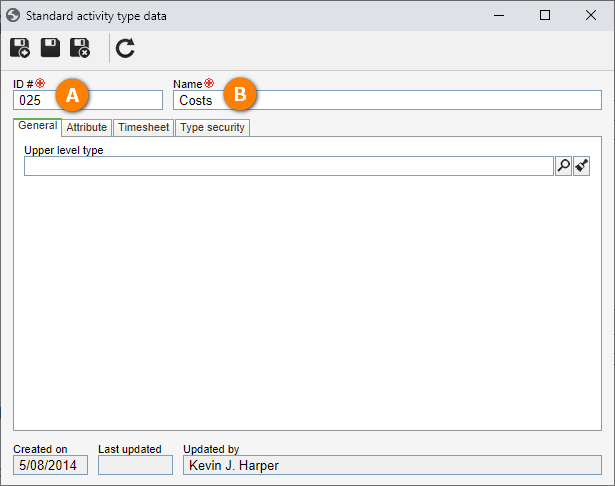
Once done, click on the  button.
Thus, we have successfully created a standard activity type!
2nd step: Creating a standard activity
Now that a type has been created, it is possible to create standard activities.The objective
of the standard activity is to define the steps and information necessary to execute a verification activity. For example, having a checklist, attributes, and responsible parties.
To do that, go to the AS004 menu, click on the button and select the "Costs" type.
On the screen that will open, fill in the following fields:
- ID #: CCTL.
- Name: Costs control of telephone lines.
- Planning and execution team: Select the team used to create the asset type.
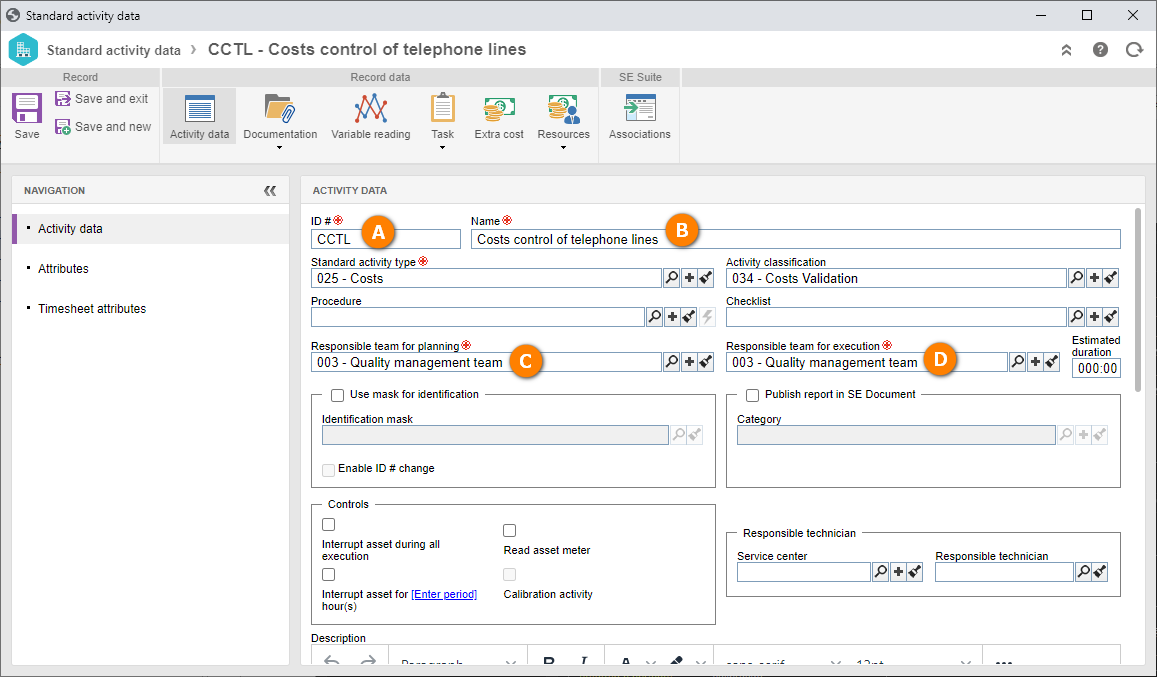
After doing that, click on the Save and exit button.
The asset was created successfully!
3rd step: Creating a verification plan
The verification plan is responsible for managing the configurations of the asset verification activities.
It defines the activity execution period, priority, associated assets, and standard activity association.
To create a verification plan, access the AS020 menu and click on the button.
On the plan data screen, select the "Costs control of telephone lines" standard activity in the Activity field.

Once done, click on the button.
On the screen that will open, fill in the following fields:
- Name: Extruder alignment.
- Asset: Select the "Linear gage" asset created in the Create an asset step.

After doing that, click on the Save and exit button.
Thus, we have successfully created a verification plan!