Finishing a data collection
 |
 |
 |
 |
 |
Prerequisites
- Access to the Management > Collection deletion (SP023) menu or to the Management > Collection tracking (SP004) menu.
- Executed data collection.
Introduction
After configuring, creating, executing, and analyzing a data collection, it is possible to finish it in two ways: manually or automatically. The system also provides the options of postponing a data collection or deleting it.
Learn how to perform each action:
Manually finishing the collection
1. Access the Management > Collection tracking (SP004) menu.
2. Select the desired collection.
3. Expand the More button and click on the Finish data collection button.

By default, finished data collections cease to be listed in the tracking menu. If you wish to view them, use the Finished data collection status as filter.
Automatically finishing the collection
1. Access the Management > Collection tracking (SP004) menu.
2. Select the desired collection and click on the  button.
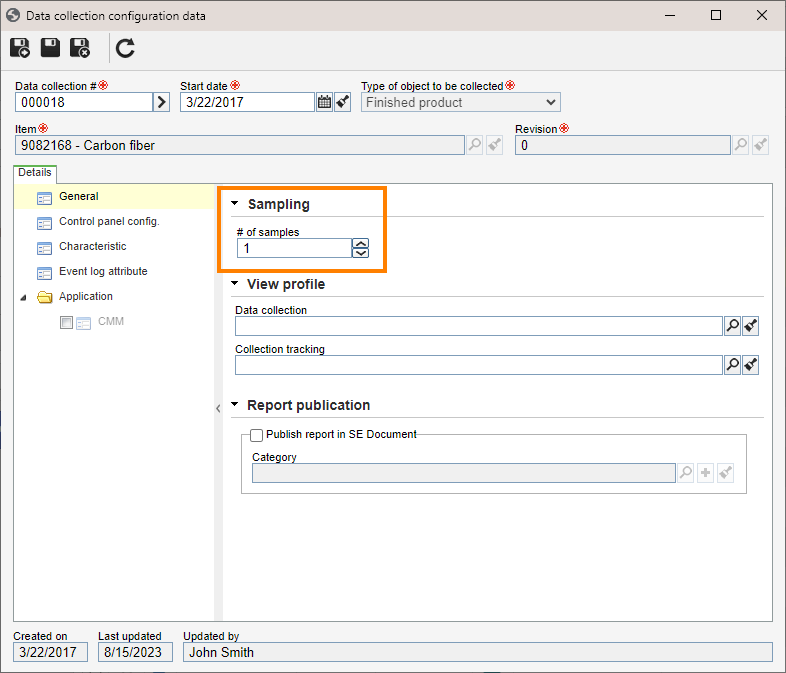
3. In the General > Sampling section, fill in the # of samples field. Thus, when the collection reaches the number of samples defined in this field, the system will automatically finish the collection. If you do not wish for the collection to be finished automatically, clear the field and save the collection with it blank.
4. Click on the  button.
Postponing a data collection
It is possible to interrupt a data collection, keeping it postponed in the system:
1. Access the Management > Collection tracking (SP004) menu.
2. Select the desired collection.
3. Expand the More button and click on the Postpone data collection button.

Once postponed, the collection will no longer be shown in the list. To find it, access the Management > Collection tracking (SP004) menu and filter the status by Postponed collections. Once the collection is listed again after the search through the filter, it will be possible to select it and reactivate it by expanding the More button and clicking on the Enable data collection button.
Deleting a data collection
1. Access the Management > Collection deletion (SP023) menu or the Management > Collection planning (SP003) menu.
2. Select the desired collection.
3. Click on the  button.

If the data collection you wish to delete is associated with an SPC portal, the system will issue an alert with the name of the portal to which the collection is related. Read more about this topic in the SoftExpert SPC widgets article.
Conclusion
This article showed how to finish a data collection, both definitively (closure or deletion) and temporarily.
Thus, the main steps for using SoftExpert SPC were covered: initial configurations, planning, execution, tracking, and closure of the data collection.
To gain more knowledge, refer to the articles available in the Advanced resources category.