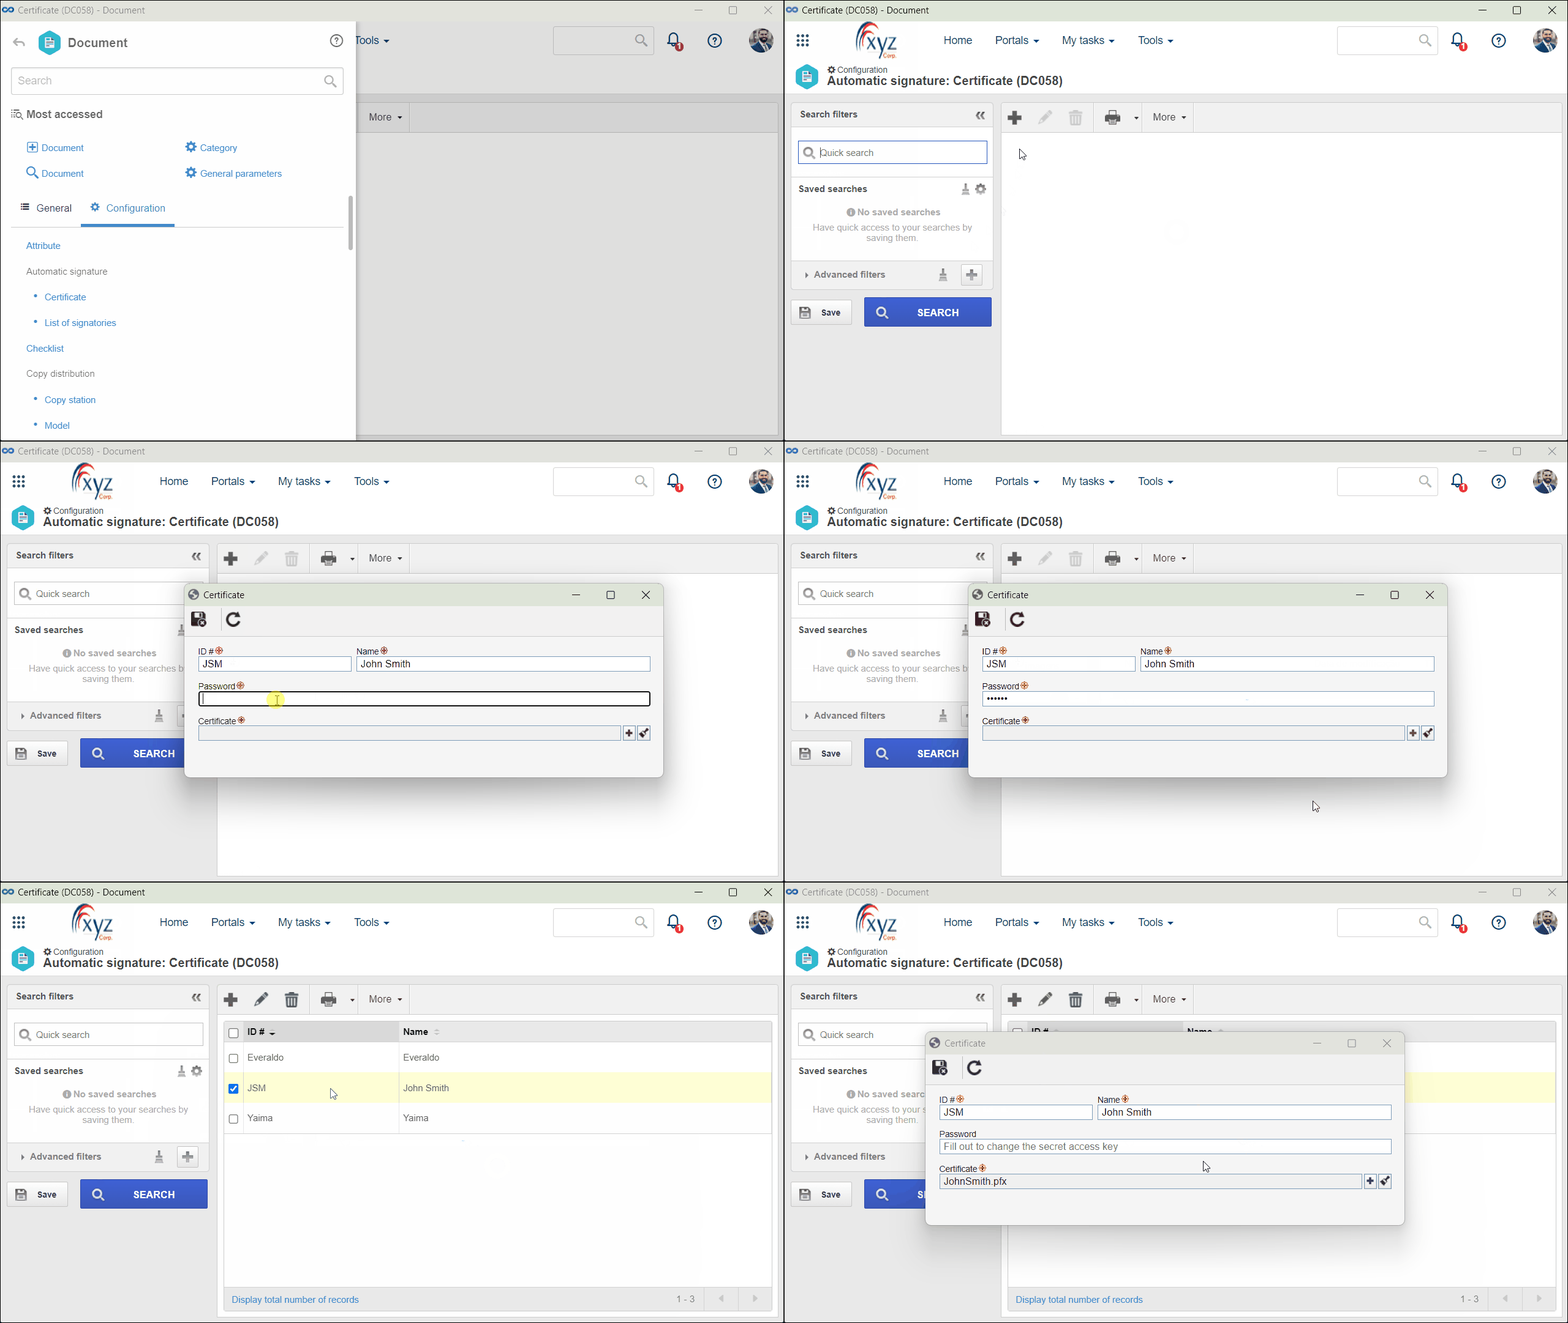
Configuring a certificate
Prerequisites:
- Access to the Configuration > Automatic signature > Certificate (DC058) menu.
- Valid certificate installed in the user's machine according to the type that will be selected later in the signature configuration.
This documentation does not offer support for the installation of a valid certificate in your repository. To do so, refer to the specific support of the certificate type enabled in the signature configuration.
Introduction
Certificates will compose the list of signatories used for the automatic signature of electronic files in the Document component.
What is a digital certificate and how to obtain it?
Digital certificate is an electronic document digitally signed by a certification body, containing data regarding the issuer and the owner. The paramount function of a digital certificate is to associate a person or entity with a public key, acting as an "identification document" in the virtual world.
To acquire a digital certificate, the stakeholder must be identified by a Registry Authority through the verification of personal documents (such as ID, Social Security, or passport number).
It is also possible to obtain a digital certificate virtually, through a respectable third-party certification authority (CA).
The main information of a digital certificate is: public key of the owner; name and e-mail address; certificate validity period; name of the CA that issued the certificate; serial number of the digital certificate; digital signature of the CA.
See below how to configure the certificates:
Configuring a certificate
1. Access the Configuration > Automatic signature > Certificate (DC058) menu.
2. Click on  on the toolbar to add a new certificate.
3. On the screen that will be displayed, enter an ID # and a name for the certificate.
4. Enter the password for the certificate. The password is provided by the certificate platform.
5. In the Certificate field, associate the .cert, .p12, or .pfx file of the certificate being added.
6. Click on  and save the new certificate.

Editing the recorded certificates works in the same way as adding new certificates.
To edit a certificate, select it in the list of records on the main screen and click on  .
.
Conclusion
The certificate has been properly configured and is ready to be added to the desired list of signatories.


