Adding an image as a watermark
Prerequisite
- Access to the Configuration > Document > Watermark (DC045) menu.
Introduction
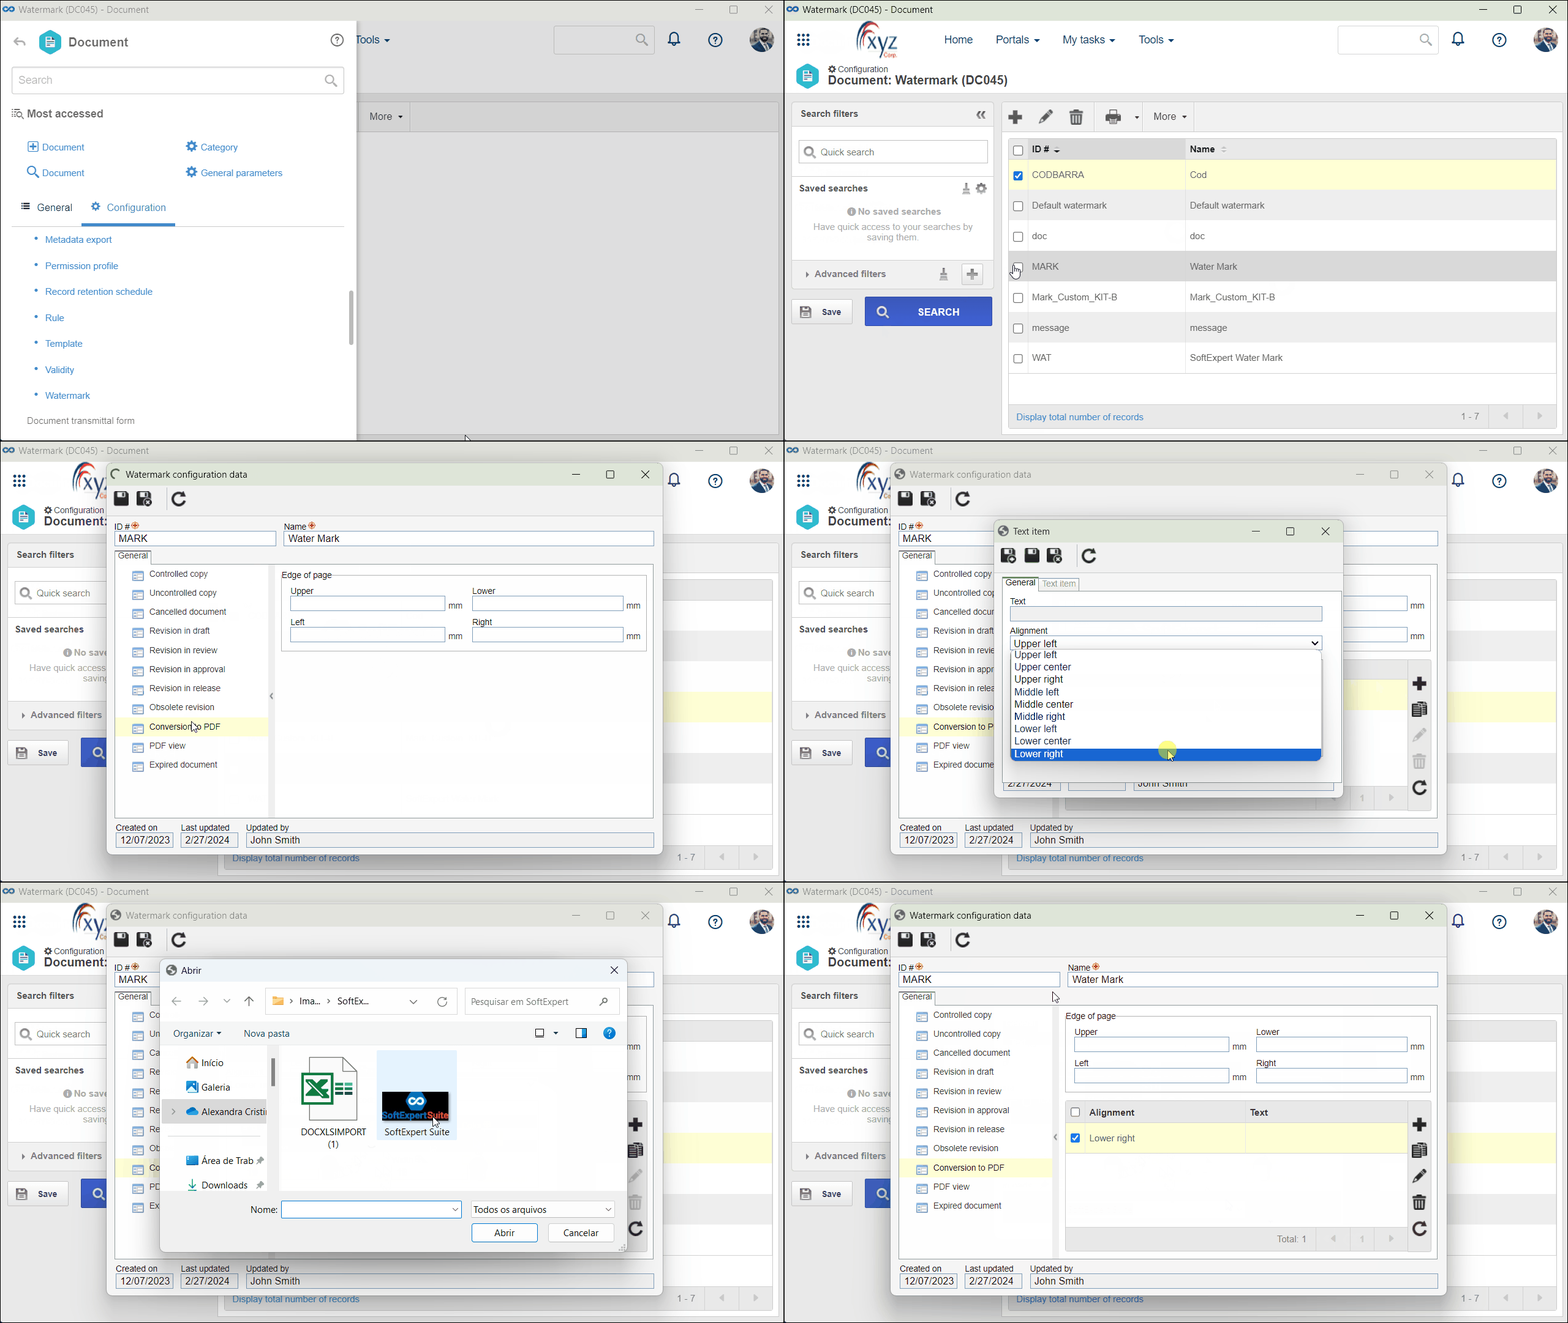
SoftExpert Document allows for adding an image as a watermark. To do so, simply add the image to the watermark configurations.
See the steps to add an image as a watermark below:
Adding an image as a watermark
1. Access the Configuration > Document > Watermark (DC045) menu.
2. On the creation screen, select the desired configuration and click on the  button.
3. On the screen that will be opened, select the status in the General tab.
4. Below the Margins section, on the side toolbar, click on the  button.
5. On the new screen, in the Alignment field, select the position of the item related to the print area of the electronic file.
6. Check the Image option.
7. Use the File field to select the image on your device that will be the watermark. In the Size and Width fields, enter the dimensions of the image.
8. Click on  to save the changes.

- It is possible to add different watermarks to different positions on the page for the same status.
- When the file is in a status with a defined watermark, the system will display the text items concatenated in the sequence defined in the Text item tab. If the item is a barcode, after reading it, the text items will also be displayed concatenated in the sequence defined in the Text item tab.
- To change the presentation order, use the Move up and Move down buttons on the side toolbar. Use the Delete and Edit buttons on the side toolbar to delete or edit the selected item.
Conclusion
The image has been added as a watermark. To use it in the documents, it will be necessary to configure the watermark in the category of the desired document.