Starting a workflow via association
These configurations are valid until version 2.2.3 of the system. To learn about the new associations tab of the workflow activity execution screen, click here.
Prerequisites
- Process with automation enabled and modeled with no errors in SoftExpert Process.
- Instantiate process control enabled in the process security data.
- Access to the Execution > Start (WF003) menu.
- Access to the My tasks > Workflow > Activity execution menu.
- For an instance to be started from the association of a workflow during the execution of the activity, the Workflow option must be enabled in the process activity, on its data screen, in the Configuration > Association tab. See how to perform this configuration in the Configuring associations in the activity article.
Introduction
Instances can be started from several screens of different components that perform associations with workflows.
In SoftExpert Workflow, association is established on the activity execution screen, in the Associations > Workflow tab.
See how to start a workflow from the association screens:
Starting a workflow via association
1. Access the My tasks > Workflow > Activity execution menu.
2. Select the activity you want to execute and click on the  button.
3. On the activity data screen, access the Association > Workflow tab.
4. Click on the  button.
5. The Instantiate process screen will be displayed.
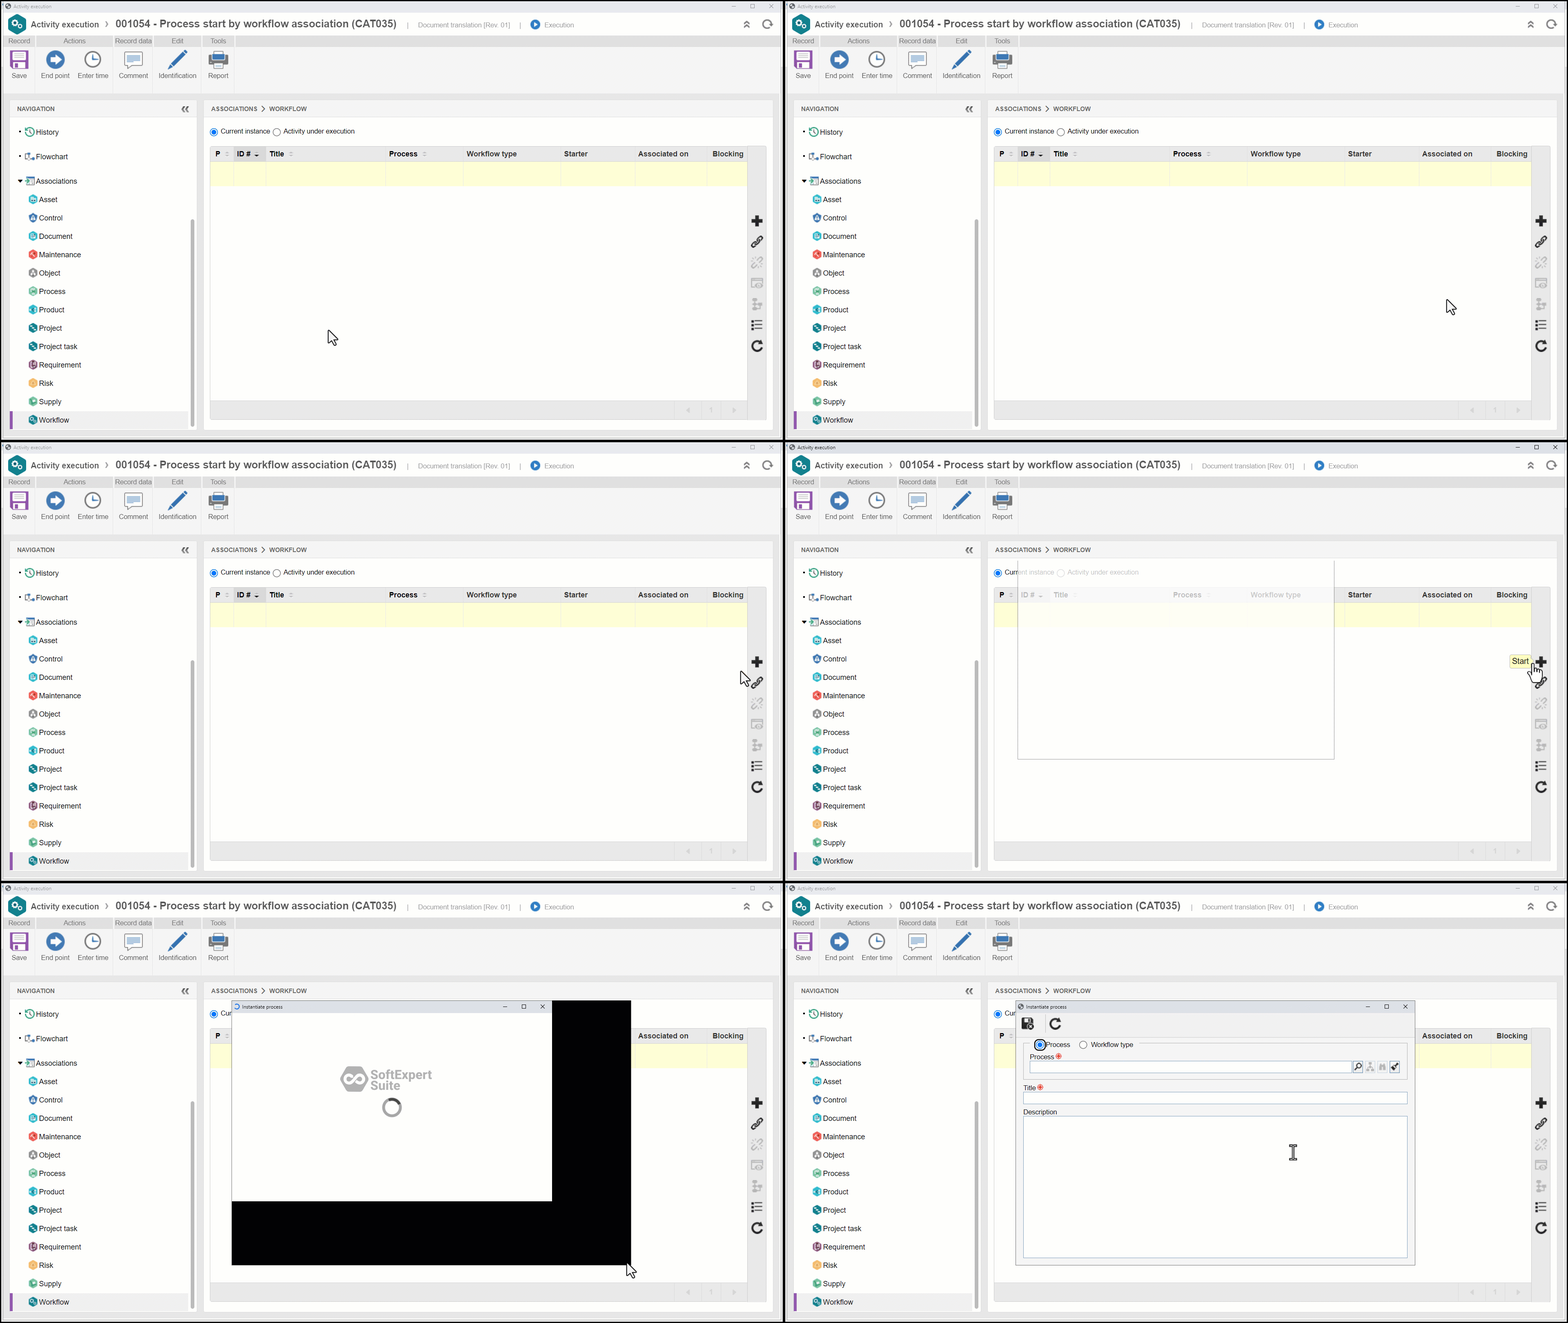
6. Select the process that will be started.
Some associations may have predefined processes or process types for better control of the links established in the record.
As soon as a process is selected, the buttons on the side of the Process field will be enabled so that it is possible to view the flowchart or the data screen of the record.
7. Enter a title for the workflow that is being started. This field may be automatically filled out if the selected process is configured with a default title.
8. Enter a description for the workflow being started. This field may be disabled if the "Enable description information" option is not checked in the process data screen (Configurations > Instance).
9. After filling in the fields, click on the  button to start the workflow.
Start rules
- If the starter of the workflow is the executor of the first activity of the process flow, the activity data screen will be displayed, allowing its execution.
- If the activity is configured with permission to change the ID #, title, or description, the activity identification screen will be displayed, allowing this data to be edited.
- The necessary configurations for the identification screen to be shown to the workflow starter in the first activity of the instance are located on the activity data screen, in Configurations > Instance.
On this screen, at least one of the following parameters must be checked: "Enable ID # change", "Enable title change", or "Enable description change". If none of these fields is checked, this screen will not be displayed.
- The necessary configurations for the identification screen to be shown to the workflow starter in the first activity of the instance are located on the activity data screen, in Configurations > Instance.
- If the "Enable starter to edit instance viewing permissions" option is checked on the process security data screen, during the execution of the first activity, the Security section will be displayed, which will allow the starter to perform the desired security configurations for the workflow.
- During the process modeling, deadlines can be configured. According to these configurations, actions can be triggered by the system after the workflow is started.
Conclusion
Thus, the workflow was successfully started through the association screen!
Access the SoftExpert Workflow tasks for more details on how to execute the activities.