Associating forms
Prerequisites
- Access to the File > Process (PM022) menu.
- Created and designed process.
- Having the SoftExpert Form component among the solutions acquired by the organization.
Introduction
There are two ways to associate forms with SoftExpert Process:
Directly in the process
On the process data screen, through the Configurations > Form button.

In the activity or decision of a process
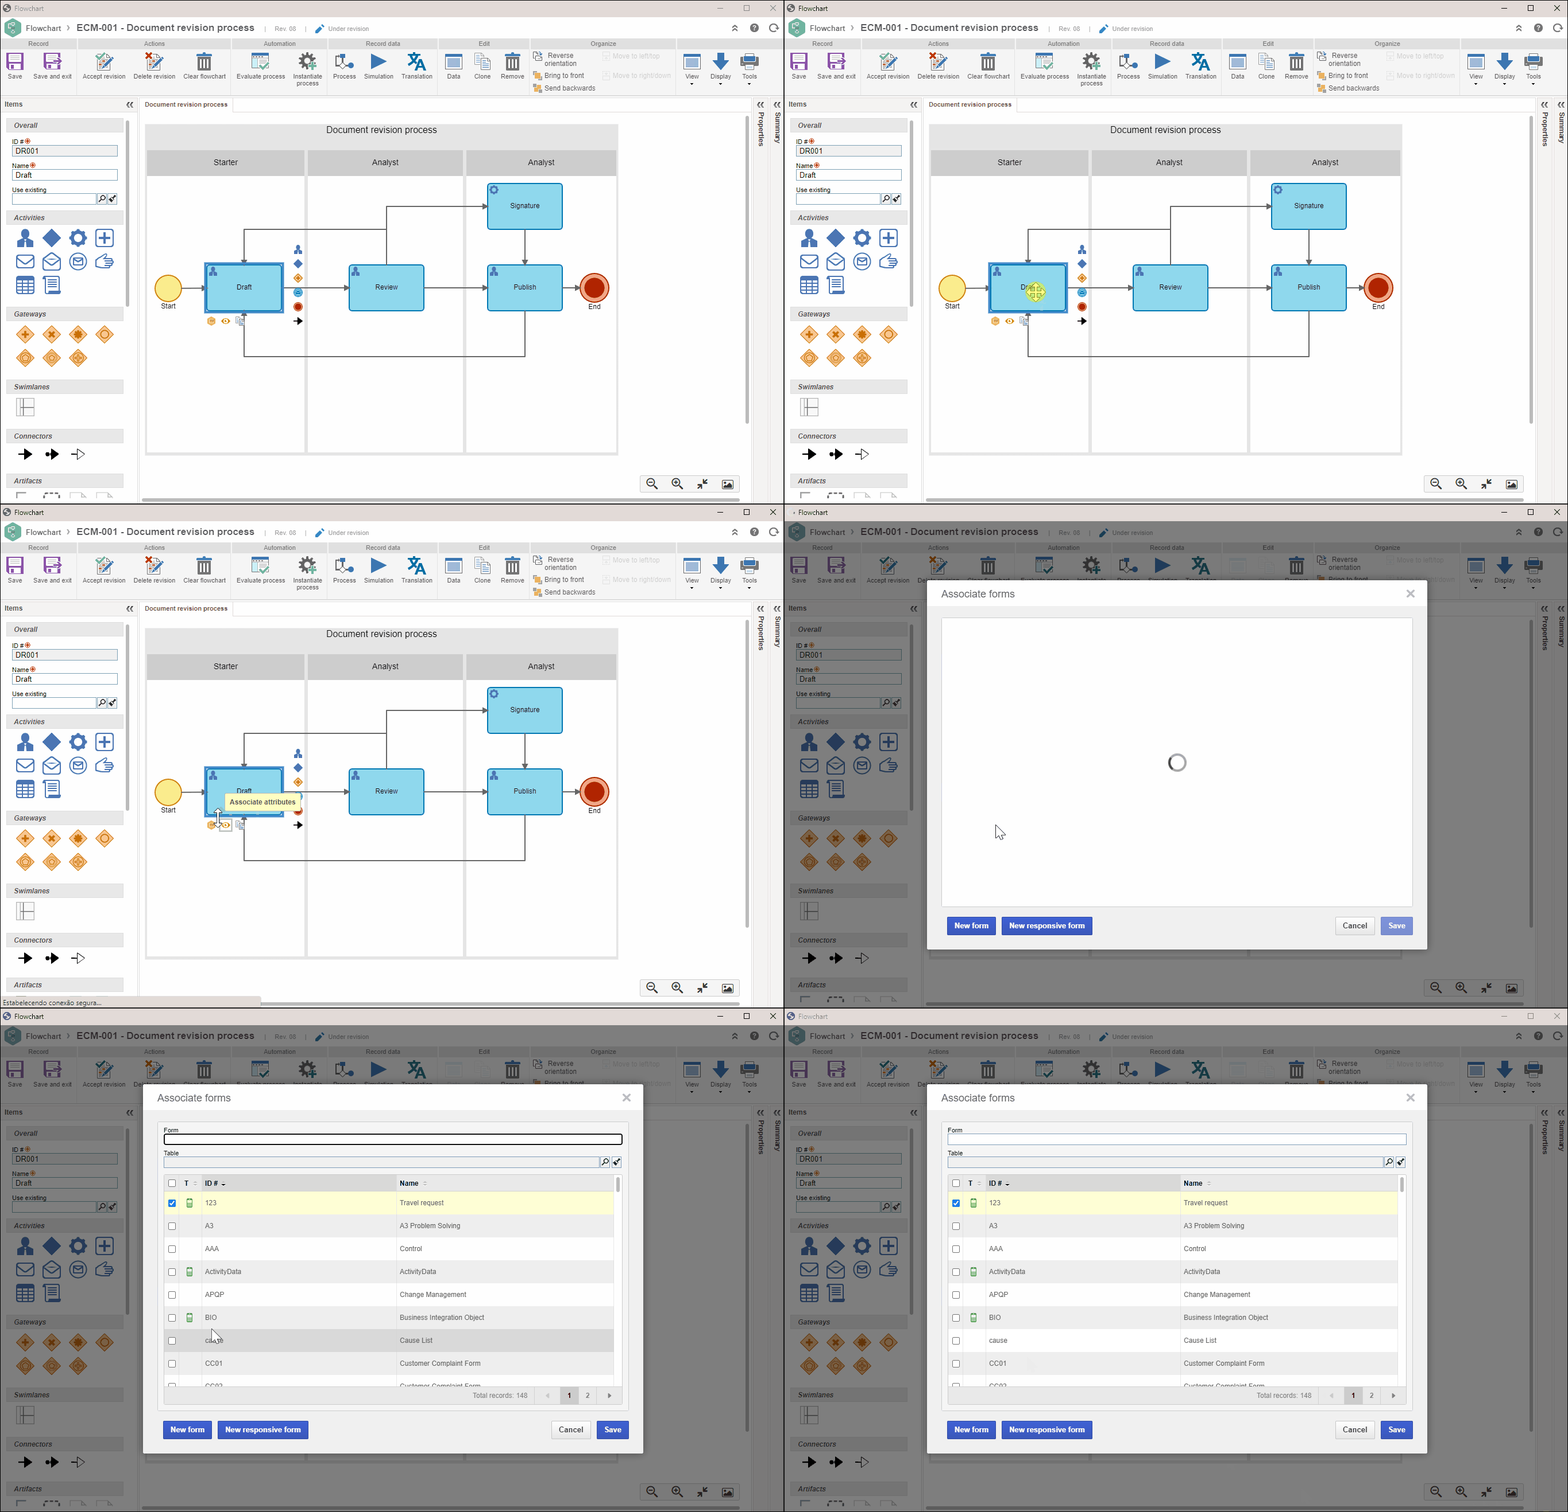
| In the flowchart screen | Once the modeling screen is open, select the activity and click on the Associate forms button that will be enabled. |
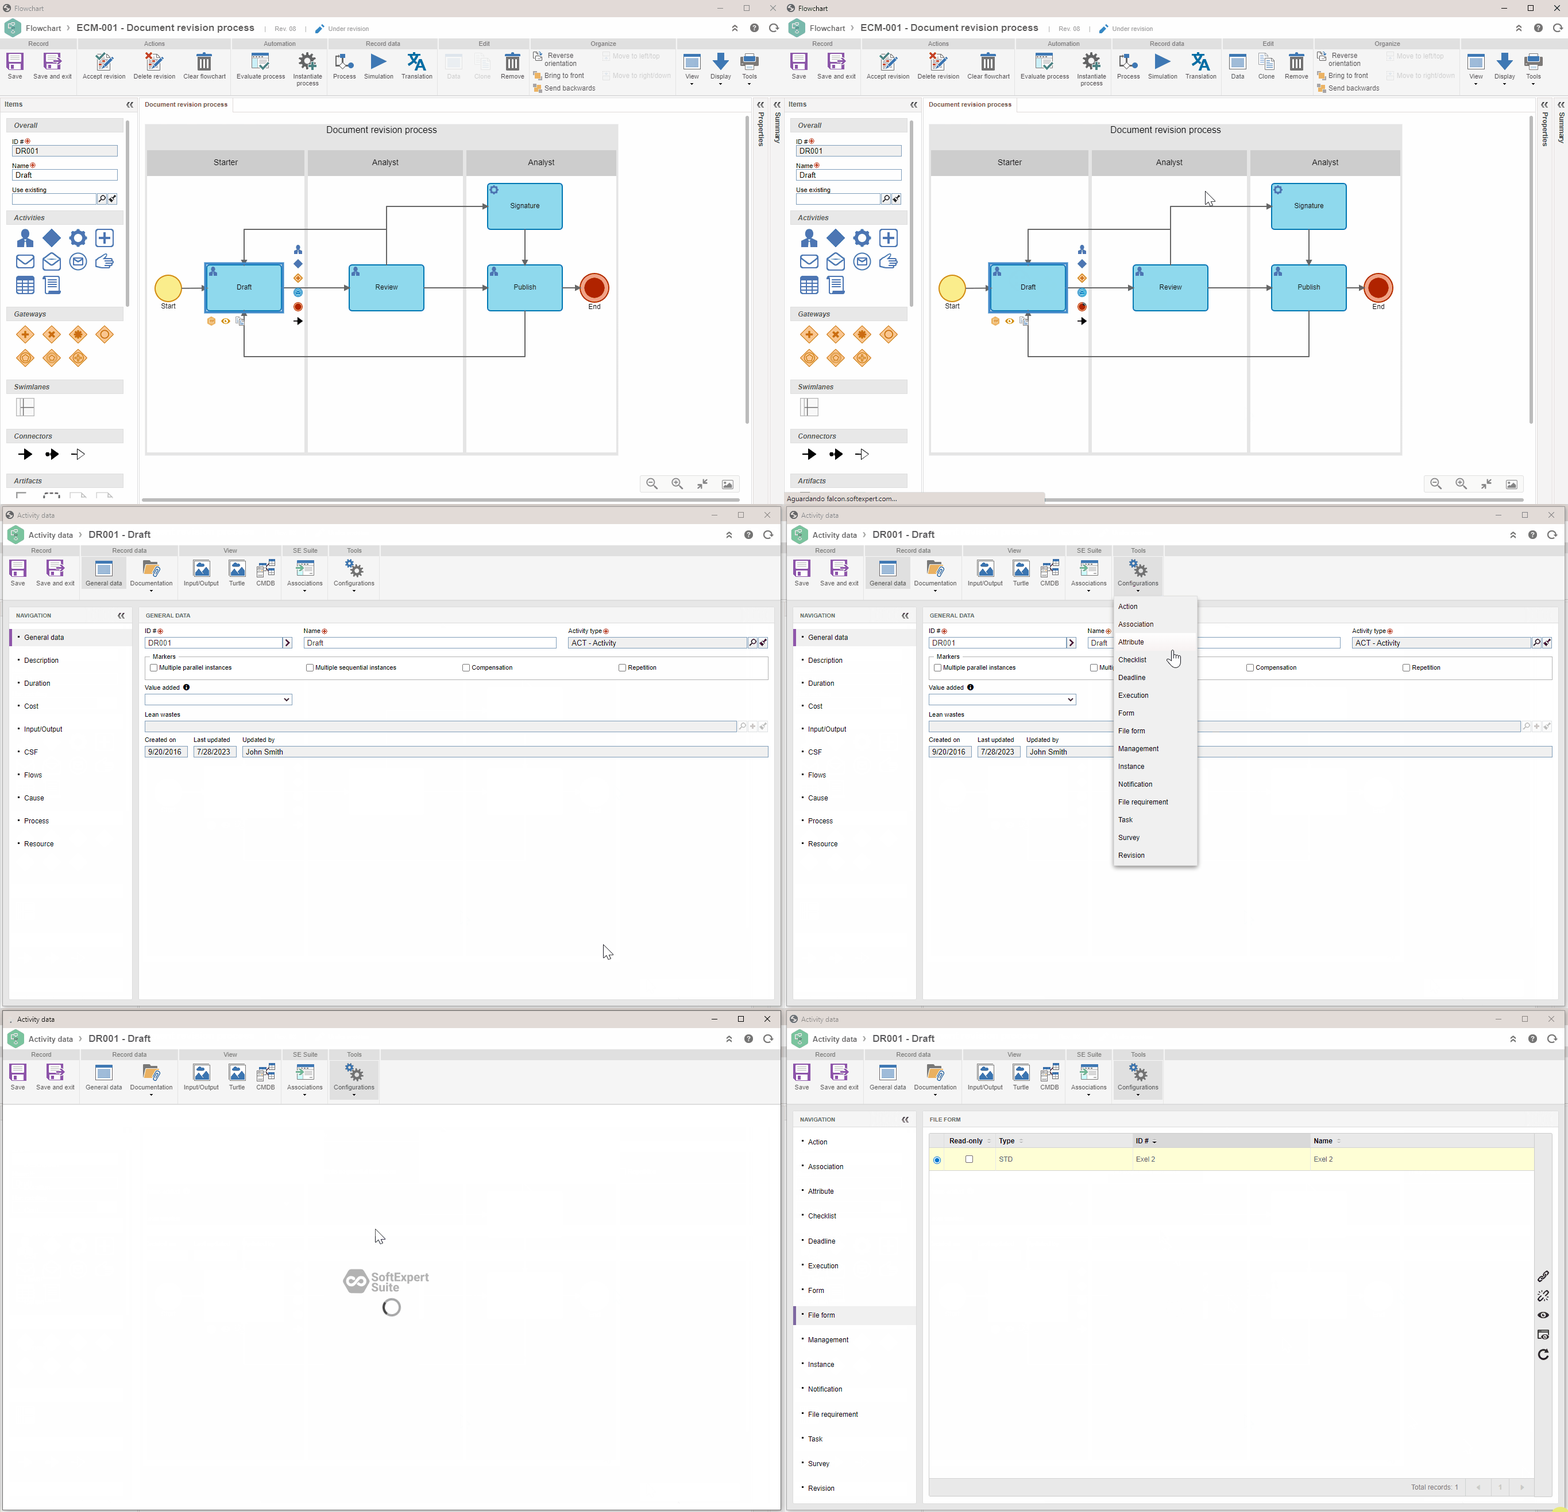
| In the activity data screen |
Through the Configurations > Form button, it is possible to associate specific forms to be filled out when executing the activity or decision in the Workflow component. Through the Configurations > Form file button, it is possible to associate forms of the file type with the activities or decisions. |

See a practical example of both cases below:
Associating a form with the process
1. Access the File > Process menu (PM022).
2. Select the process with which you wish to associate the form.
3. Click on the arrow next to the  button and on Process data.
4. On the data screen, expand the Configurations button and select Form.
5. On the association screen, click on the  button.
6. Search for and select the form you wish to associate.
7. To finish, click on  .
.
Associating a form with activities and decisions
1. Access the File > Process menu (PM022).
2. Select the process that has the activity with which you wish to associate the form.
3. Click on the  button.
4. On the flowchart screen, select the activity.
5. Click on the Associate forms button that will be available when selecting the activity.
6. Search for and select the form you wish to associate.
7. To finish, click on  .
.
After associating the form, if the association is being made through the activity or decision data screen, the following options may be available through the Configuration > Form button:
- Use the checkbox in the Read-only column to determine whether the form will be displayed on read-only mode when executing the activity in the Workflow component. Keep the checkbox unchecked for the form to be filled out during the activity/decision execution.
- The Show form only in activity execution option allows you to display only the form on the execution screen of the activity in SoftExpert Workflow. This feature is only available when the activity has an associated form; when checked, the Association, Attribute, Checklist, File form, Requirement, Task, and Survey sections will be disabled, as these items cannot be filled out.
Forms associated with the activities can be viewed through the data screen of the process to which they belong. To do so, once the process data screen is open, click on Configurations and File form.
Conclusion
Thus, the form has been successfully associated with the process or the activity/decision of the process flowchart.
The steps above are similar for all form association screens. The differences are the location and the object in which the association is taking place.