Applying an identification mask
Prerequisites
- Access to the File > Document menu.
- Category configured with identification masky.
Introduction
The document creation menu allows for creating and storing the desired records.
Upon adding a document, it is possible to associate an identification mask for its definition to be simple and easily recognized.
Follow the steps to apply an identification mask.
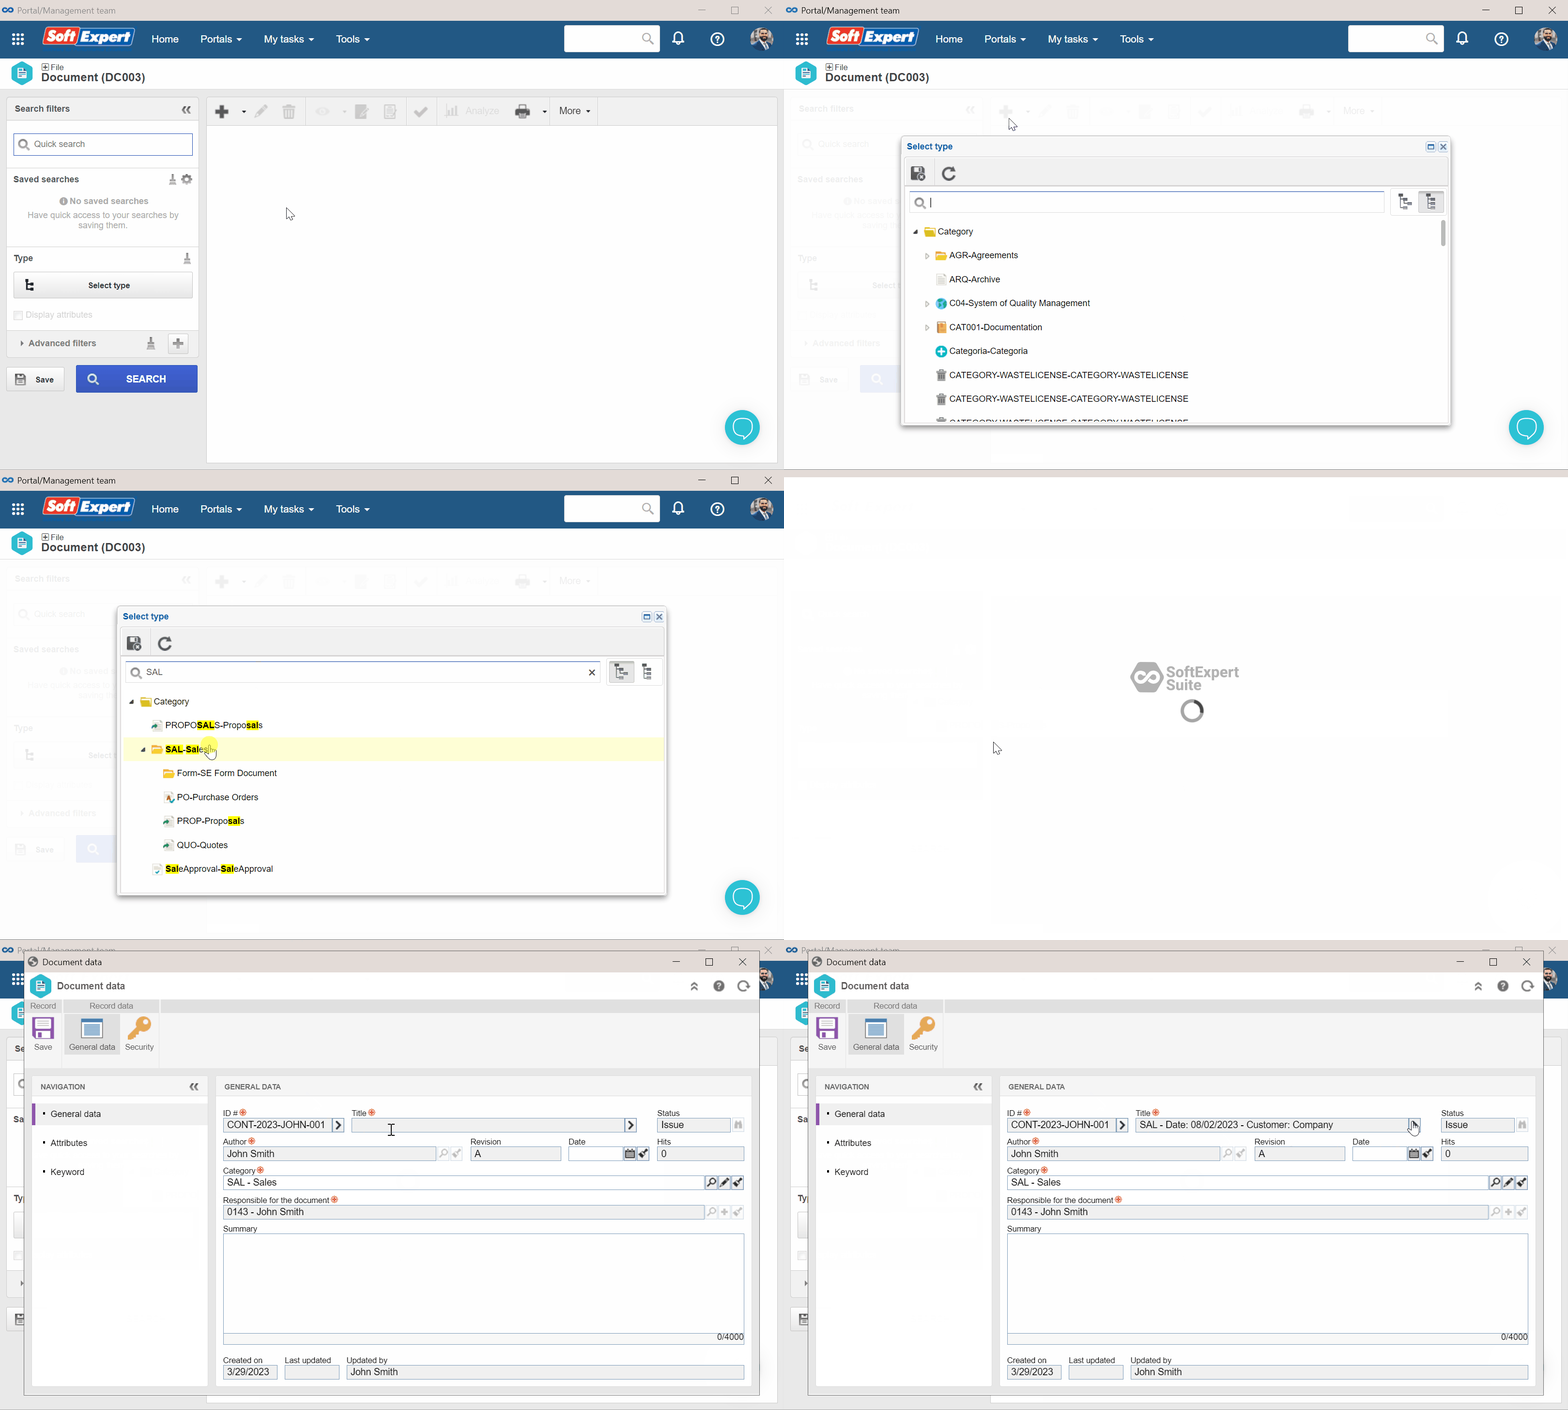
For this example, we will use the "Sales" category to apply a mask to a document. For further details on the example mask, access the Associating a mask with the category article.
Applying an identification mask to a document
1. Access the File > Document (DC003) menu.
2. Click on the  button and select the category configured with a mask.
3. On the category data screen, click on the arrow next to the ID # and Name fields.
4. After doing that, save the record.

Conclusion
Thus, upon adding a document with the mask, it will be possible to filter by ID # or title.


