Change activity deadline
This topic will teach you how to change the deadline of the activities.
To this end, simply follow the steps below:
1st step: Configure the process manager
First of all, your user must be the manager of the process or instance.
In SoftExpert Workflow, there may be a process manager with control over all instances, and an instance manager, which can be different in each instance, depending on the need.
Go to the File > Process menu (PM022).
In the Quick search field, search for the "Purchase request" process, click on the arrow next to the  button and select the "Process data" option.
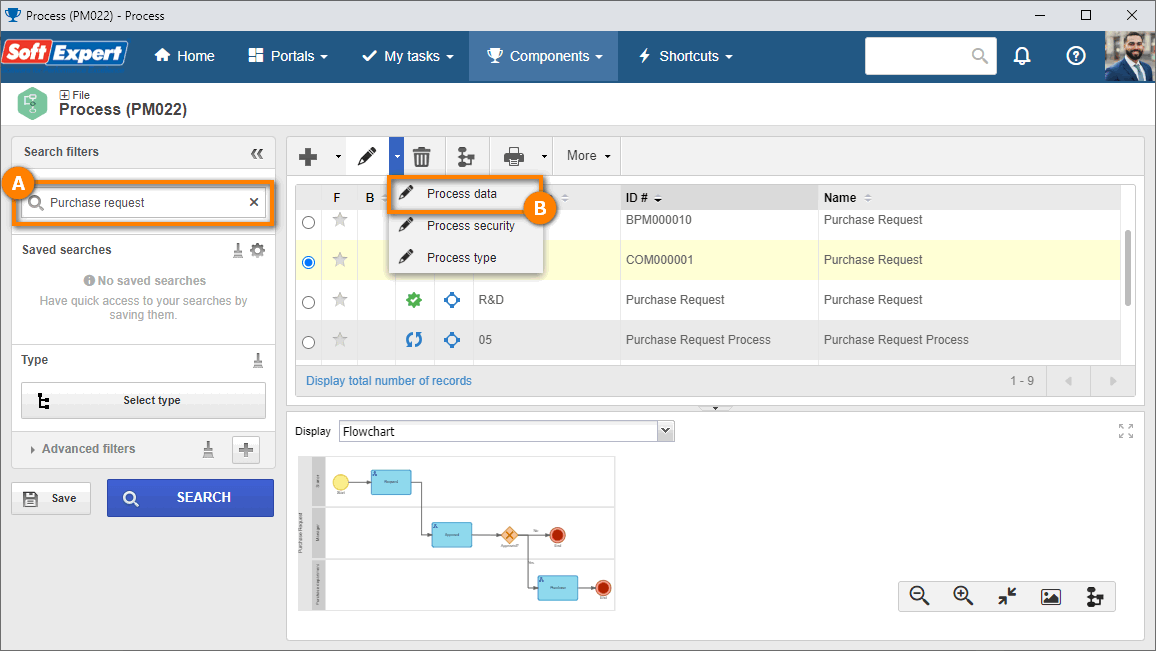
On the screen that will open, select the "Management" option in the navigation panel.
Then, in the Type field, select the "User" option and select your user.
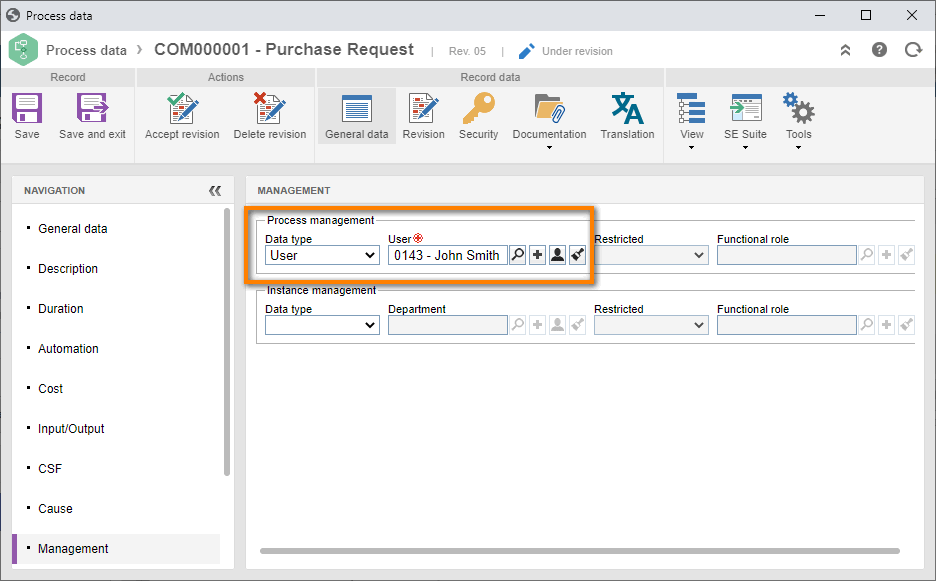
After doing that, click on the Save and exit button.
In this way, we have successfully changed the activity executor!
2nd step: Change the activity deadline
There are two ways to make this change:
• Via flowchart;
• Via Management menu shortcut.
To change the activity deadline via flowchart, go to the Management > Workflow menu (WF004).
In the Quick search field, search for the "My first instance" process and click on the  button.
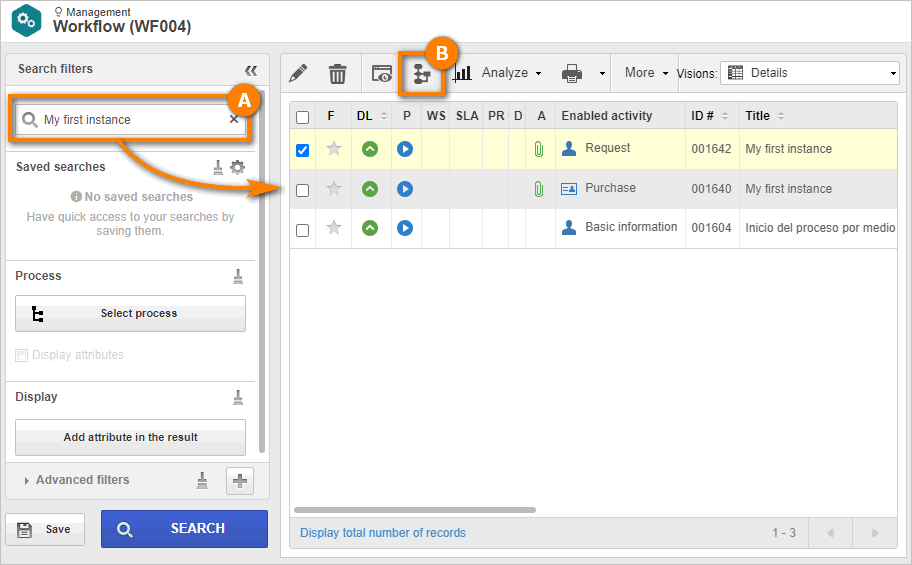
In the flowchart, select the "Purchase" activity and click on the Redefine deadline button.
On the screen that will open, enter the date, time and an explanation for the change, as shown in the image below.
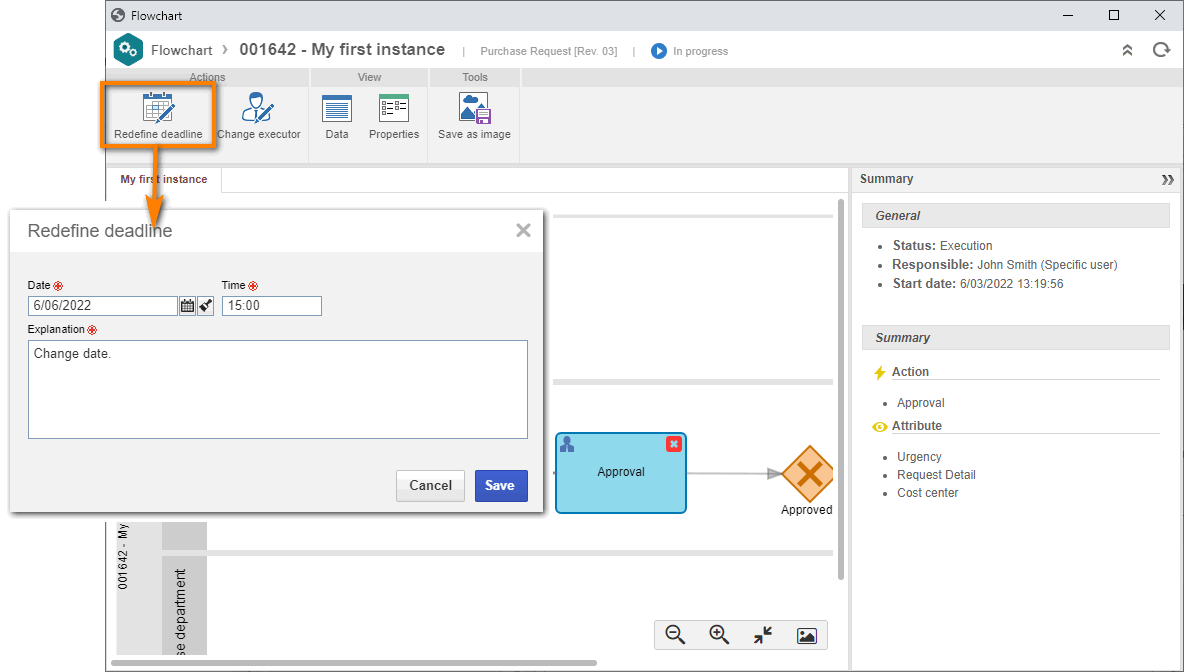
To finish, click on the Save button.
In this way, we have successfully changed the activity deadline via flowchart!
Now, to change the deadline of an activity via Management menu shortcut, take the following steps:
1. Go to the Management > Workflow menu (WF004).
2. Click on the Select process button, search for the process type and apply the filter.
3. Click on the process name, and then on the Change executor option in the panel that will be displayed.
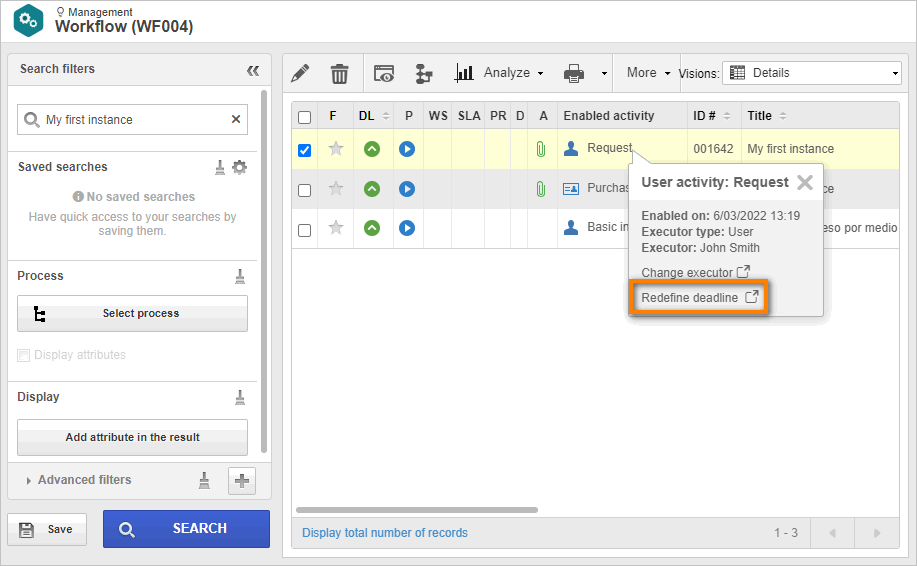
4. On the screen that will open, enter the date, time and an explanation for the change, as shown in the image below.
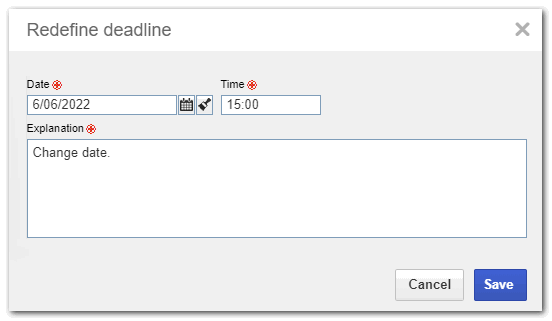
After doing that, click on the Save button.
In this way, we have successfully changed the activity deadline through the Management menu!