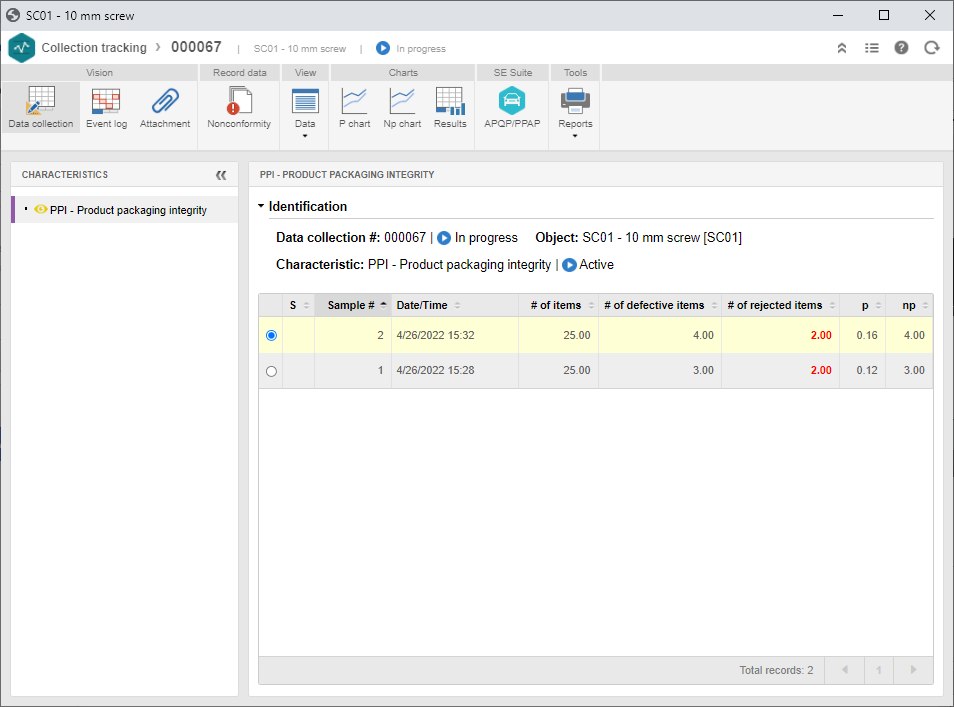
View the collection result
This topic will teach you to add values to the collection and view its results.
For that, simply follow the steps below:
1st step: Adding values to a collection
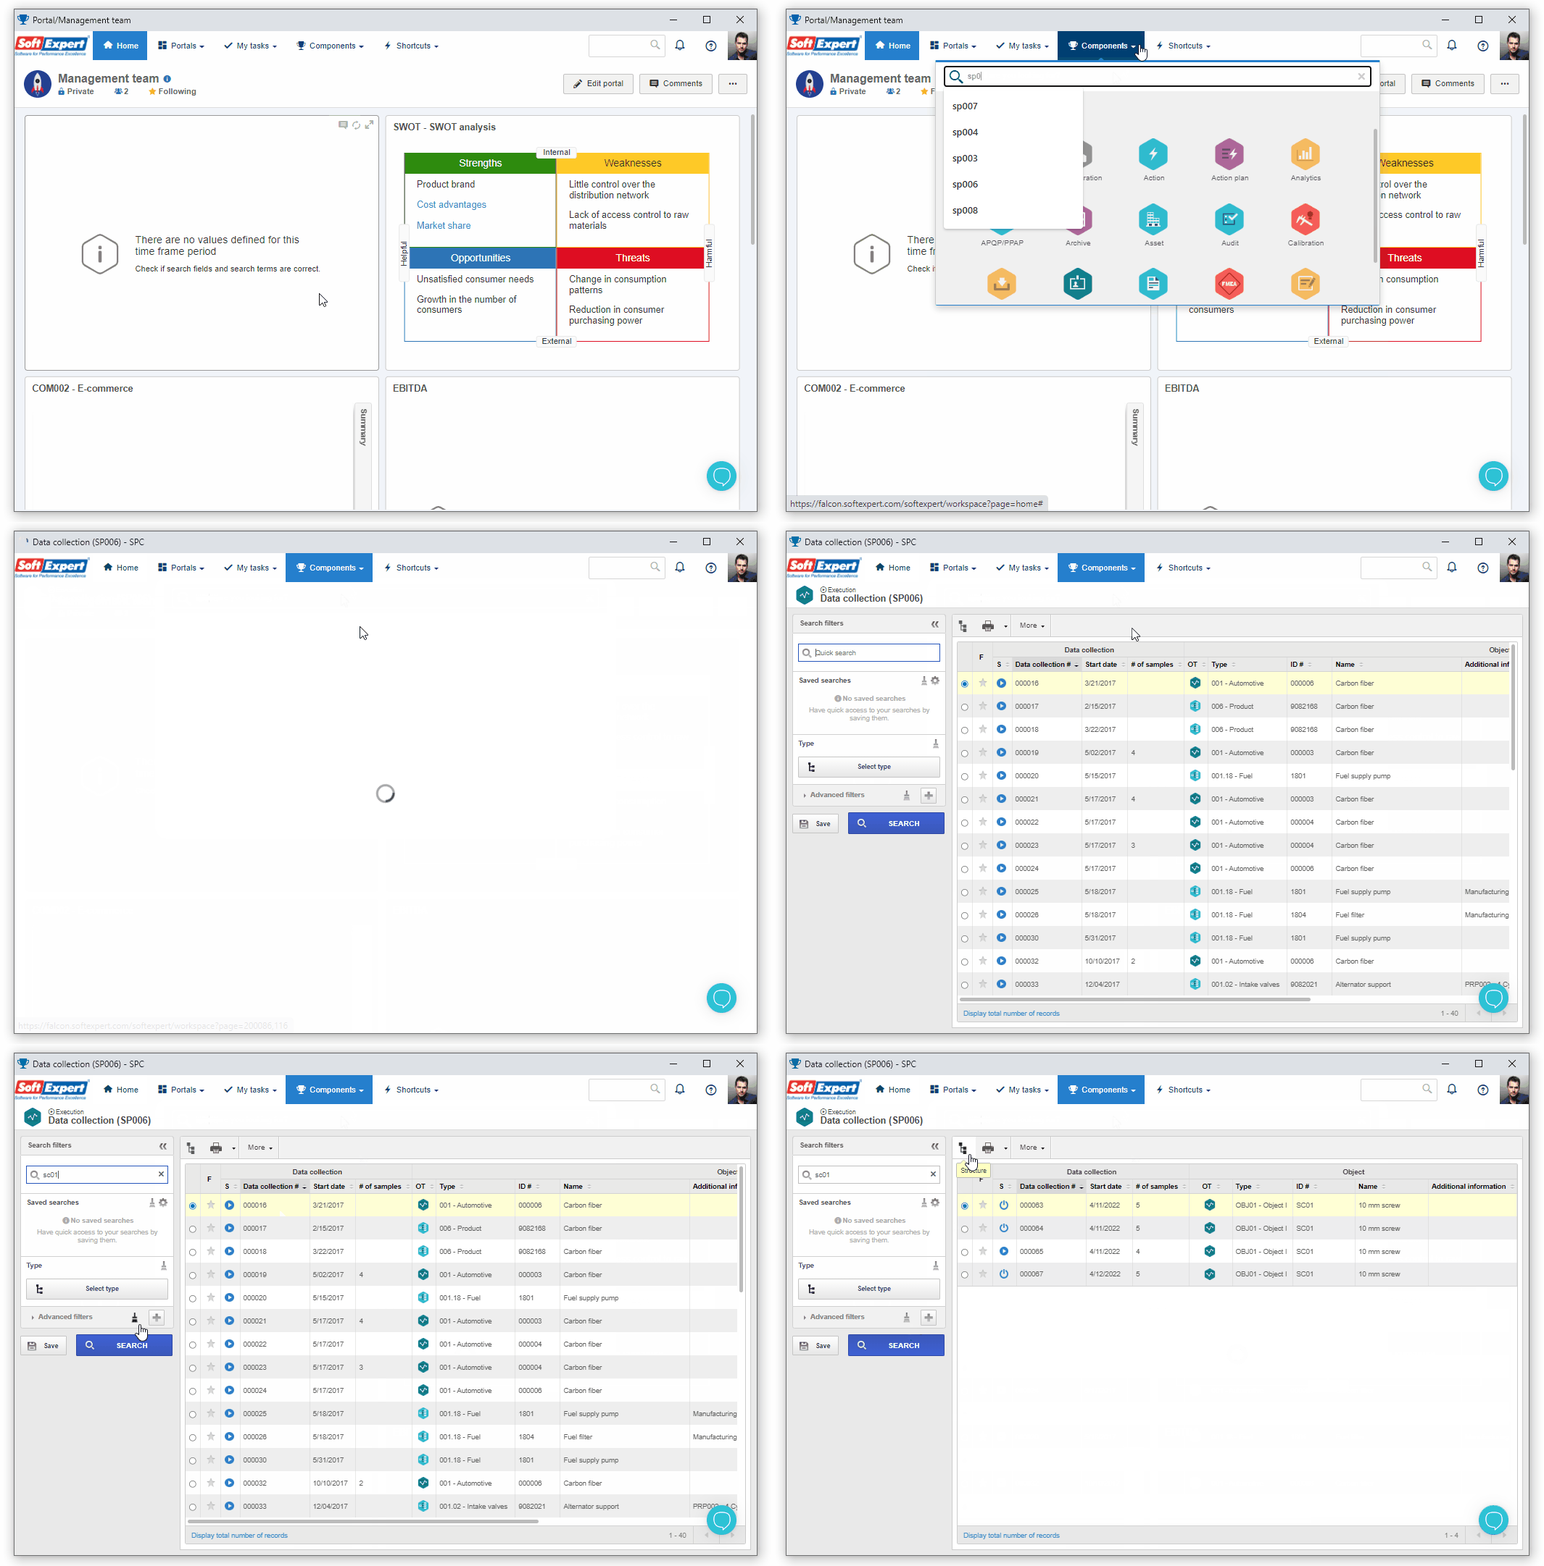
To add values to a collection, access the SP006 menu and, on the quick search field, fill out the name of the object created in Create a collection from scratch.
Then, click on the  button.
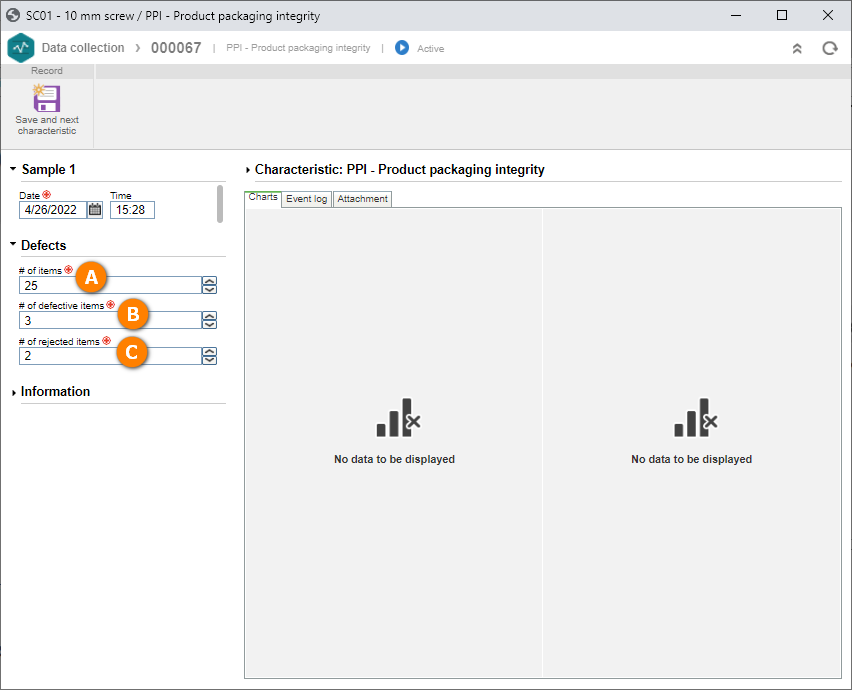
On the screen that will be opened, locate the Defects section and enter the number of items that have been inspected; for defective items, enter the value "3" as number of defective items.
Finally, for rejected defective items, enter the value "2" for the number of rejected items.
Once done, click on Save and next characteristic.
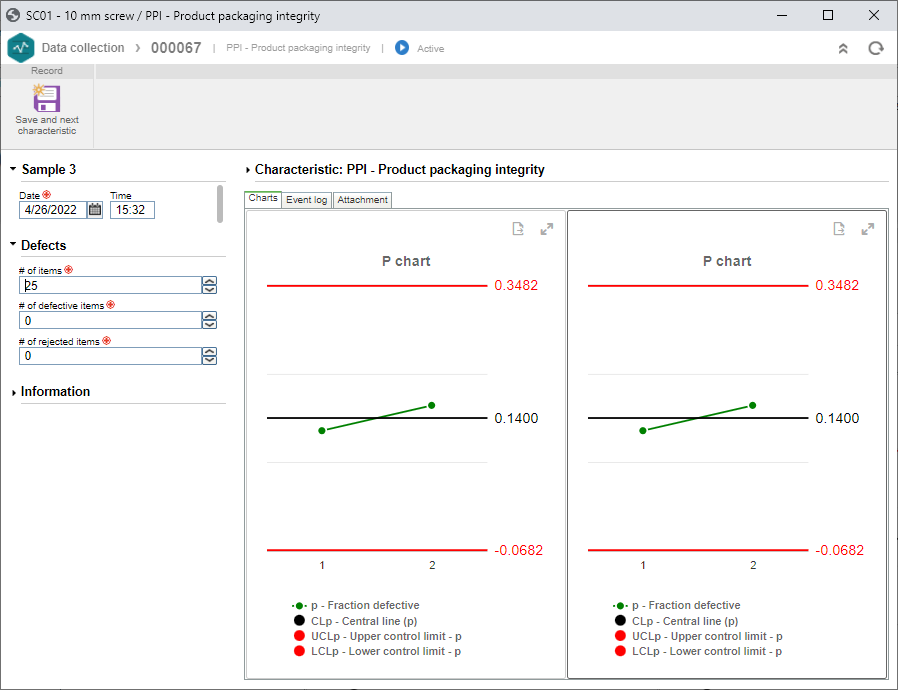
Repeat this process to add the second sample and view the charts.
The values have been successfully added to the collection!
2nd step: Viewing collection data
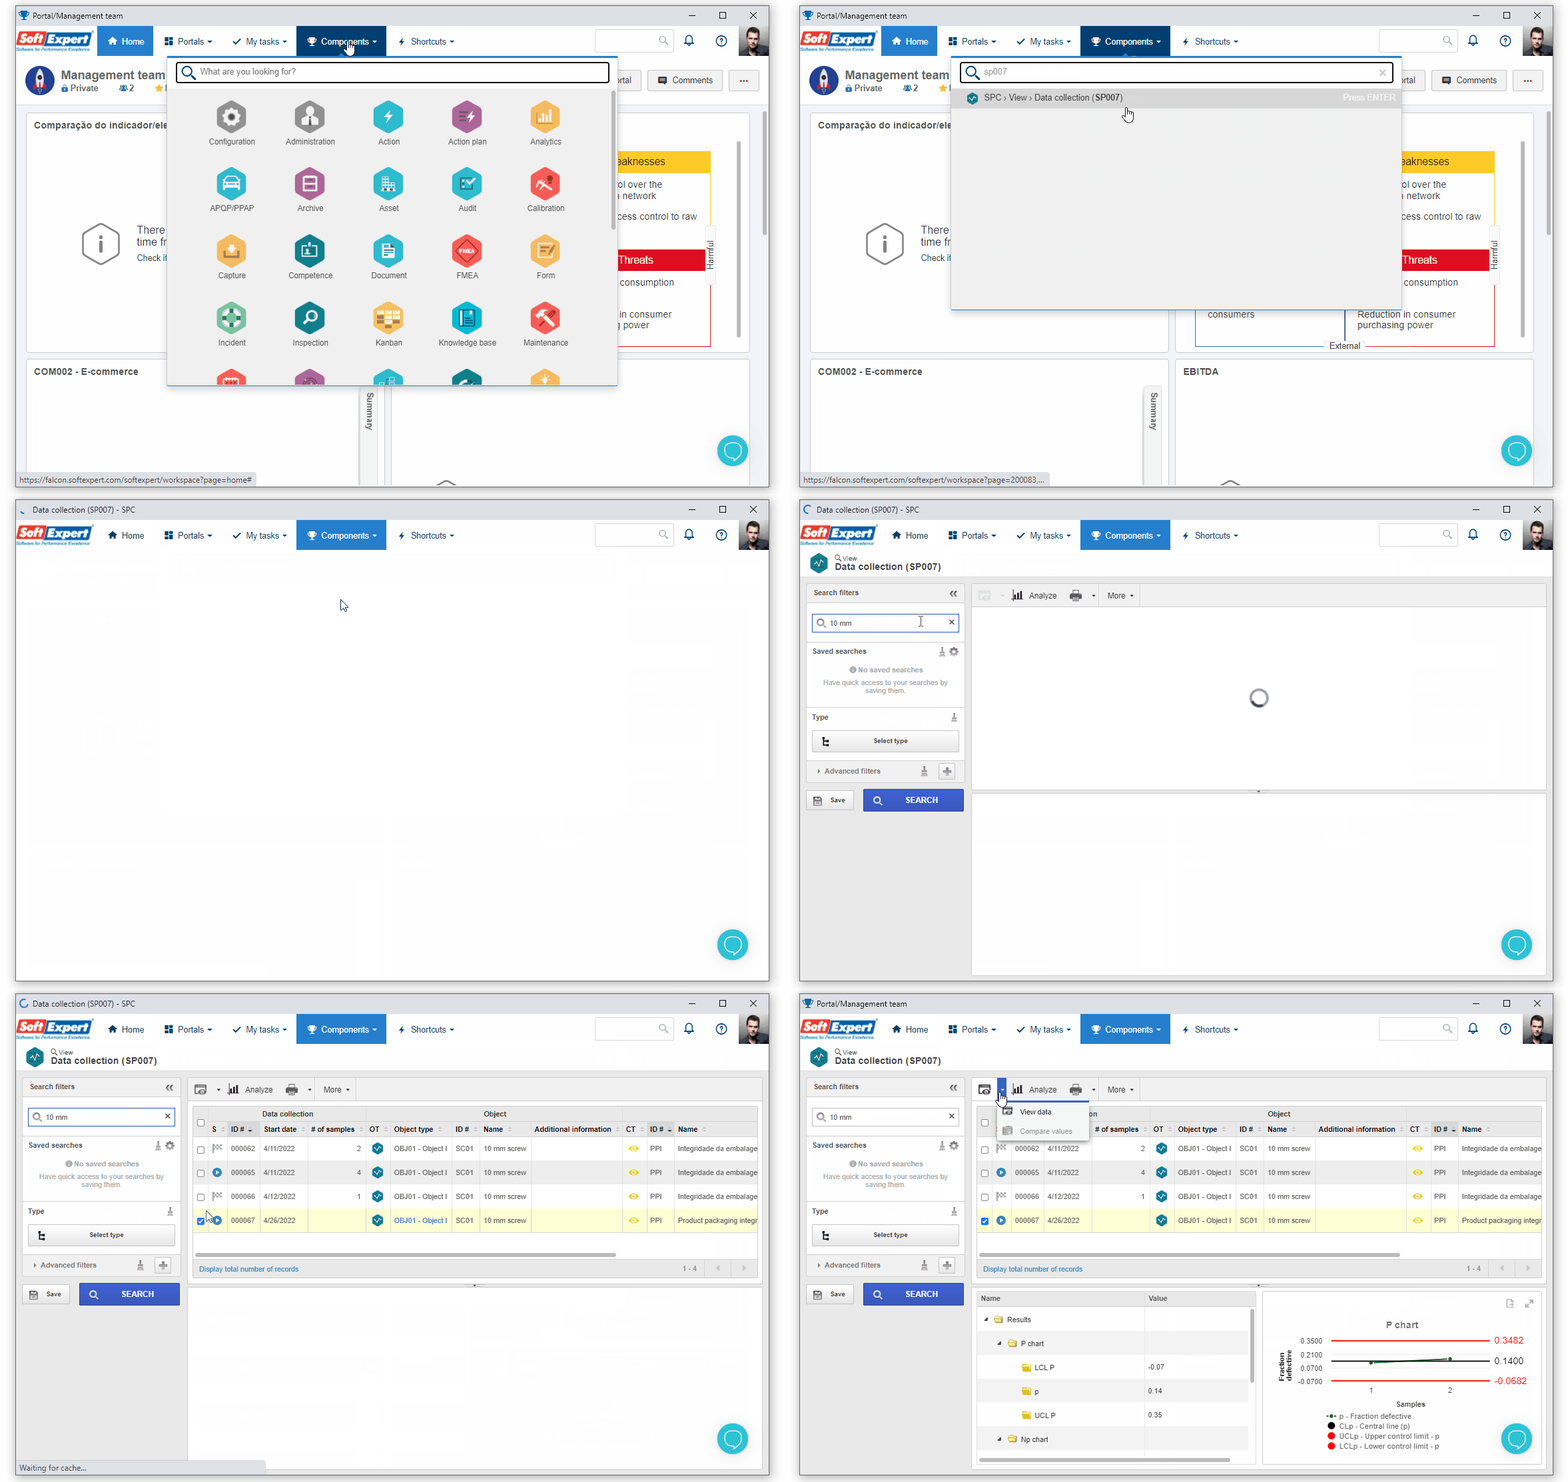
To view the collection data, access SP007 and, in the Quick search field, search for the collection created in the Create a collection from scratch topic.
Then, click on the arrow next to the  button and select the View data option.
On the upper part of the screen that will be opened, click on the Result option.
The results obtained from the samples filled out in the collection have been viewed!
