Create a collection from scratch
This article is valid until version 2.1.9 of the system. Click here to access the documentation referring to later versions.
The function of the collection in the system is to allow the planning of data collections for different study types, importing all characteristics according to the object being studied.
For that, simply follow the steps below:
1st step: Configuring the general parameters;
To successfully use SE SPC, it is necessary to configure the general parameters.
1. To do that, access the SP019 menu.
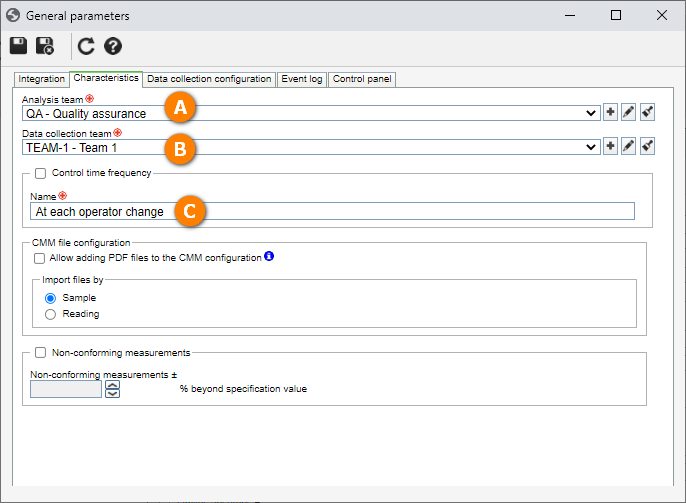
2. On the general parameters screen, access the Characteristics tab.

3. After that, fill out the following fields:
- Analysis team: Enter a team of which your user is part, created in your environment. This team will be responsible for tracking and managing the collection through the Management menus.
- Data collection team: Enter a team of which your user is part, created in your environment. This team will be responsible for filling out the collection data through the Execution menu.
If there are no recorded teams, click on the  button next to the field and, on the screen that will be displayed, enter an ID # and the name for the desired team and save.
4. Keep the Control time frequency option unchecked and, in the Name field, enter the "At every operator change" value.
Once done, click on  to save the configurations.
The configuration of the general parameters has been finished!
2nd step: Creating a characteristic
Characteristics describe the objects and can be evaluated in function of requirements determined in a design, a specification, a template, or another convenient pattern.
In the system, it is possible to create two types of characteristics: variable-type and attribute-type characteristics.
See further details in the Characteristics topic of the SE SPC manual.
For our example, we will create an attribue-type characteristic.
1. To do that, access the SP021 menu, click on the arrow next to the button and select the Attribute option:
2. On the characteristic data screen, fill out the ID # field with the "PPI" value and the Name field with the "Product packaging integrity" value.
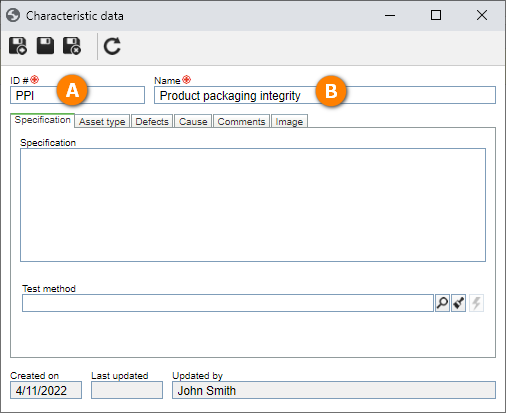
3. Once done, click on the button.
Thus, the characteristic creation has been successfully finished!
3rd step: Creating an object
Object creation aims to create all the objects produced by the organization and that will go through the SPC collection process.
1. To create an object, access the SP020 menu, click on the arrow next to the button and select the Add option:

2. On the screen that will be opened, choose an object type and click on .
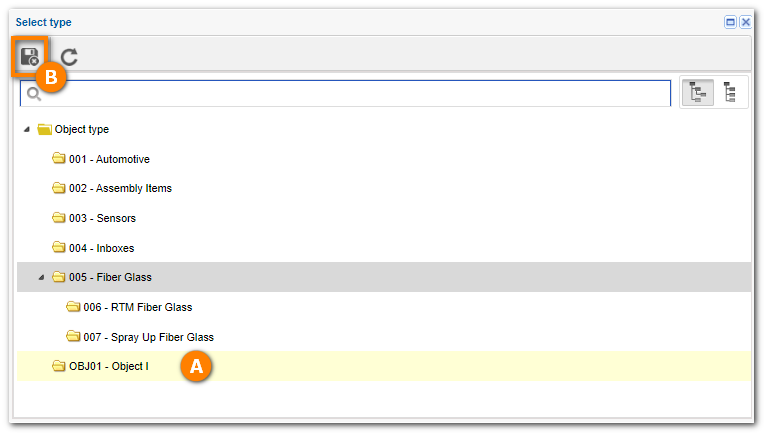
If there are no object types created, refer to the Configuring an object type section of the SE Administration.
3. On the object data screen, fill out the ID # and Name fields and, in the Icon field, select an image.
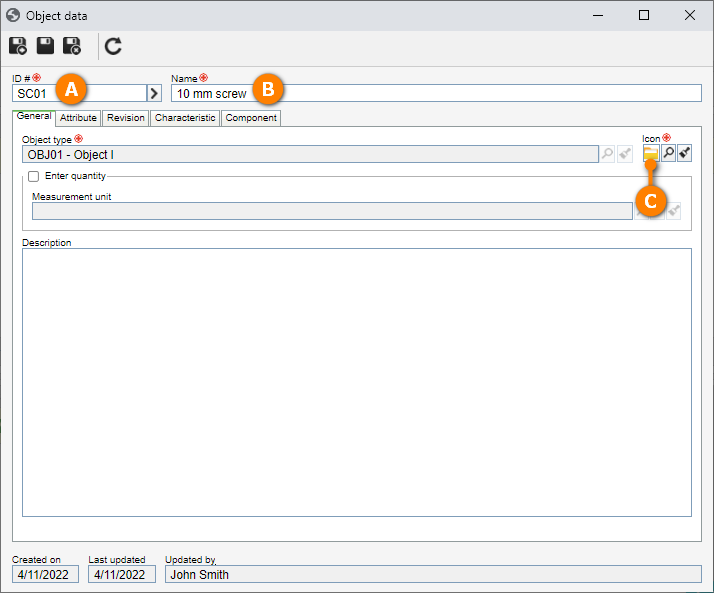
Then, click on the  button to finish the creation of the object.
4th step: Associating a characteristic with the object
Once the object is created, it is time to associate characteristics to use it in the data collection record.
1. To do that, keep the object data screen open, select the Characteristic section and click on the  button.
2. On the characteristic selection screen, select the characteristic created in the Creating a characteristic step.
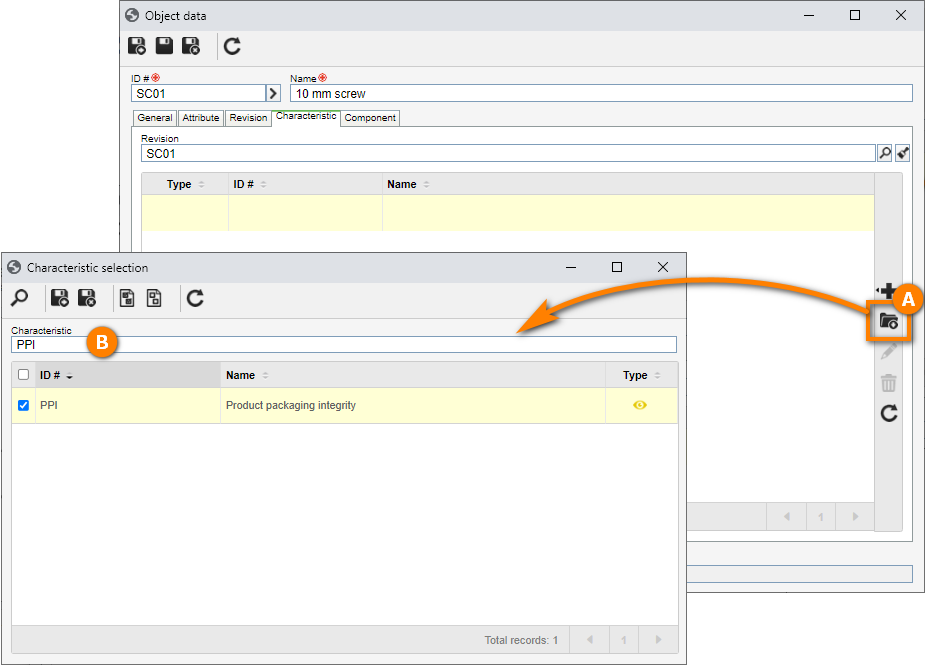
3. Once done, click on the button on the "Characteristic selection" and "Object data" screens.
5th step: Releasing the object revision
By releasing the revision of an object, it will be released.
To release the object, in the list of records of the Object (SP020) menu, locate and select the desired object in the second quadrant list of records and click on the  button on the third quadrant toolbar.
The object has been released!
To perform changes after the released, it is necessary to open a new revision.
6th step: Planning the collection
After the object is released, the collection can be planned.
To do that, access the SP003 menu, click on the arrow next to the button and select the New option.

In the data collection configuration data screen, the Data collection # field will automatically be filled out with a sequential number by the system.
In the Start date field, select the desired date to start the collection planning.
For the Type of object to be collected field, keep the "Free object" option selected.
Finally, select the object created in the Creating an object step. Thus, the Revision field will automatically be filled out.
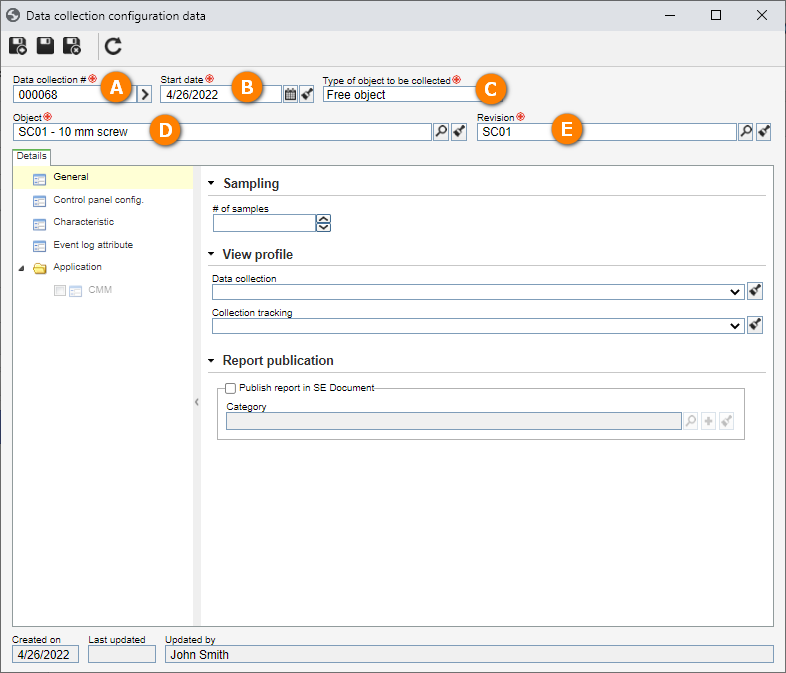
Then, click on .
The SPC collection has been recorded!