Create a requirement
Requirements related to the organization aim to comply with the rules and regulations established for your business.
To create a requirement, simply follow the steps below:
1st step: Adding a reference requirement
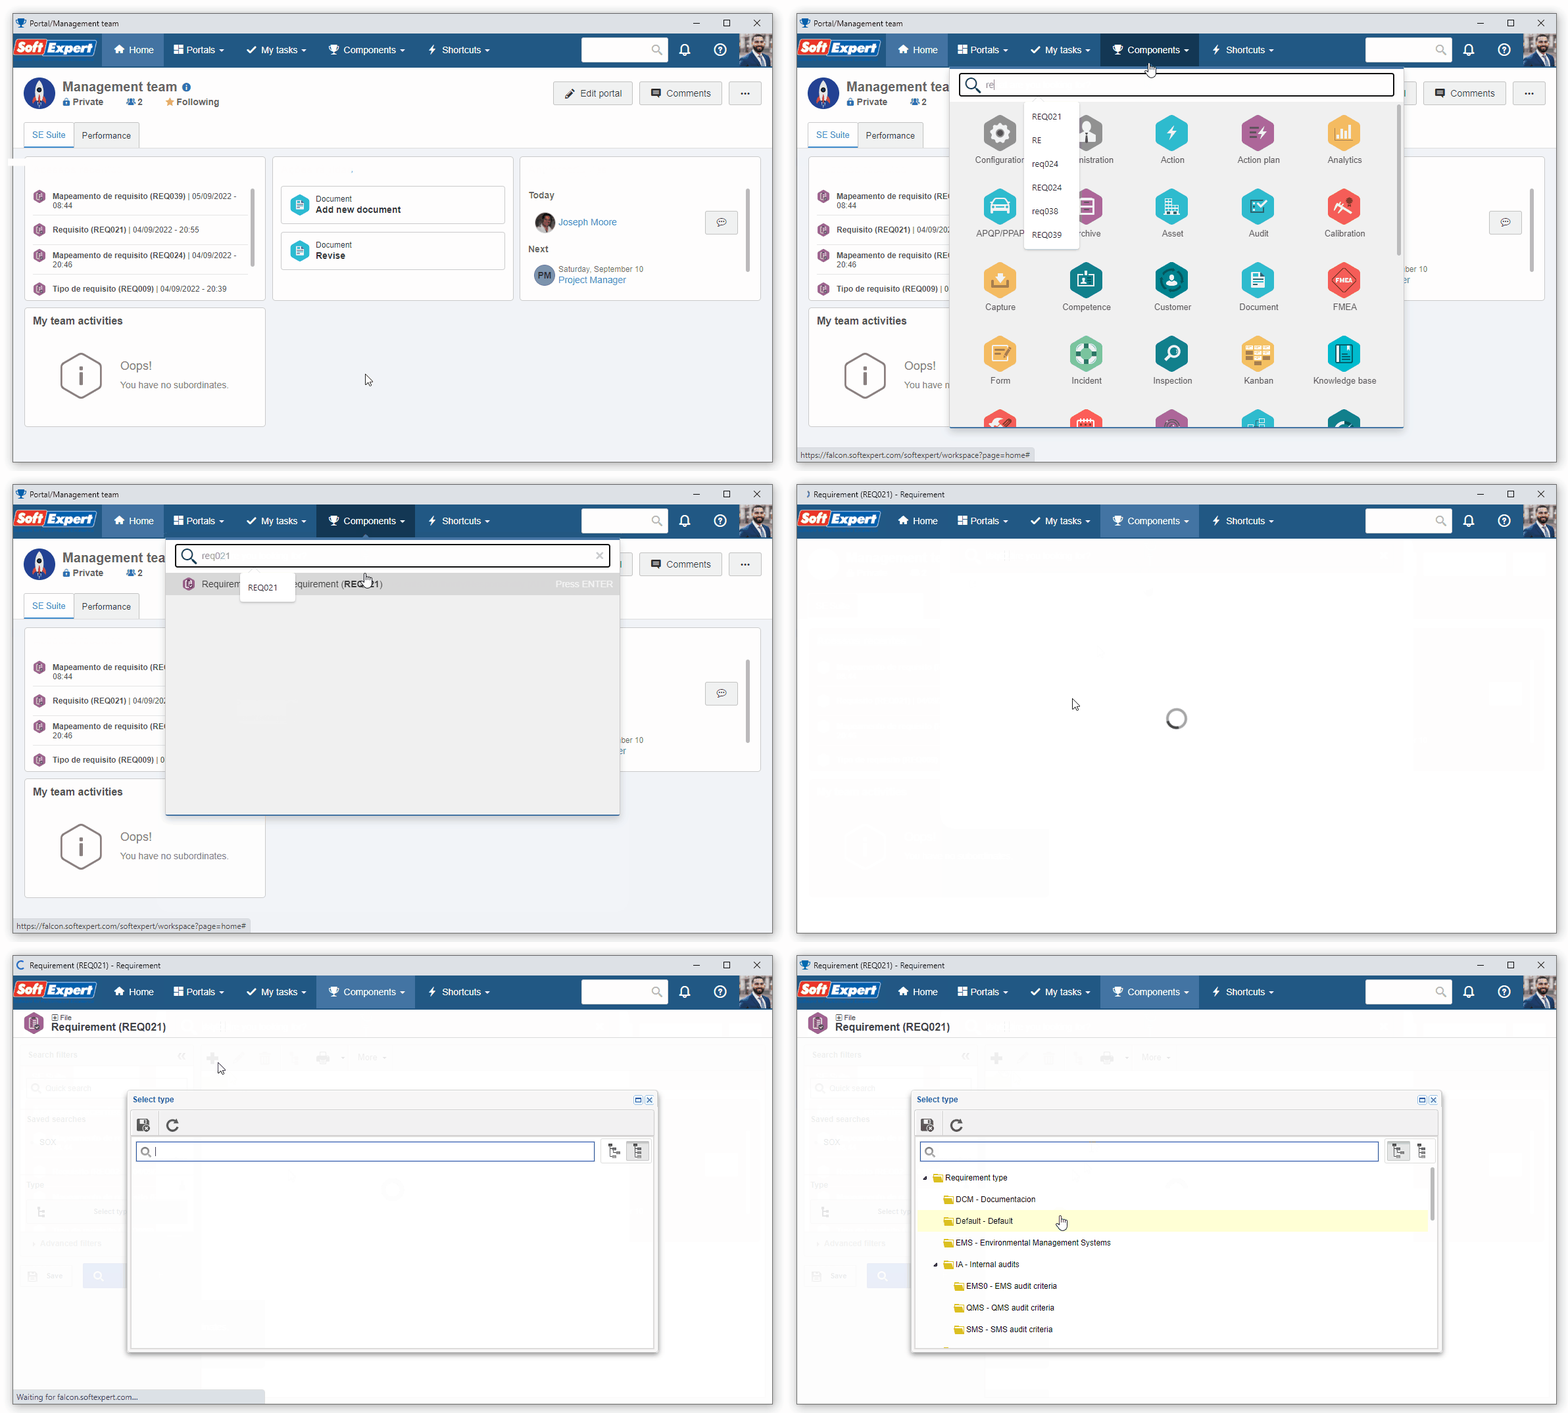
To add a reference requirement, access the File > Requirement menu (REQ021), click on the  button, and select the "Default" default type.
Even if it is the first time in which the user is creating a requirement, the system has a default requirement type record; thus, it is not necessary to create a type to create a requirement.
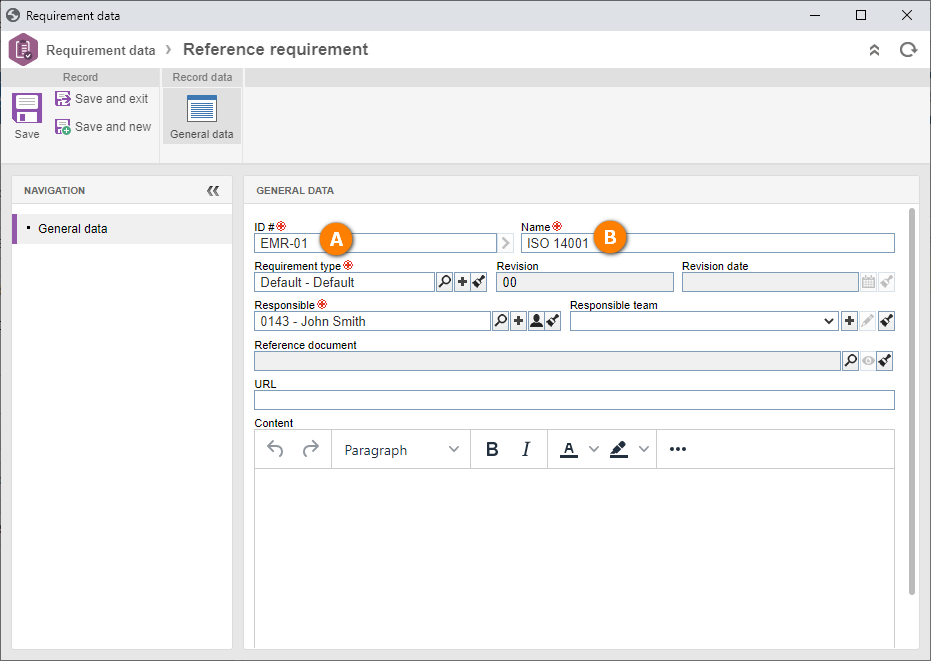
On the screen that will open, fill in the ID # field with "EMR" and the Name field with "ISO 14001".
After that, click on the Save and exit button.
Done. We have successfully added a requirement!
2nd step: Creating a requirement structure
When the requirement has a structure, such as ISO regulations or product requirements, it is possible to add levels.
To do that, still in the REQ021 menu, select the created "ISO 14001" requirement and click on the  button.
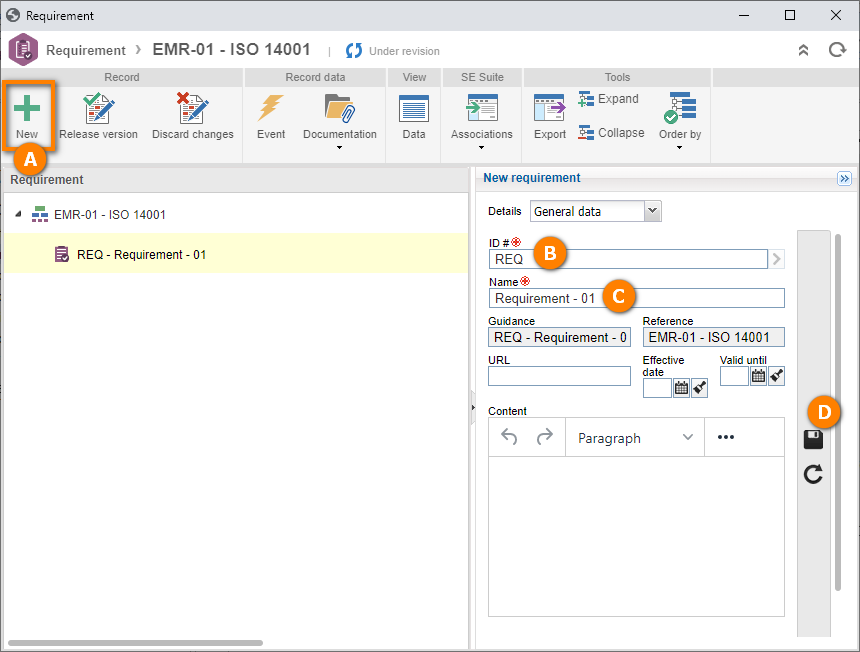
On the structure screen, it is possible to create requirements by separating them by "levels" or "chapters" as defined in compliance.
To create a lower level requirement, simply click on the New button and fill out the requirement ID # and name according to the image below.
After doing that, click on the  button.
In this way, we have successfully created a requirement structure!
3rd step: Releasing the requirement revision
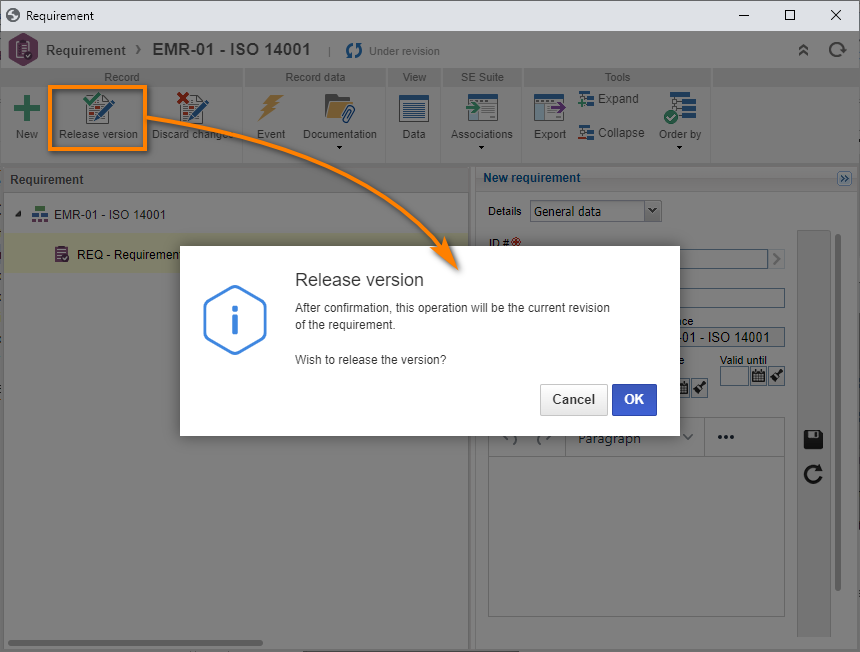
To finish the requirement creation, click on the Accept revision button and accept the system request.
Thus, we have successfully released the requirement revision!


