Plan a project
This topic will teach you how to plan a project from scratch.
To do this, simply follow the steps below:
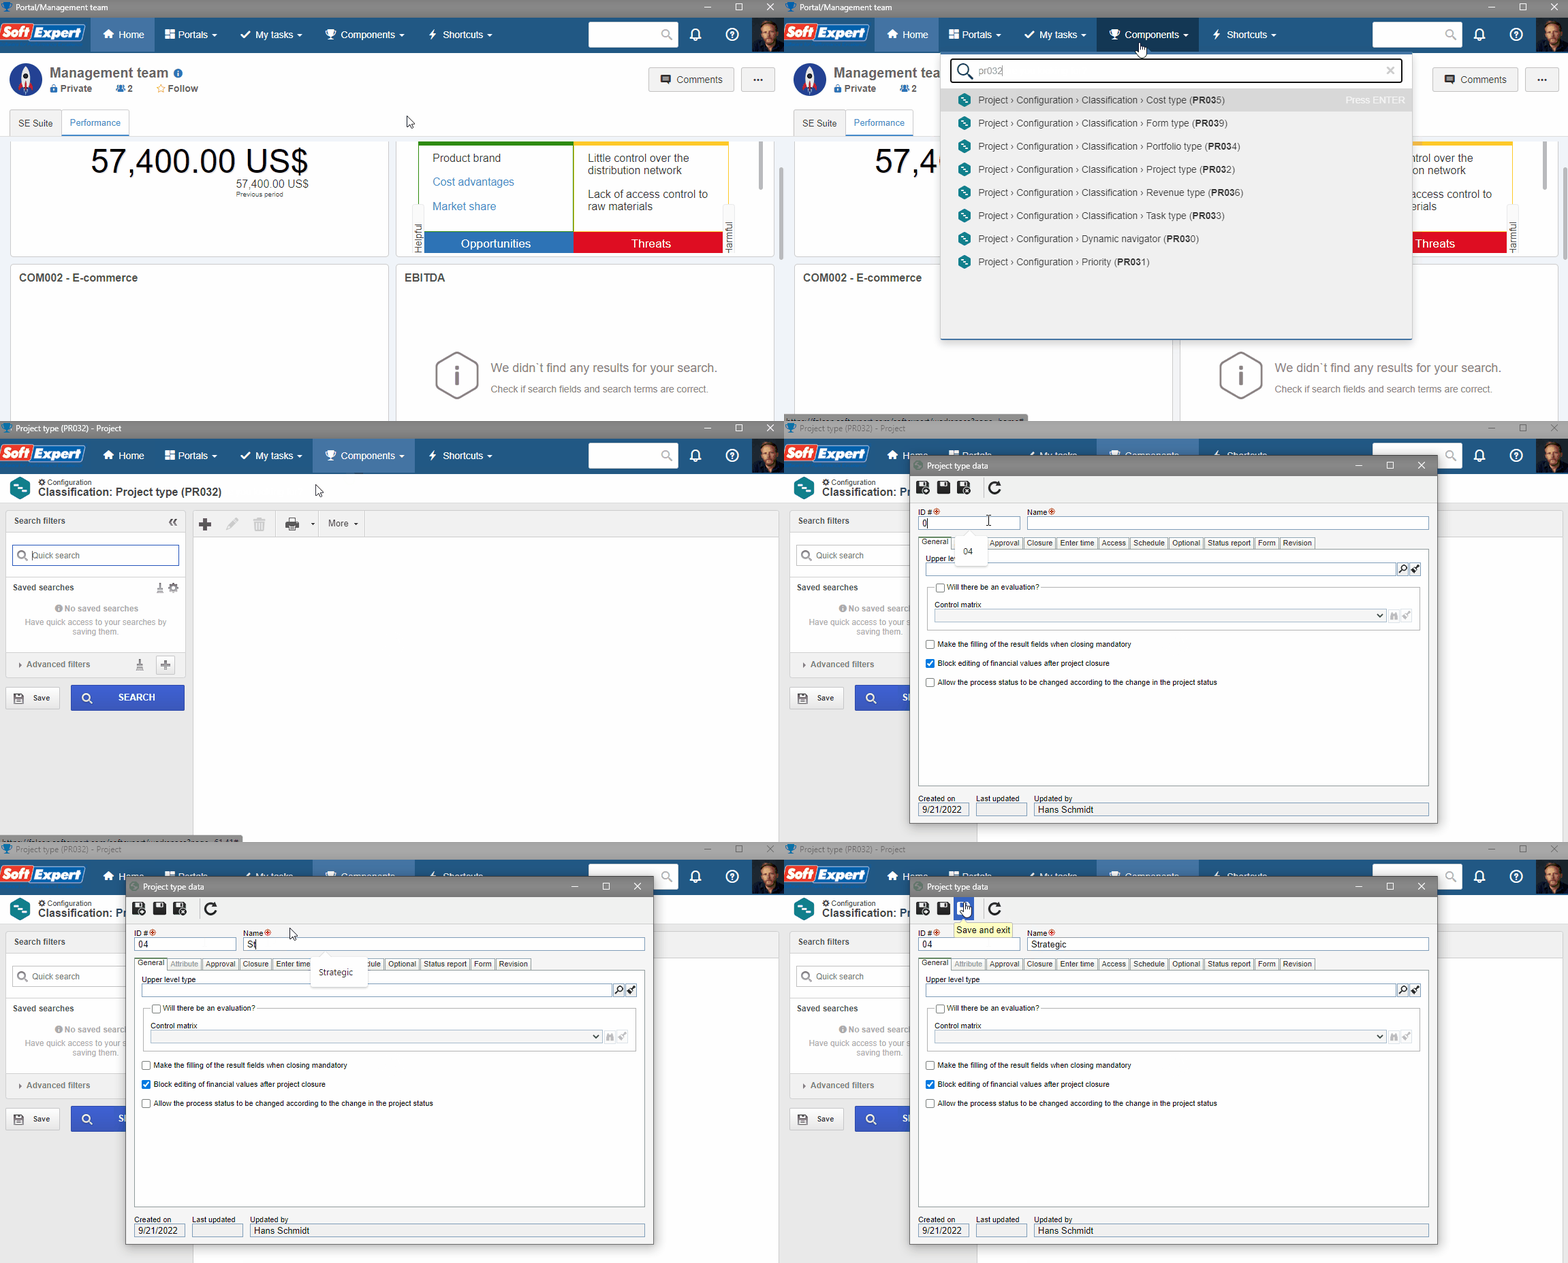
1st step: Creating a project type
Creating a project type is necessary to define some configurations and group them, enabling a better organization of the records that exist in the system.
To create a project type, access the PR032 menu and click on the  button.
On the screen that will open, fill in the ID # field with "04" and the Name field with "Strategic".
Click on the  button.
2nd step: Planning a project
Once the project type is created, we can plan the project.
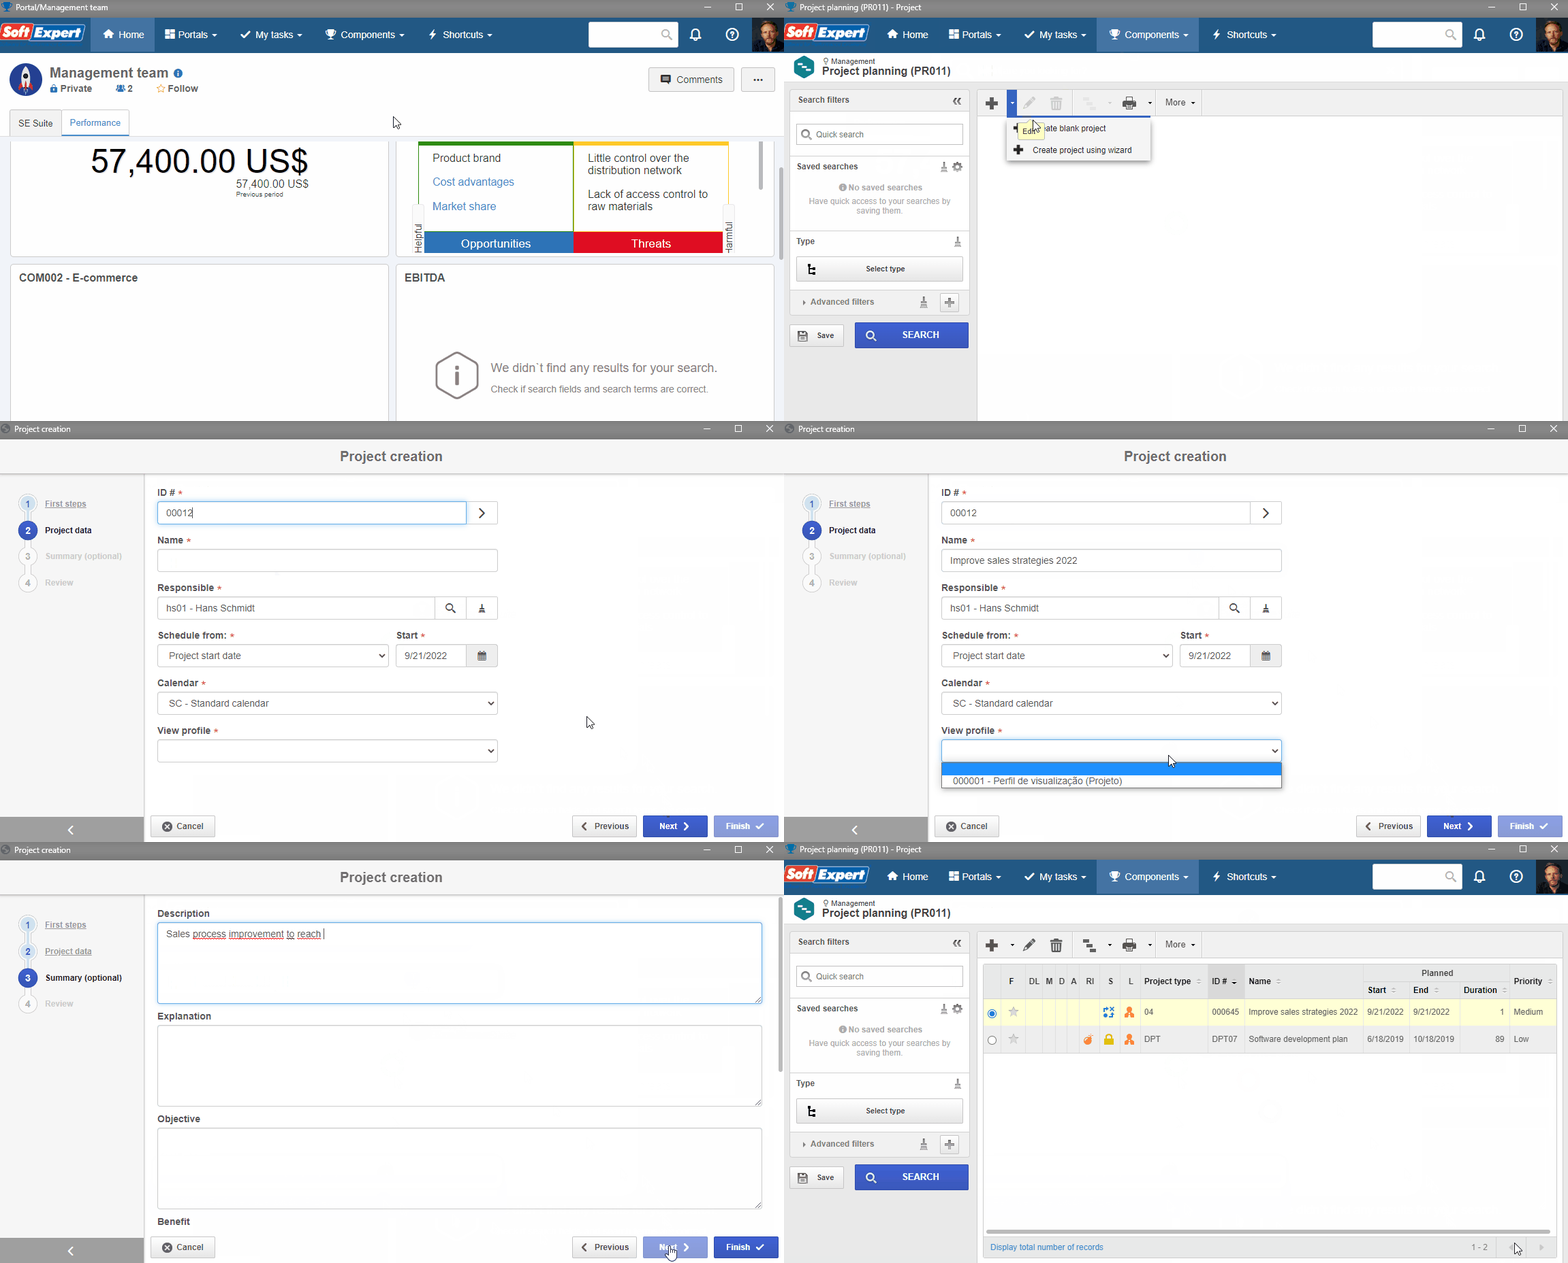
To plan the project, access the PR011 menu and click on the arrow next to the  button and on Create project using wizard.
On the screen that will open, select the project type created in the previous step.
Then, click on the Next button.
On the next step, enter "00012" for the ID #, and "Improve sales strategies 2022" for the name.
Select the default system record with the "000001" ID # in the View profile field.
Then, click on the blue Next button.
In the Description field on the Summary step, enter "Sales process improvements to reach more customers in 2022".
Click on the Finish button.
All done! The project planning is finished. Simply click on the red Close button to return to the main screen.

