How to create, start, and finish a sprint
Prerequisites
- Access to the Board and backlog (KN008) menu.
- Workspaces configured with the Scrum methodology.
Introduction
This article will present all operations that can be performed in the sprints; it covers how to create a sprint and associate tasks with it, how to start a sprint once it is configured, and, finally, how to close it when it ends.
Remember that, in order to work with sprints, the workspace must be configured with the Scrum methodology.
Creating a sprint
1. In the Vision section of the Board and backlog (KN008) menu, access the Backlog screen.
2. Select the workspace in which the sprint will be created.
3. Click on the Create > Sprint option.
4. Enter the data of this sprint, such as its name, and the planned dates and times for the start and end of its tasks. If necessary, describe the Objectives of the sprint.
5. Click on the Save option.
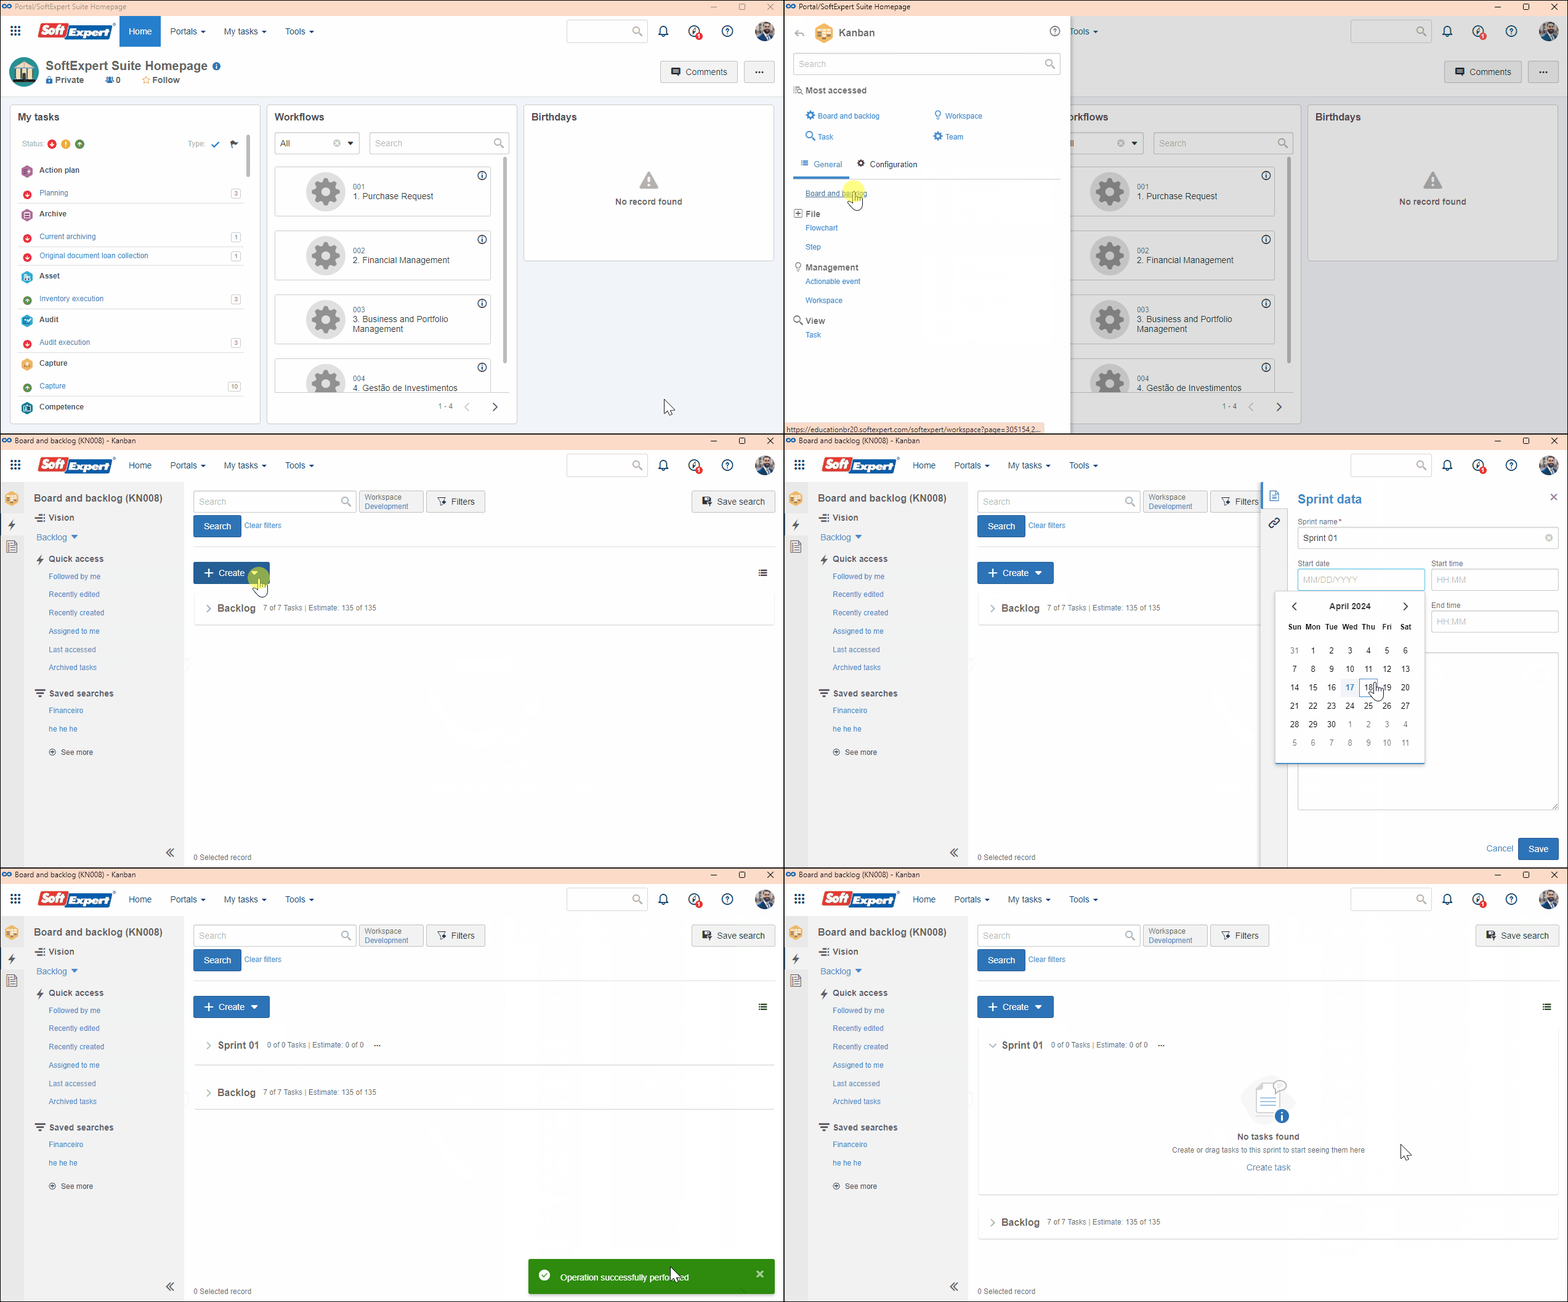
Once this is done, the sprint that has just been created will be available in the backlog of the workspace of which it is part and will be ready to have tasks associated.
Starting the sprint
With the sprint created and its tasks associated, it can be started. To this end, take the following steps:
1. Access the Backlog screen from the Board and backlog (KN008) menu.
2. Find the sprint that will be started and click on the  button.
3. Click on the Start sprint option.
4. The system will ask if you really wish to perform this action. If there is anything pending, you will be requested to adjust the sprint before starting it.
5. Confirm the operation.
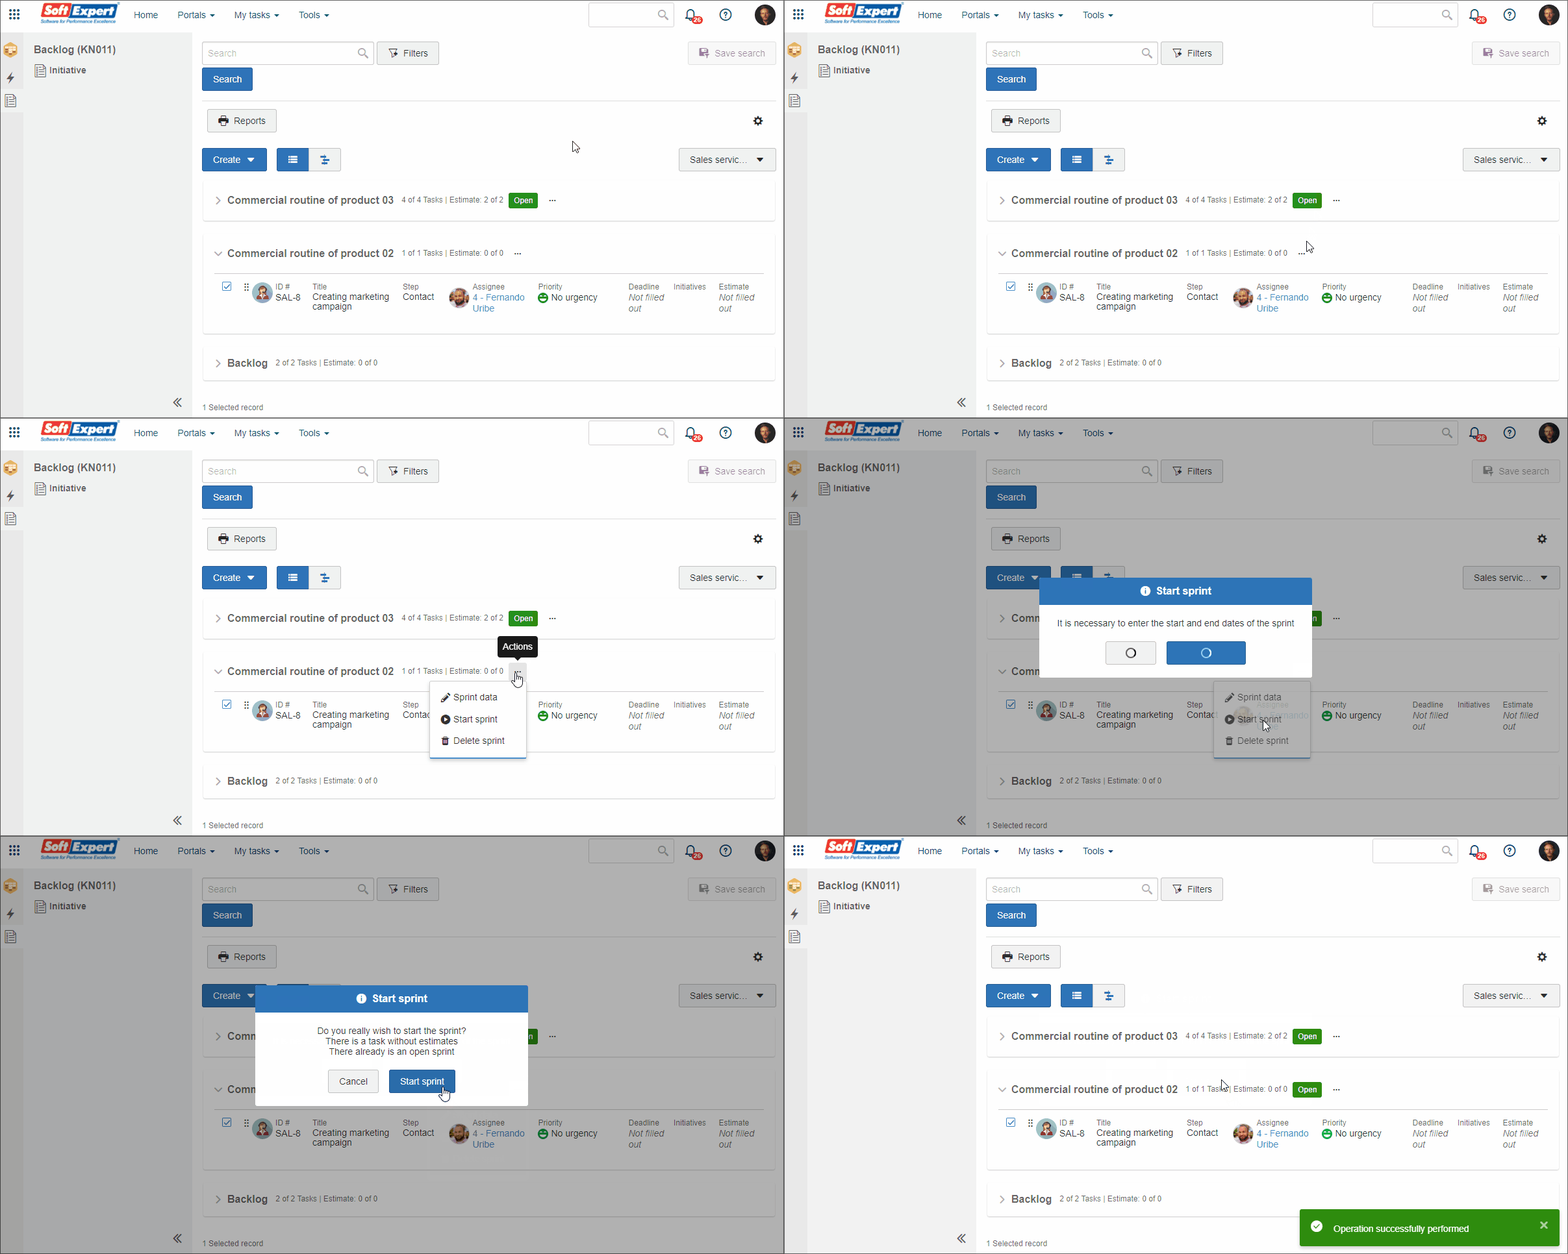
Once this is done, the sprint will be active. Thus, the tasks of the started sprint will be enabled to be executed by their assignees on the Board screen.
Closing an active sprint
1. Access the Backlog screen.
2. In the active sprint, click on the  button.
3. Click on Close sprint.
4. If a task has not been finished, the system will generate a notification. A list of unfinished tasks will be displayed on the screen.
5. Unfinished tasks can be moved to another existing sprint. In this case, select the other sprint, then click on OK to confirm the closure of the current sprint.

At this point, the sprint will be closed.
The sprint can also be closed by the manager on the Board screen.
To do so, simply click on the Close sprint option found in the upper part of the screen of this menu.
Conclusion
After the sprint is created, it must have tasks associated with it. See how to do that in the Creating tasks via backlog article.
