Defining a task flow in the workspace
Prerequisites
- Access to the Management > Workspace (KN009) menu.
- Configured flowchart.
- Configured workspace.
Introduction
After creating the workspace, we must define the flow that its tasks will follow.
See how to do that in this article.
Associating task type and flowchart
1. Access the Management > Workspace (KN009) menu.
2. Select the workspace and click on  .
.
3. Click on the Task flow option.
4. Click on the  button to define a task flow.
5. In the Task type field, click on  to select a task type already created. If you prefer, click on the
  button, create a new task type and associate it with the flow.
See how to create a task type:
You will be able to perform this operation only if you have access to the Configuration > Task type (KN005) menu.
Take the following steps to create a task type:
1. Access the Configuration > Task type (KN005) menu.
2. Click on the  button.
3. On the screen that will open, select an icon to represent the task type.
4. Give the task type a name.
5. Click on  .
.
6. Click on the  button to select a flowchart already created. If you wish, click on the
  button to create a new flow and associate it with the task type in the workspace. See the details of this inclusion in the Defining a flowchart article.
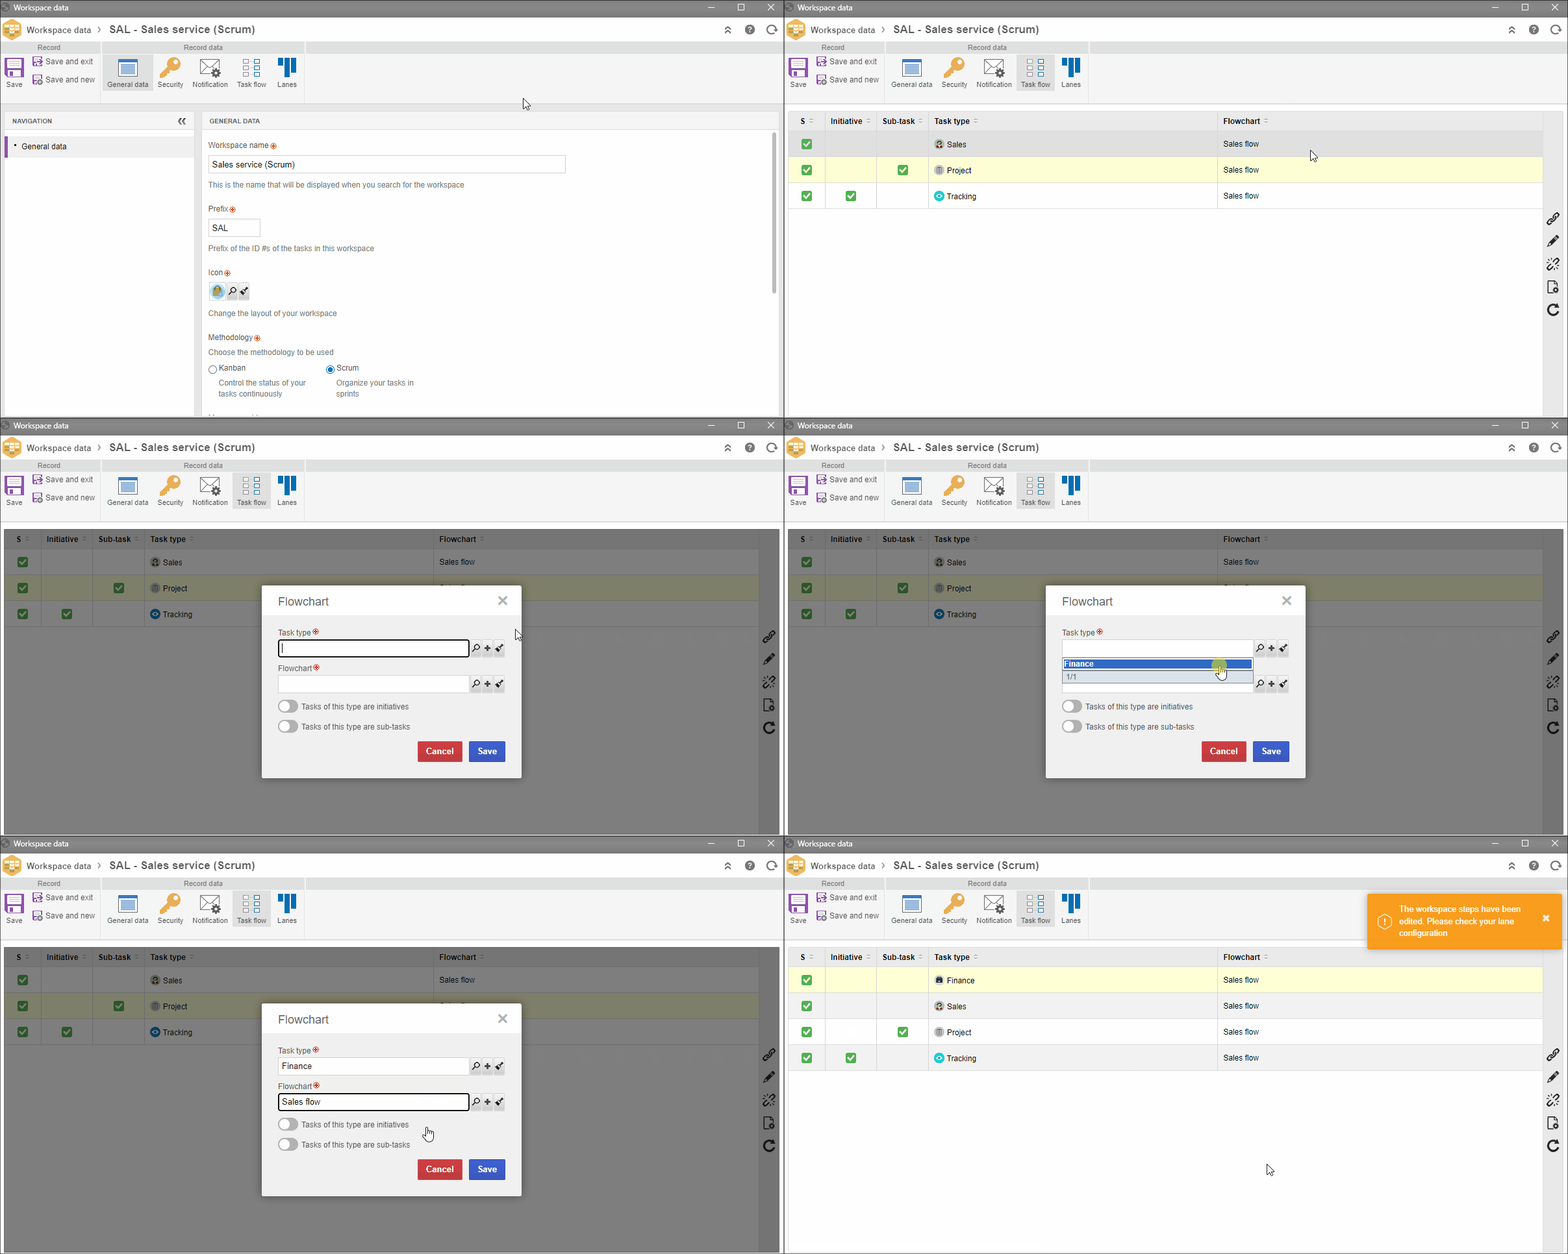
7. Click on Save. Repeat the steps above to add all task types that the workspace must have, as well as their flows.
Changing the workspace flow
If you want to change the flow of a task type, you must make the steps from the old flow correspond to the new ones.
See how to do it:
1. Access the Task flow option, on the workspace data screen.
2. Select the task type.
3. Click on the  button.
4. Click on the  button to search for the created flowchart. If you wish, click on the
  button to create a new flow and associate it with the task type in the workspace. See the details of this inclusion in the Defining a flowchart article.
5. Then, in the New step field, select the new-flow step to which the tasks that are in the old-flow step will be sent. Repeat this procedure for all listed steps.
6. Click on Save.
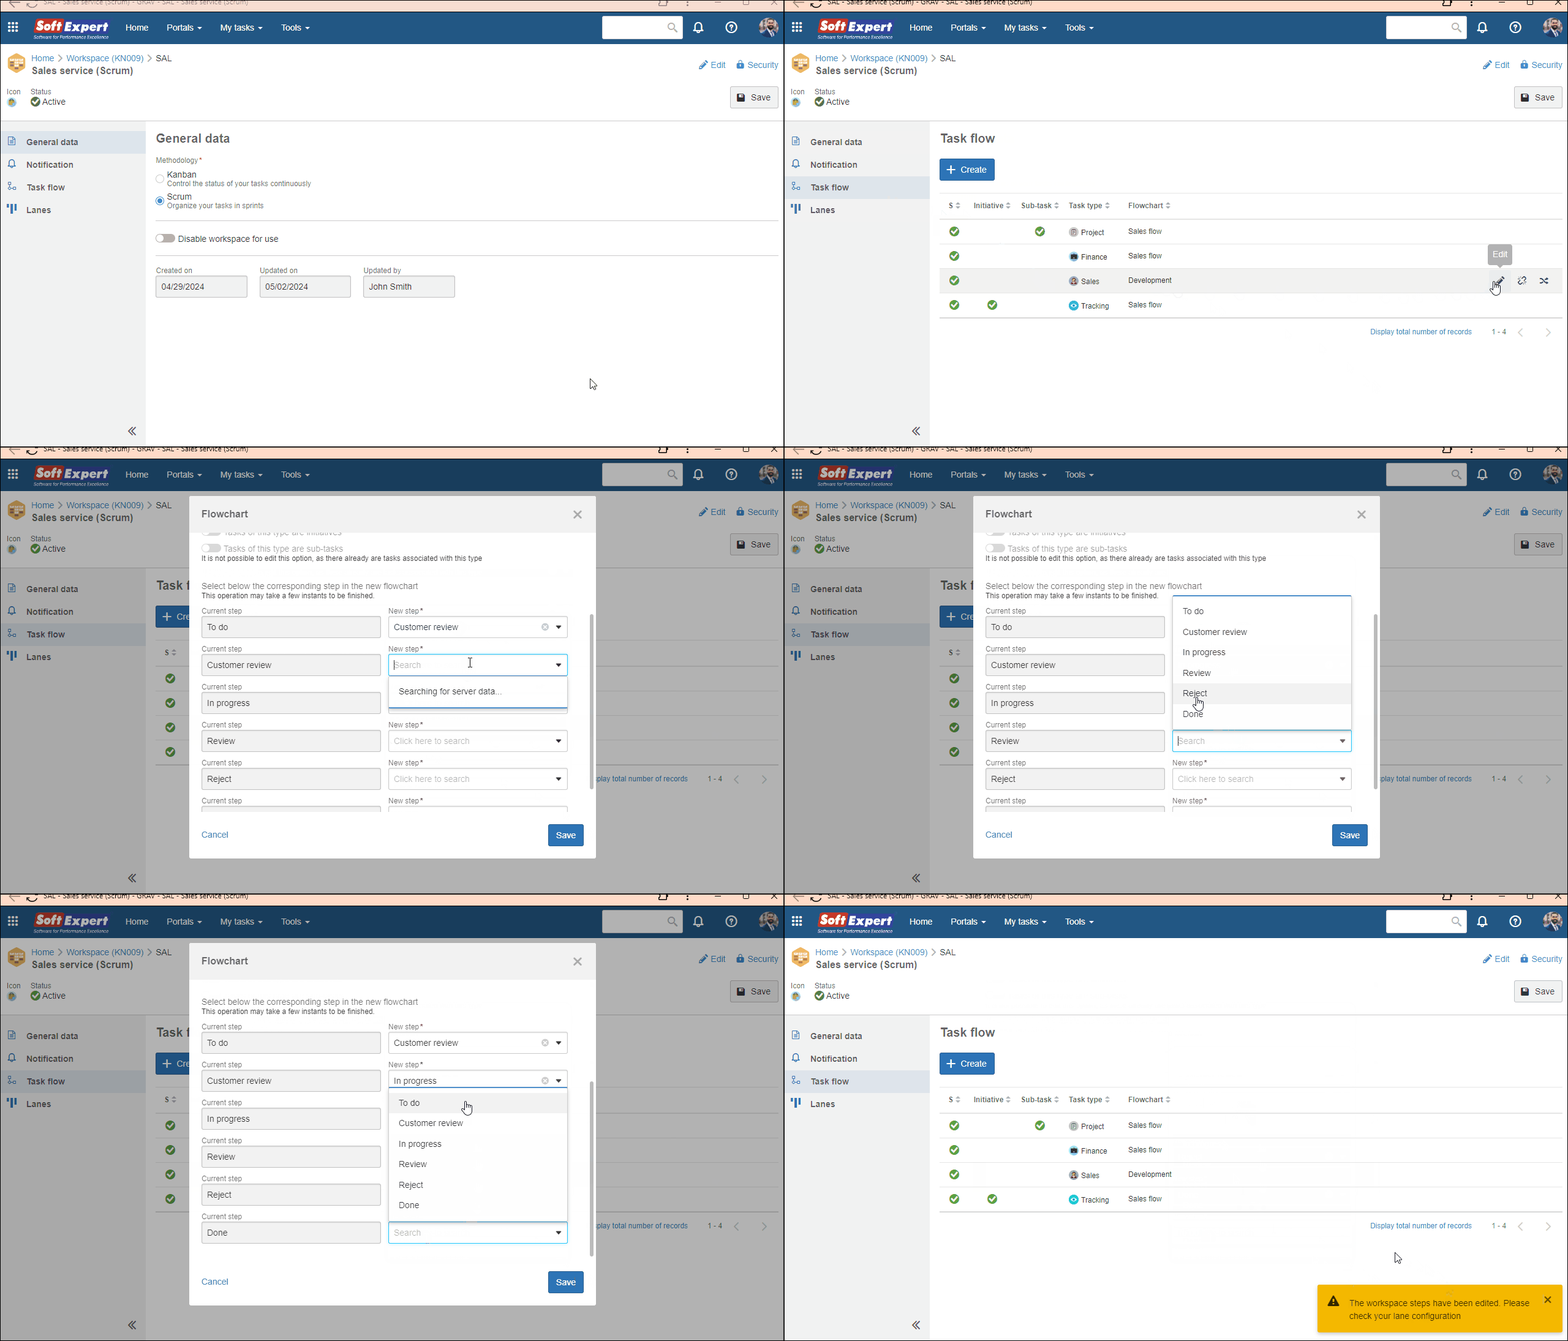
Once this is done, the new flowchart will be applied to all tasks of that type, and its tasks will be found in each of the steps selected in this change.
Conclusion
Thus, the flow of the tasks belonging to this workspace will be defined. Next, see how to define the workspace lanes in the Defining board lanes in the workspace article.
