Configuring a timesheet in the category
Prerequisites
- Access to the Configuration > Category (PL020) menu.
- Category with the General tab configured.
Introduction
Timesheets are used for responsible parties to enter the time spent on the actions of a category, whether they are isolated or plan actions.
These configurations will only work correctly if the SoftExpert Time control component is part of the solutions acquired by your organization.
Configuring a timesheet
1. Access the Configuration > Category (PL020) menu.
2. Select the desired category and click on the  button.
3. Click on the Timesheet tab.
4. Check the Allow timesheet option.
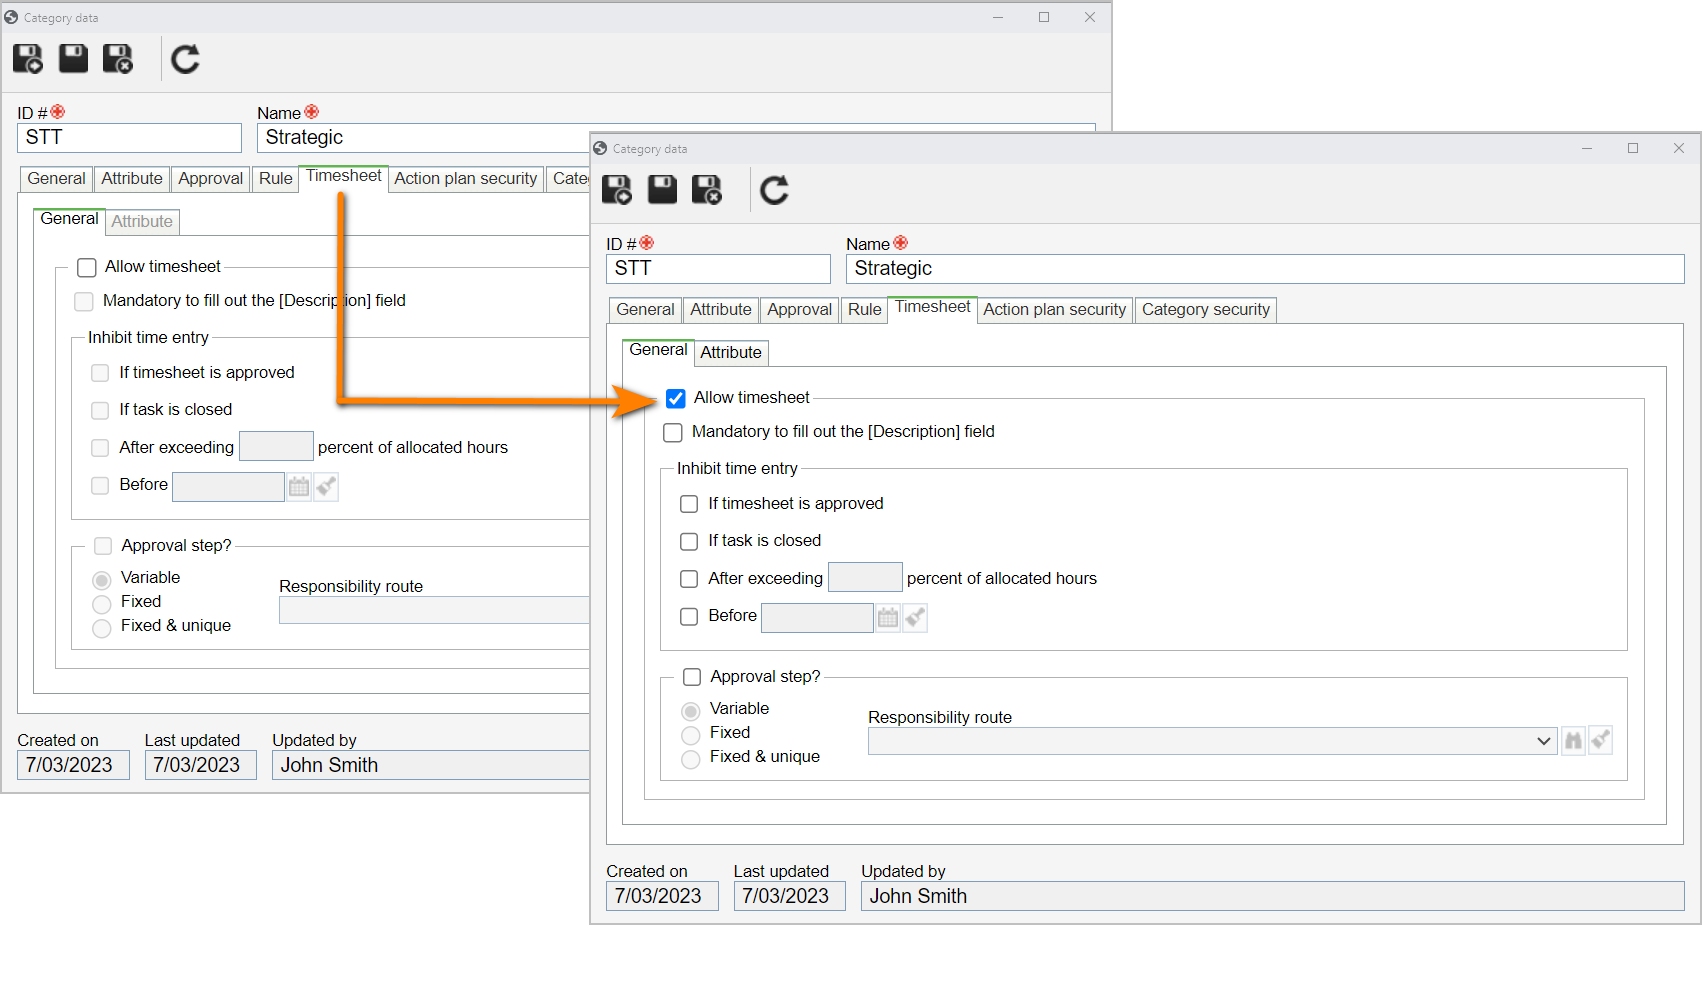
5. Then, in the General tab, check the desired options to define when the timesheet will be blocked:
Options
| Approved | The timesheet will be blocked after the approval of the time entered for the actions. |
| After finishing the task | The timesheet will be blocked when actions are closed. |
| If the hours entered exceed the planned hours by ___ percent | The timesheet will be blocked when exceeding a percentage of the total hours allocated (planned) for the resources (responsible parties) in the project task. In the field that will be enabled, enter the percentage of exceeding time as of which the timesheet will be blocked. |
| Before | The timesheet for the actions of this category will be blocked before a certain date. In the field that will be enabled, enter the date before which the timesheet will be blocked. |
| Mandatory to fill out the [Description] field] | When entering time in the actions of this category, it will be mandatory to fill out the Description field. |
6. If you wish for the time entered in the category actions to go through approval, check the Approval step? option.
Timesheets are approved through the "Timesheet approval" task in the SoftExpert Time Control component.
7. Then, check the desired route type and select a route in the available field. For further details on route types and their configurations, refer to the Configuring the responsibility route article.
8. After doing that, click on the  button on the main screen.
Conclusion
Thus, the action plans and isolated actions of the category can now use timesheets.
Timesheets can be filled out through the Tools > Timesheet menu. On the data screen of an action, it will be possible to view its timesheet configurations via the Configurations > Enter time section and to verify the entered time via the Configurations > Actual time section.