Create an input event
This topic will teach you to create an input event.
To do that, simply follow the steps below:
1st step: Creating an input event
Creating an input event means one or more objects will enter the storeroom, that is, a stock of those objects will be created.
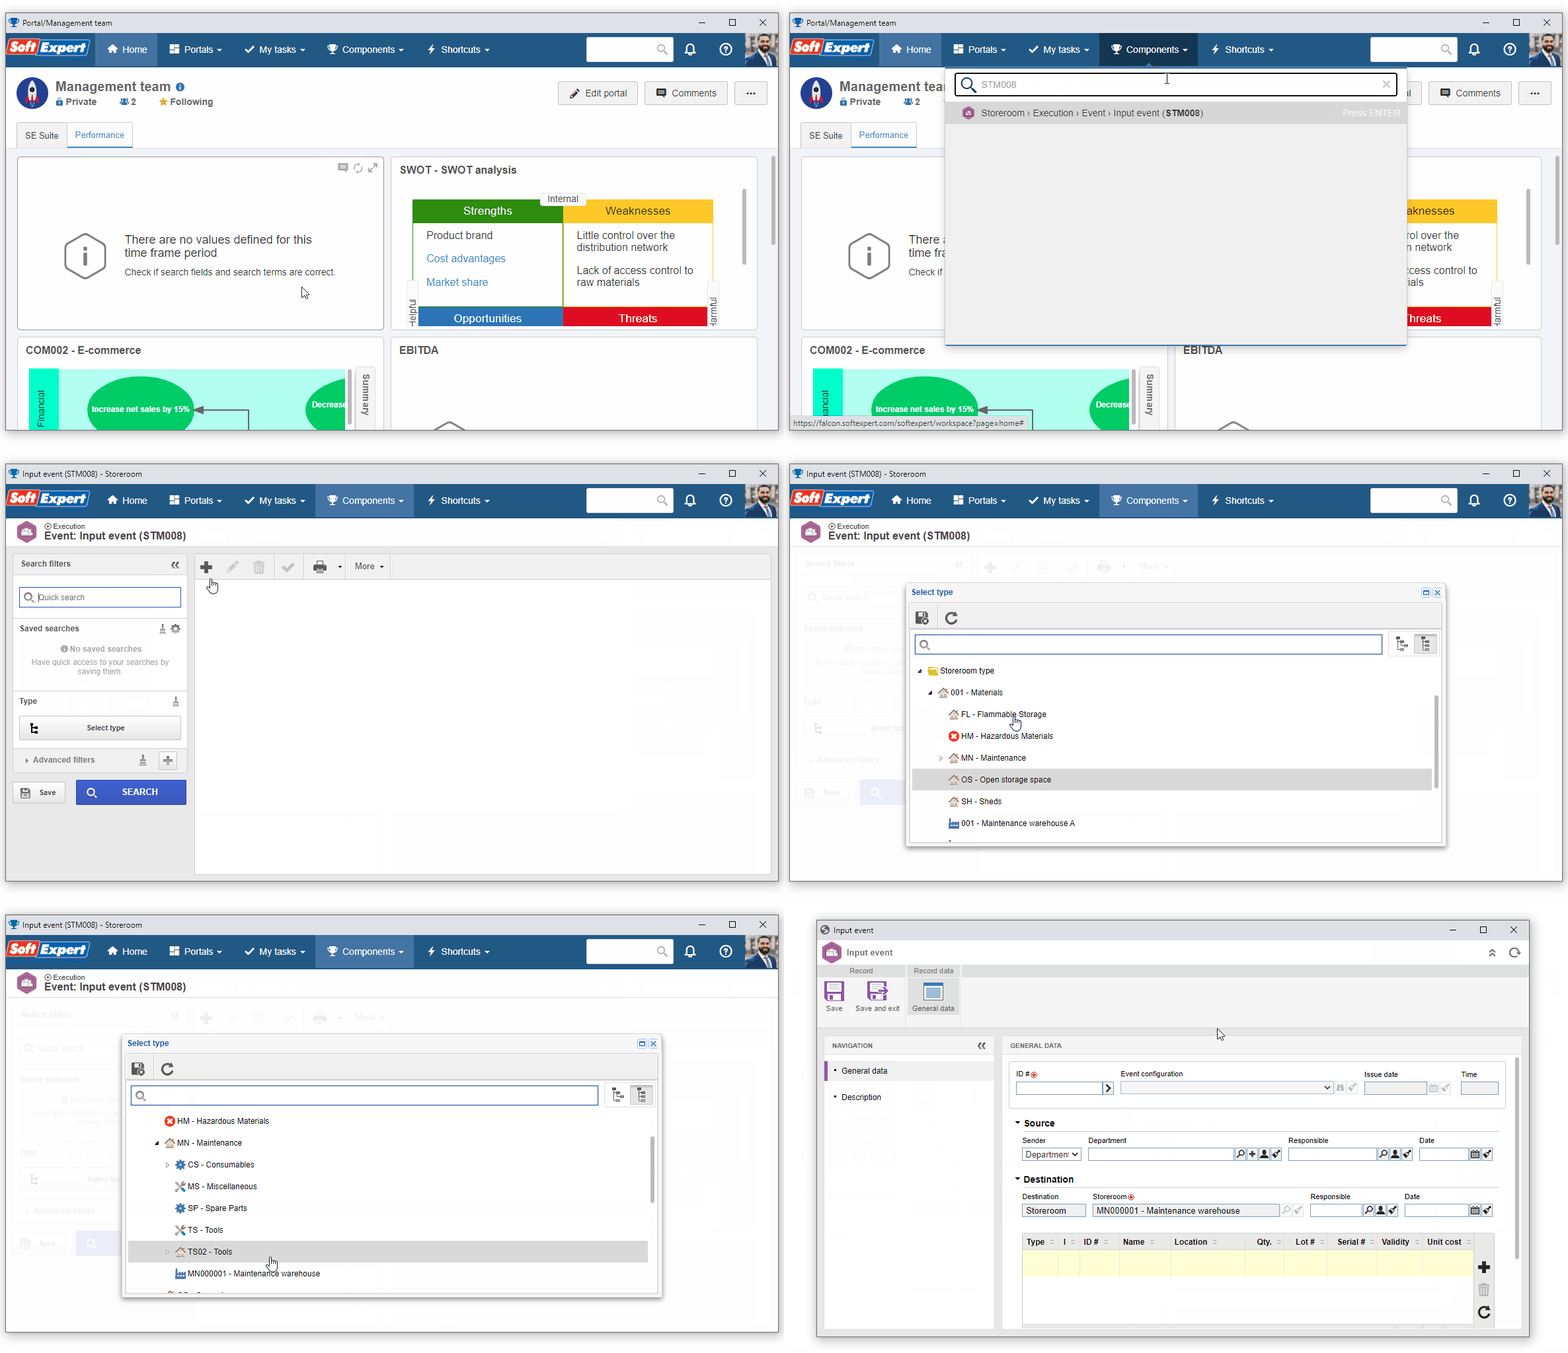
To create an input event, access the STM008 menu.
After doing that, click on the  button and select the "Maintenance warehouse" storeroom created previously.

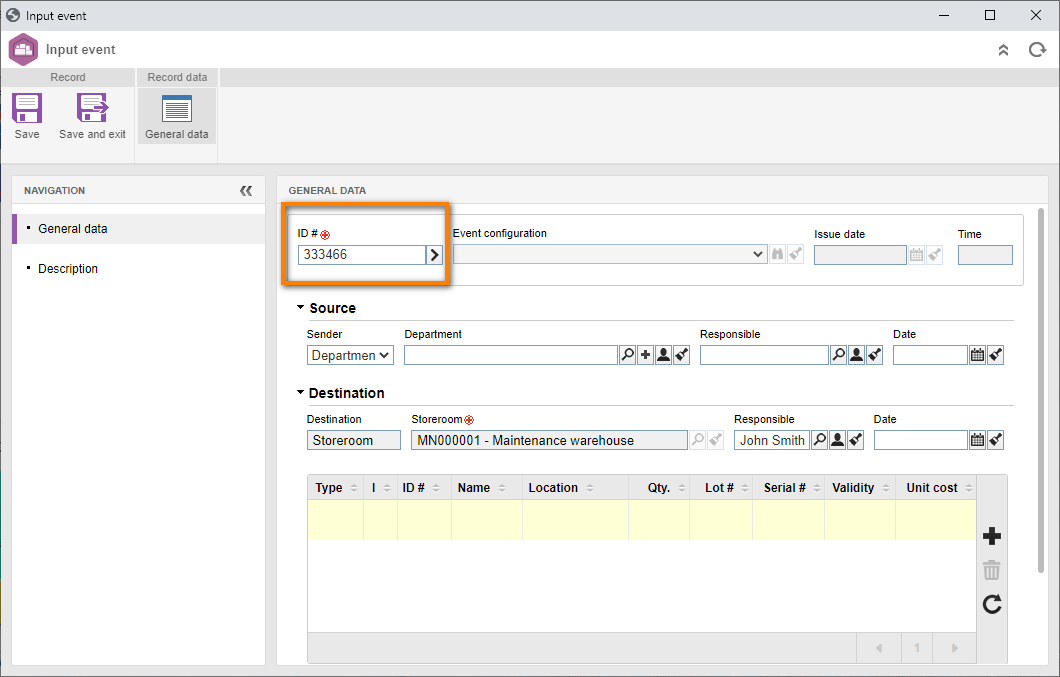
On the screen that will be opened, click on the arrow next to the ID # field to automatically generate the ID #.
Then, select the  button.

On the screen that will be displayed, fill out the following fields:
-
Object: Select the item that is entering the stock. If there are none, click on the
 button next to the field.
On the screen that will be opened, enter an ID # and a name for the object and save.
- Storage place: Fill out the storeroom location in which the object will be stored. If there are no locations created, the system will fill it out with the storeroom itself.
- Quantity: Fill out the value to indicate the quantity of the object entering the storeroom.
- Unit cost: Fill out this field to indicate the unit value of each item.

Once done, click on Save.
To send the event to the next step, simply click on the Save and exit button and on the OK button to confirm the action.
The input event was successfully created!
2nd step: Viewing the stock
Once the event has been performed, it is possible to view the number of objects in the stock.
The stock is updated whenever there are input events, output events, balance adjustments, transfers, processing, and transport.
To view the stock, access the View > Stock (STM029) menu.
Then, click on the Select type button, select the type that classifies the storeroom, and click on the Search button.
After doing that, click on the  button.

On the list of records, it is possible to successfully view all objects in stock in the storeroom, their quantity, their full cost, and their unit costs.