Criate a storeroom
The SoftExpert Storeroom component is directly linked to at least one of these three components: SoftExpert Supply, SoftExpert PDM, and SoftExpert Waste.
That is, the storeroom controls the input and output of supplies, items, and wastes; thus, before performing any events, it is necessary to properly create these objects.
For a better utilization of this quick guide, we recommend previously reading and following the steps of the SoftExpert Waste, SoftExpert Supply, and SoftExpert PDM quick guides.
To create a storeroom, follow the steps below:
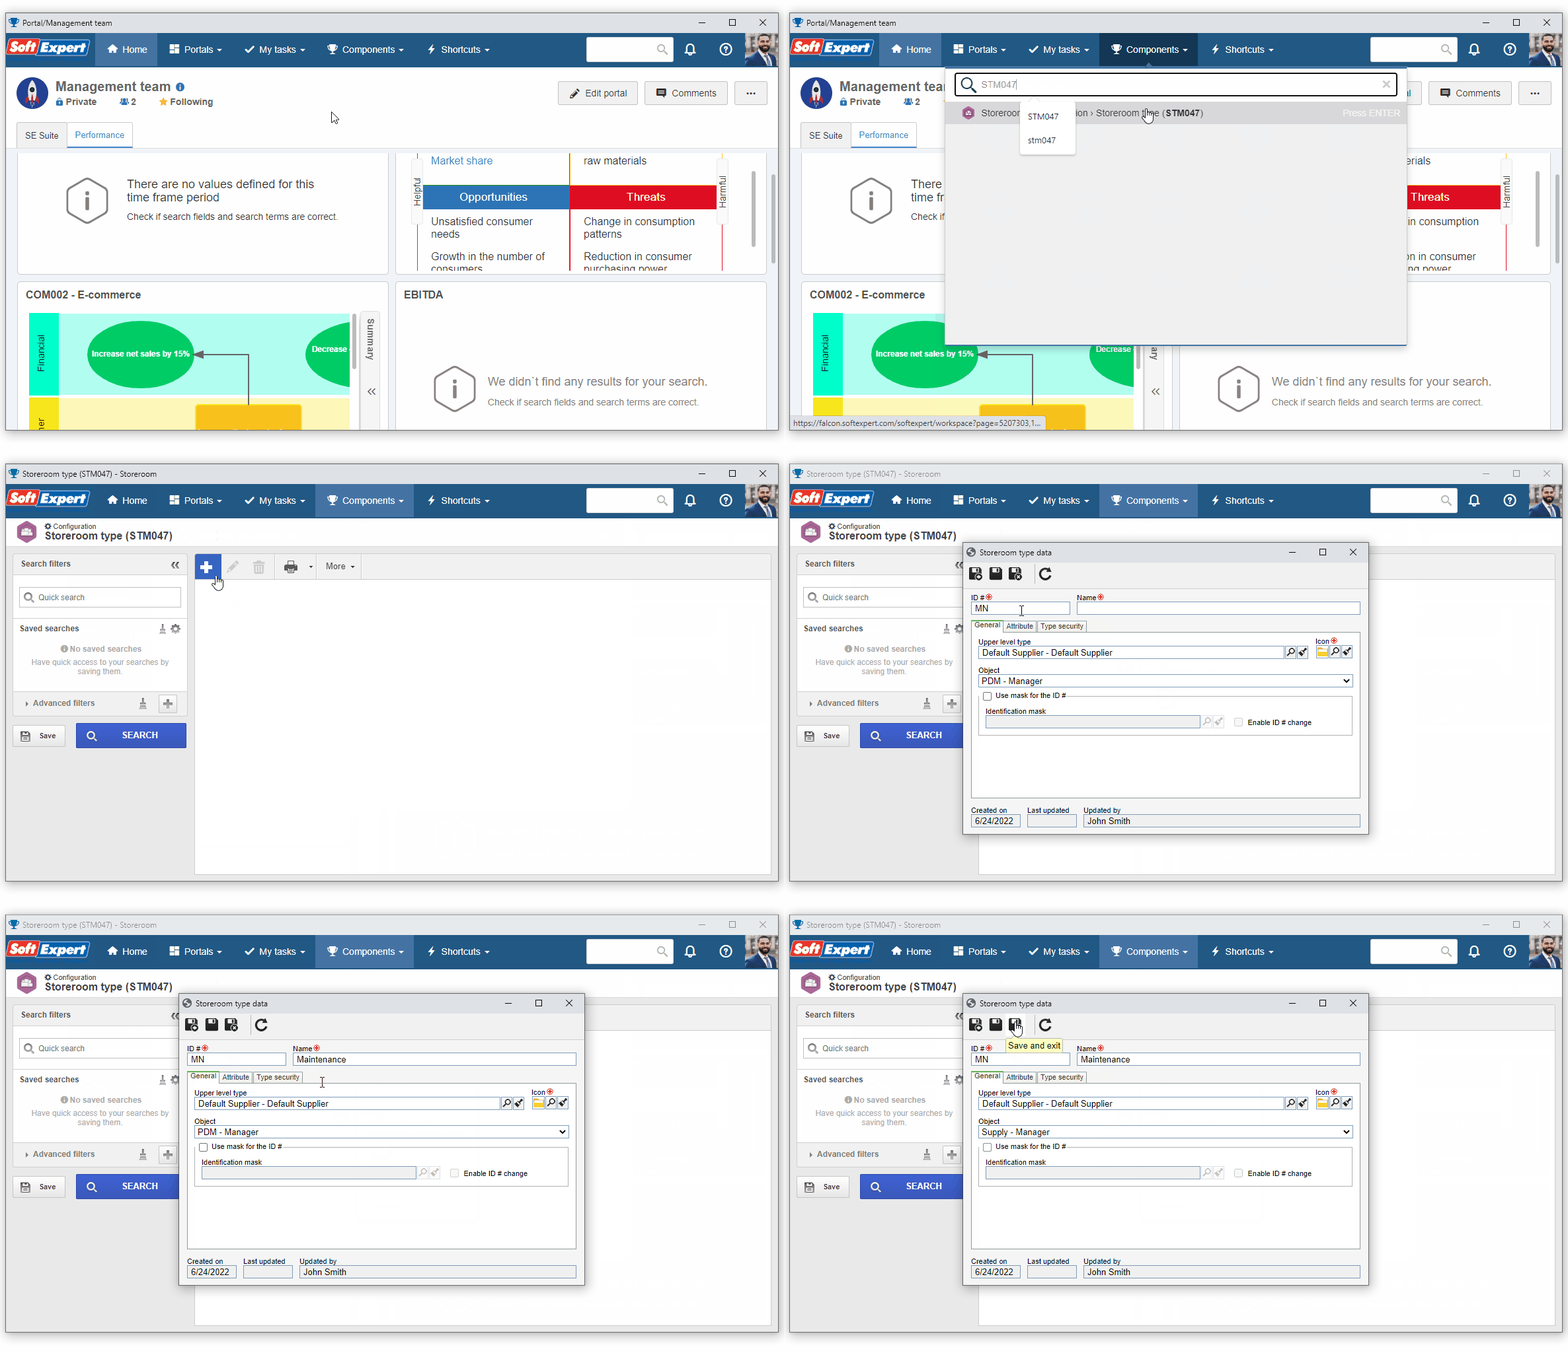
1st step: Creating a storeroom type
The type is used to classify and perform configurations that will be applied to all storerooms created in it.
To create a type, access the STM047 menu and click on the  button.
On the screen that will open, fill in the ID # field with "MN", and the Name field with "Maintenance".
The Object field in the General tab will define to which product the storeroom will be destined. For this example, select the "Supply" option.

After doing that, click on the  button.
2nd step: Creating a storeroom
To perform this step, access the File > Storeroom (STM003) menu.
After doing that, click on the  button and select the "Maintenance" type.

On the storeroom data screen, click on the arrow next to the ID # field to automatically generate the ID #.
In the Name field, enter the "Maintenance warehouse" value.
Then, in the General tab, fill in the following fields:
-
Responsible team: Enter a team of which your user will be part, registered in your environment. If there are none, click on the
 button next to the field.
On the screen that will be opened, enter an ID # and a name for the team and save. On the Member tab, associate your user with the team and click on the button.
- Department: In the Storeroom owner section, keep the Internal option selected.
Click on the  button next to the Department field to automatically fill it out with your user data.

After doing that, click on the  button.
Now, we will add the objects that will be part of this storeroom.
To do that, browse to the Details > Objects tab of the storeroom and click on the  button.

On the screen that will be opened, click on the  button and select the supplies created in the SoftExpert Supply Quick Guide.

Once done, click on the  button on the record and storeroom objects selection screen.
Thus, the storeroom has been successfully created!