Create a recognition type and profile
This article is valid until version 2.1.9 of the system. Click here to access the documentation referring to later versions.
This topic will teach you how to create a recognition profile type and how to create the profile based on the type.
To do this, simply follow the steps below:
1st step: Creating a recognition profile type
To create a recognition profile type, access the CAP019 menu and click on the  button.
On the screen that will open, enter "020" for the ID #, and "Recognition profile type" for the name.
In the Icon field, choose the pink icon with a white asterisk, as displayed in the GIF below.
Click on the  button.
2nd step: Creating a recognition profile
Through the recognition profile, it is possible to recognize parts of the captured document, allowing information from the captured file to be exported to document properties.
For this record, it is necessary to have an example file in the .pdf format or an image to define the indexes. In this case, we suggest a simple .pdf file, with only text in one line and a date in another.
Moreover, check with your system administrator if FileManager is duly configured in your environment.
To create a recognition profile, access the CAP004 menu and click on the button.
Search for and select the recognition profile type created in the previous step.
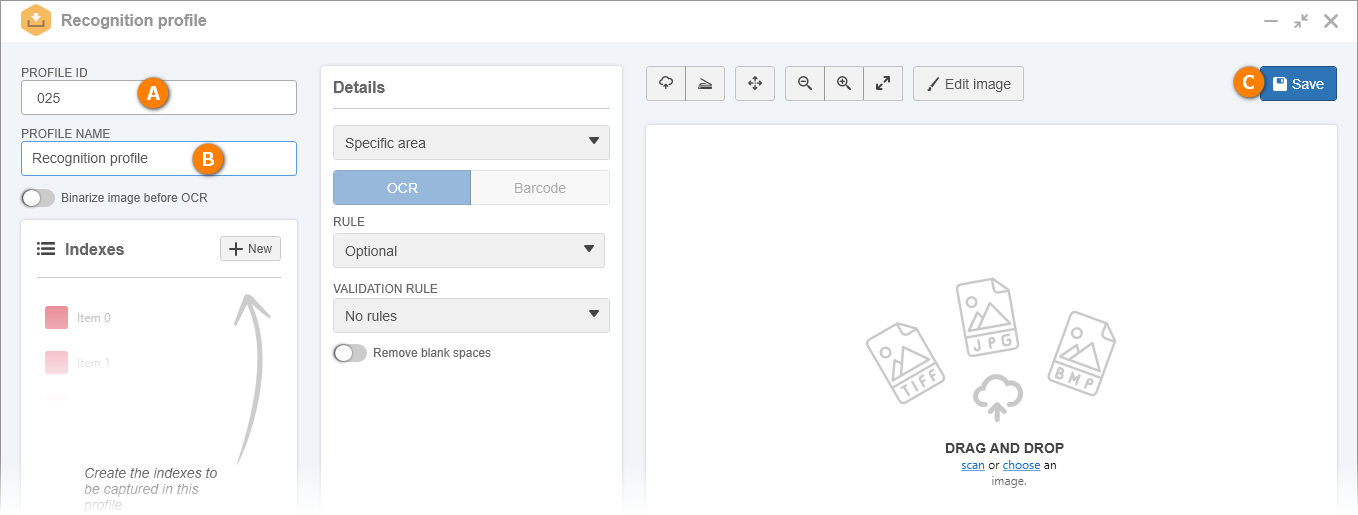
On the screen that will be opened, enter "025" in the Profile ID field.
Fill out the Name field with "Recognition profile".
Click on the  button.
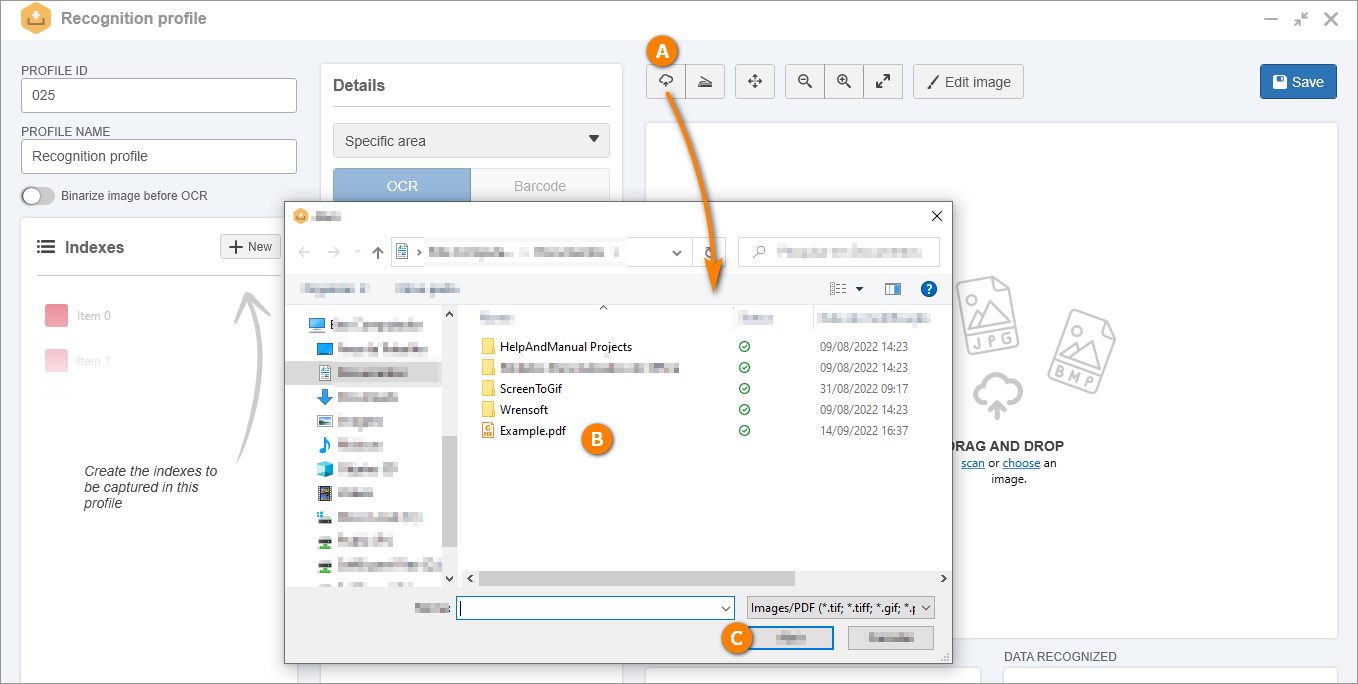
Then, click on the  button and select the .pdf file on the screen that will be opened.
Click on Open.
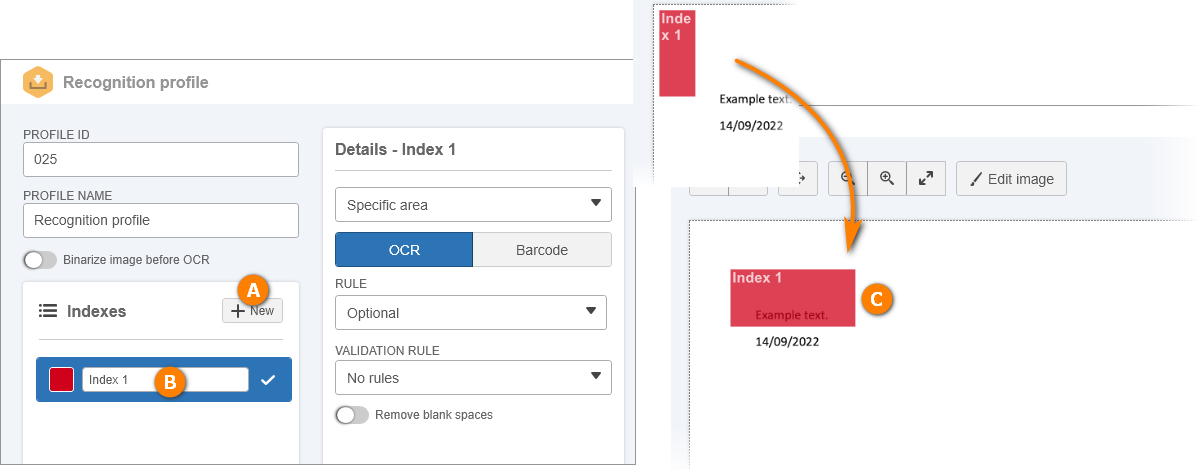
Back to the recognition profile screen, click on the New button in the Indexes panel.
On the field that will be made available, enter "Index 1" to name the index.
Drag the area of the "Index 1" index until it covers the first line of the text you wrote in the .pdf file.
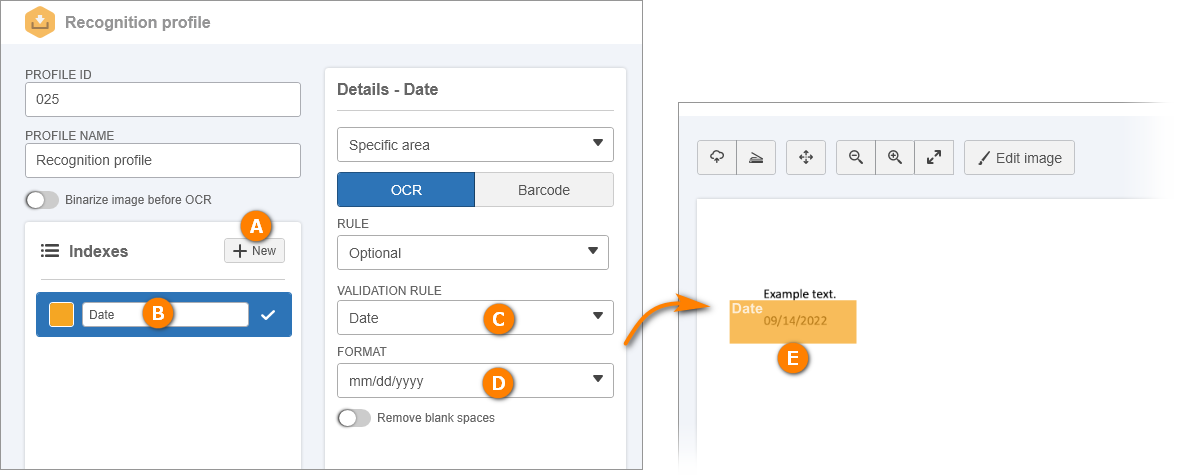
Once again, click on the New button in the Indexes panel.
On the field that will be made available, enter "Date" to name the index.
Choose the Date option in the Validation rules field of the Details panel.
Choose the "mm/dd/yyyy" format in the Rule field.
Drag the area of the "Date" index until it covers the second line of the text you wrote in the .pdf file.
Click on the button and close the screen.
Refer to the SoftExpert Capture manual for a detailed description on the other data recognition options available.