Create an asset from a template
This article is valid until version 2.1.9 of the system. Click here to access the documentation referring to later versions.
This topic will teach you how to create an asset from a template.
To do this, simply follow the steps below:
1st step: Creating a template asset
The asset template aids in the process to create similar assets, without the need to create each asset separately.
Simply create a template, and all assets created from this template will have the same configurations.
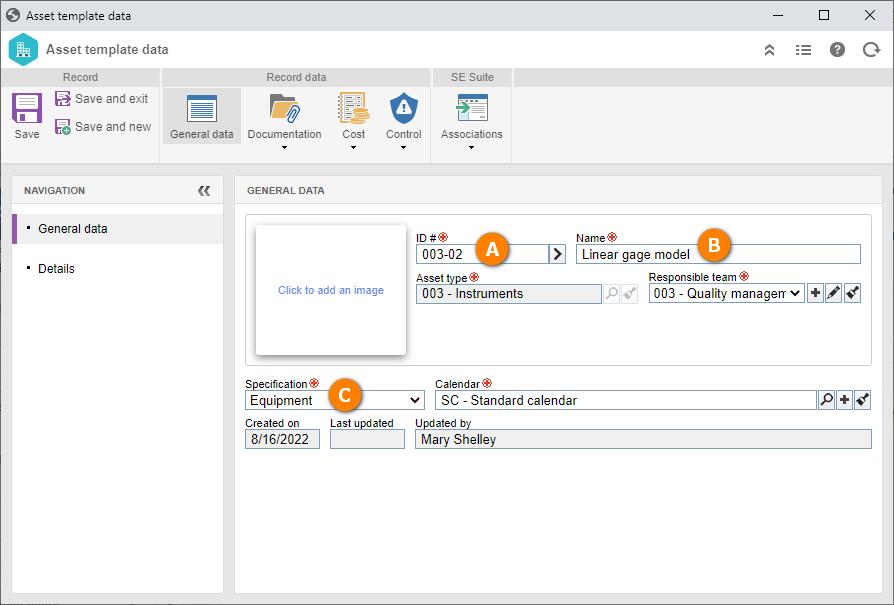
To create a template asset, go to the AS003 menu, click on the button, and select the "Instruments" type.
On the screen that will open, fill in the following fields:
- ID #: 003-02.
- Name: Linear gage model.
- Specification: For this example, choose the "Gage" option.
Then, go to the Details > Cost > Costs tab and enter "100" for the asset.
After doing that, click on the Save button.
We will also define a verification plan for this template.
Through the button bar, select the Control > Events > Verification tab and click on the option.
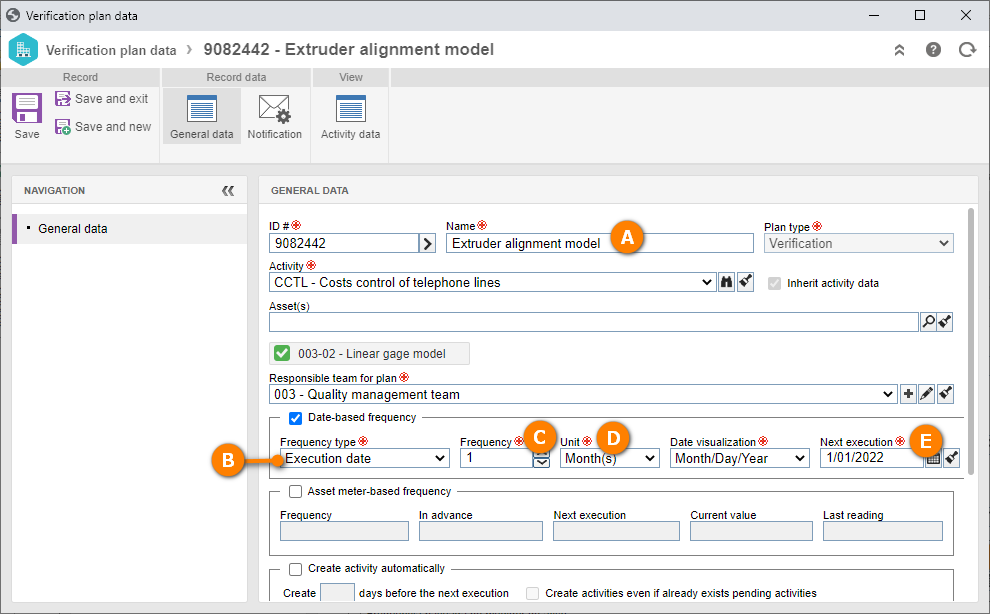
On the plan data screen, search for "Costs control of telephone lines" in the Activity field.

Once done, click on the  button.
Fill out the Name field on the screen that will be opened with "Extruder alignment model".
Then, check the Date-based frequency option and fill out the following fields:
- Frequency type: Select the "Execution date" option.
- Frequency and Unit: 1 month.
- Next execution: Add the beginning of the year as a date (01/01).
After doing that, click on the Save button.
2nd step: Creating assets from the template
To create an asset from a template, access the AS016 menu, click on the arrow next to the button, and select the "New from a template" option.
By clicking on this option, the system will display the asset creation wizard.
On this screen, fill out the following fields:
1. The number of assets that will be created: Define the value of 10.
2. The template that will be used: Select the "Linear gage model" template created in the previous step.
3. Individual cost of each asset: Enter the value of "100".
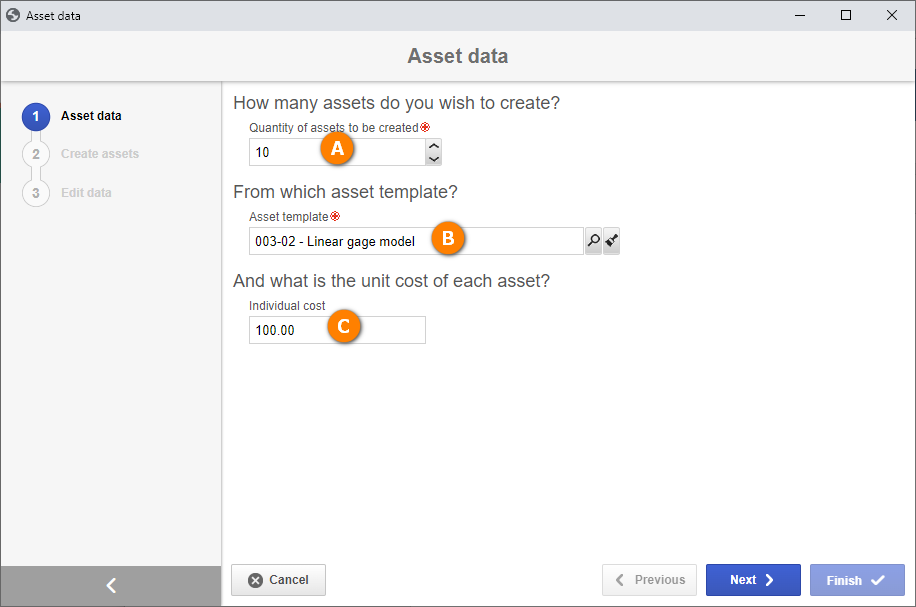
Once done, click on the Next button and confirm the system request.
The system will create the assets according to the defined quantity.
Wait for the process to be finished. Then, click on the Next button.
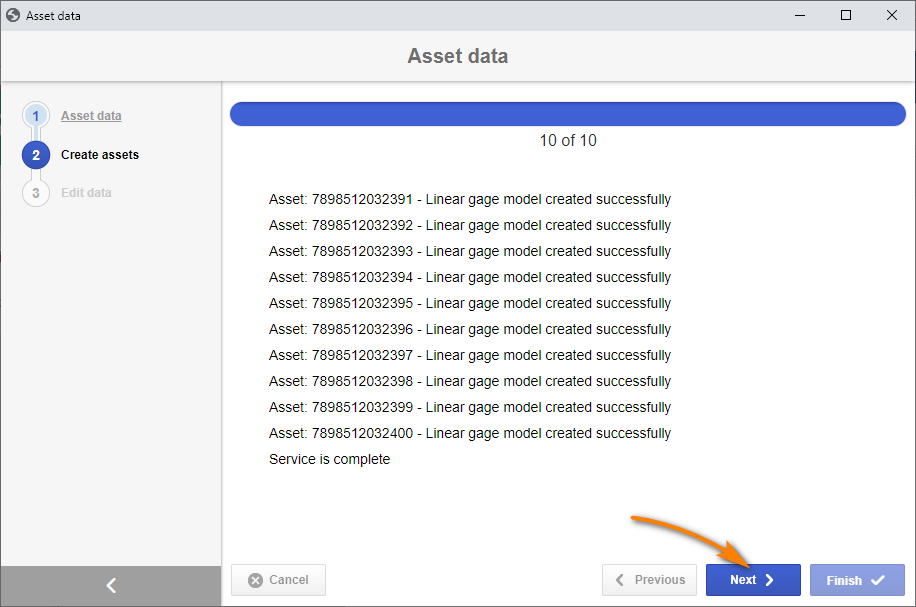
After that, on the "Edit data" step, click on the Finish button.
The system will request the data to be validated. To do so, simply accept the request.

After confirming, the new assets are created in the system!