Configuring the security of the dynamic navigator
Prerequisites
- Access to the Configuration > Dynamic navigator menu.
- Previously created dynamic navigator.
Introduction
Configuring the dynamic navigator security means defining the permissions and restrictions regarding access to and interaction with information displayed in the navigator.
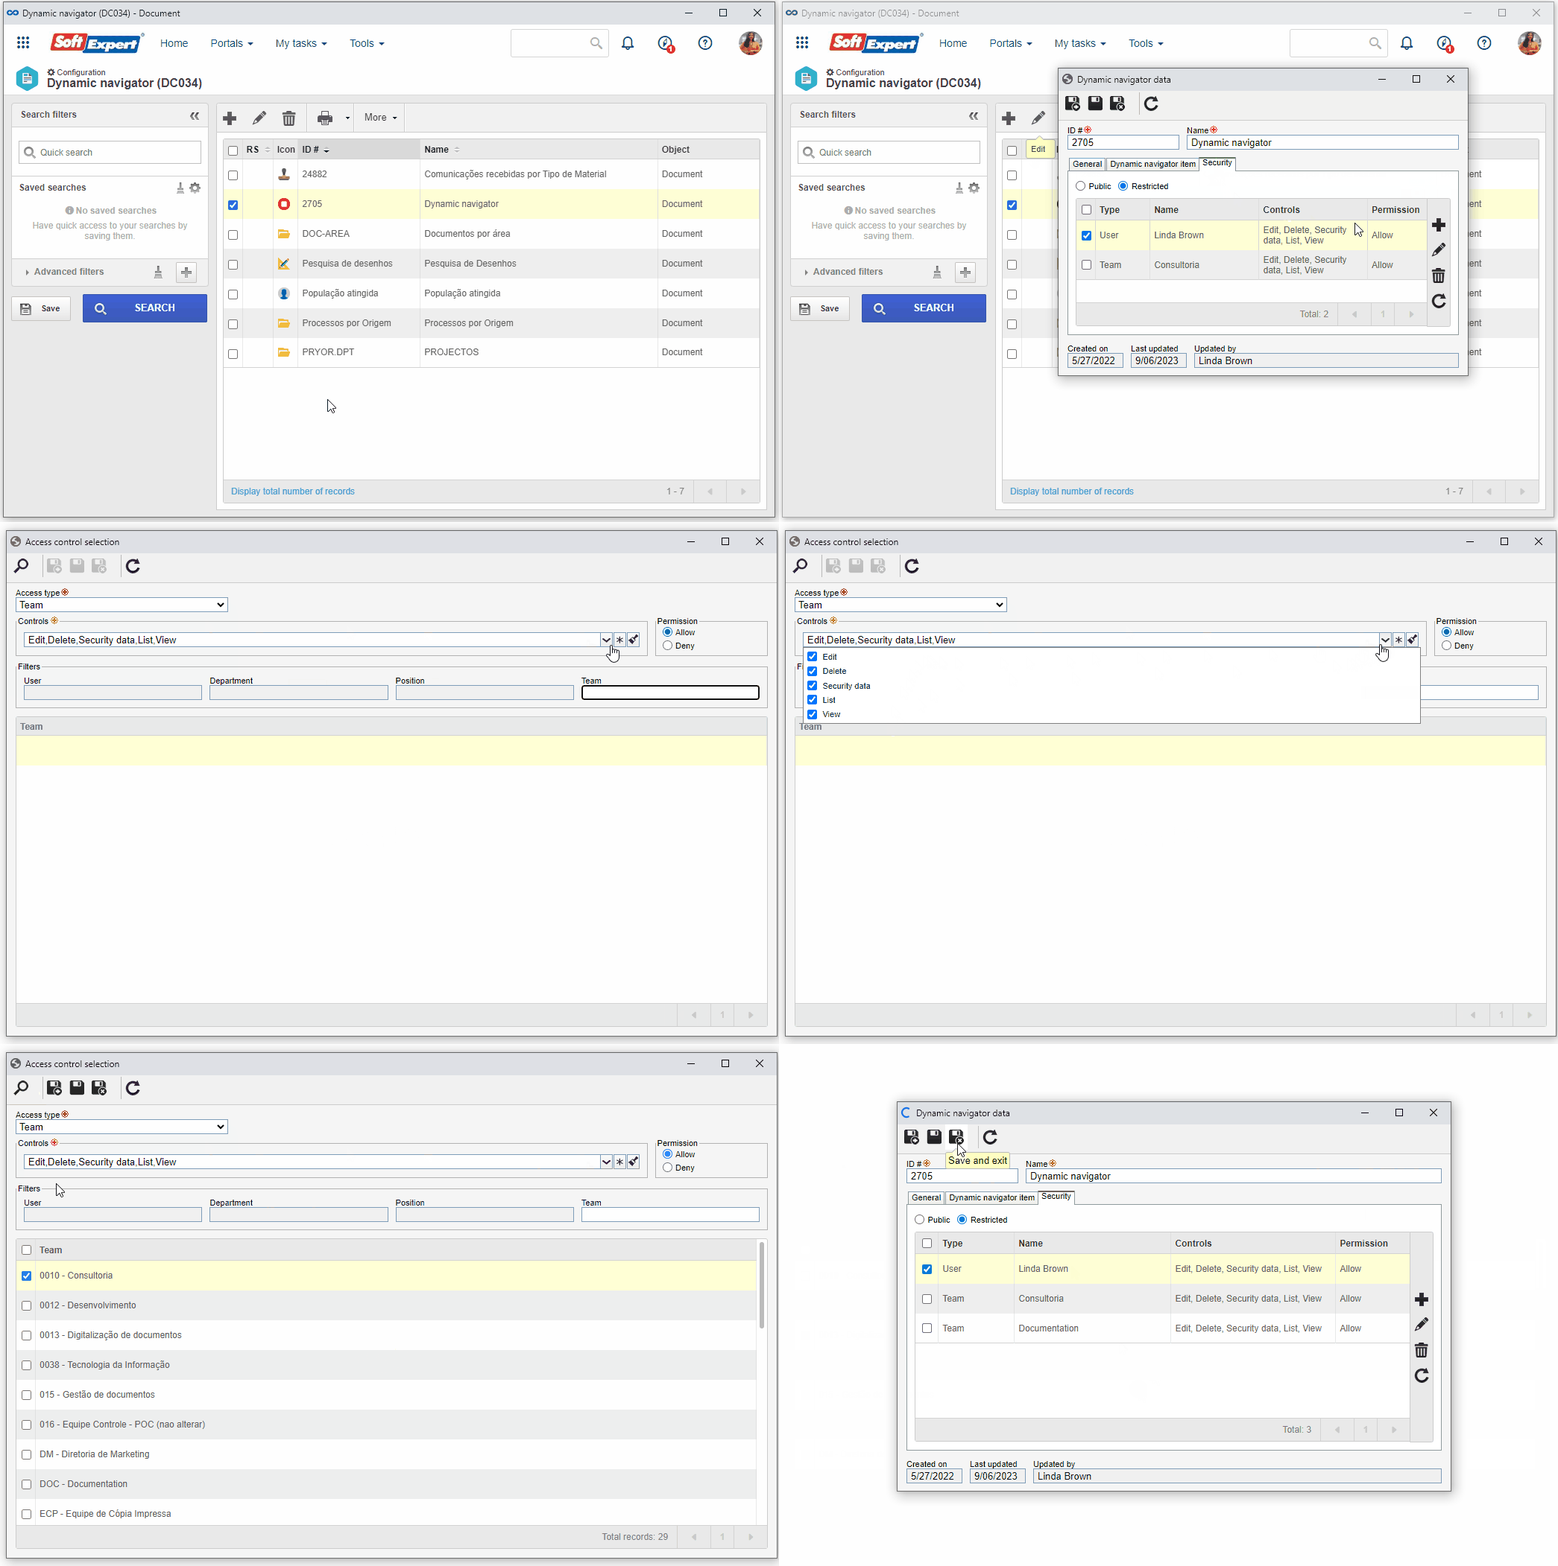
See below the steps to configure the security of a dynamic navigator. In our example, the dynamic navigator will be limited to a specific team.
Configuring the security of a dynamic navigator
1. Access the Configuration > Dynamic navigator menu.
2. Click on the  button.
3. On the screen that will be opened, access the Security tab.
4. Then, click on the  button.
If you wish to enable all users with access to the component to access the navigator, keep the Public option selected.
5. In the access control selection screen, select the Team option in the Access type field.
6. In the Controls field, select the actions that the users can perform with the dynamic navigator record result.
7. Click on the Allow option for the team to be able to perform the chosen actions.
8. Once done, click on the  button and select the desired team.
9. Click on the  button to save the information.

Additional information
- According to the selected access type, the Filters will be enabled to be filled out. Use them to make it easier to search for the desired records.
- If the selected access type is Organizational unit, the hierarchy of business units and departments belonging to them will be displayed (if any). Thus, it is possible to check the Consider sublevels option for the organizational units that are below the selected unit in the hierarchy to also be considered.
Conclusion
This article has taught you to configure the security in a dynamic navigator. You can now grant or restrict user access to the configured dynamic navigator.

