Defining a flowchart
Prerequisites
- Access to the File > Flowchart (KN006) menu.
- Access to the File > Step (KN004) menu.
Introduction
A workflow must be defined in order for SoftExpert Kanban to be used correctly; that is, you will need to create work steps and associate them with a flowchart.
To illustrate, a product selling process named "Sales flow" will be presented as an example.
See how to perform these operations below:
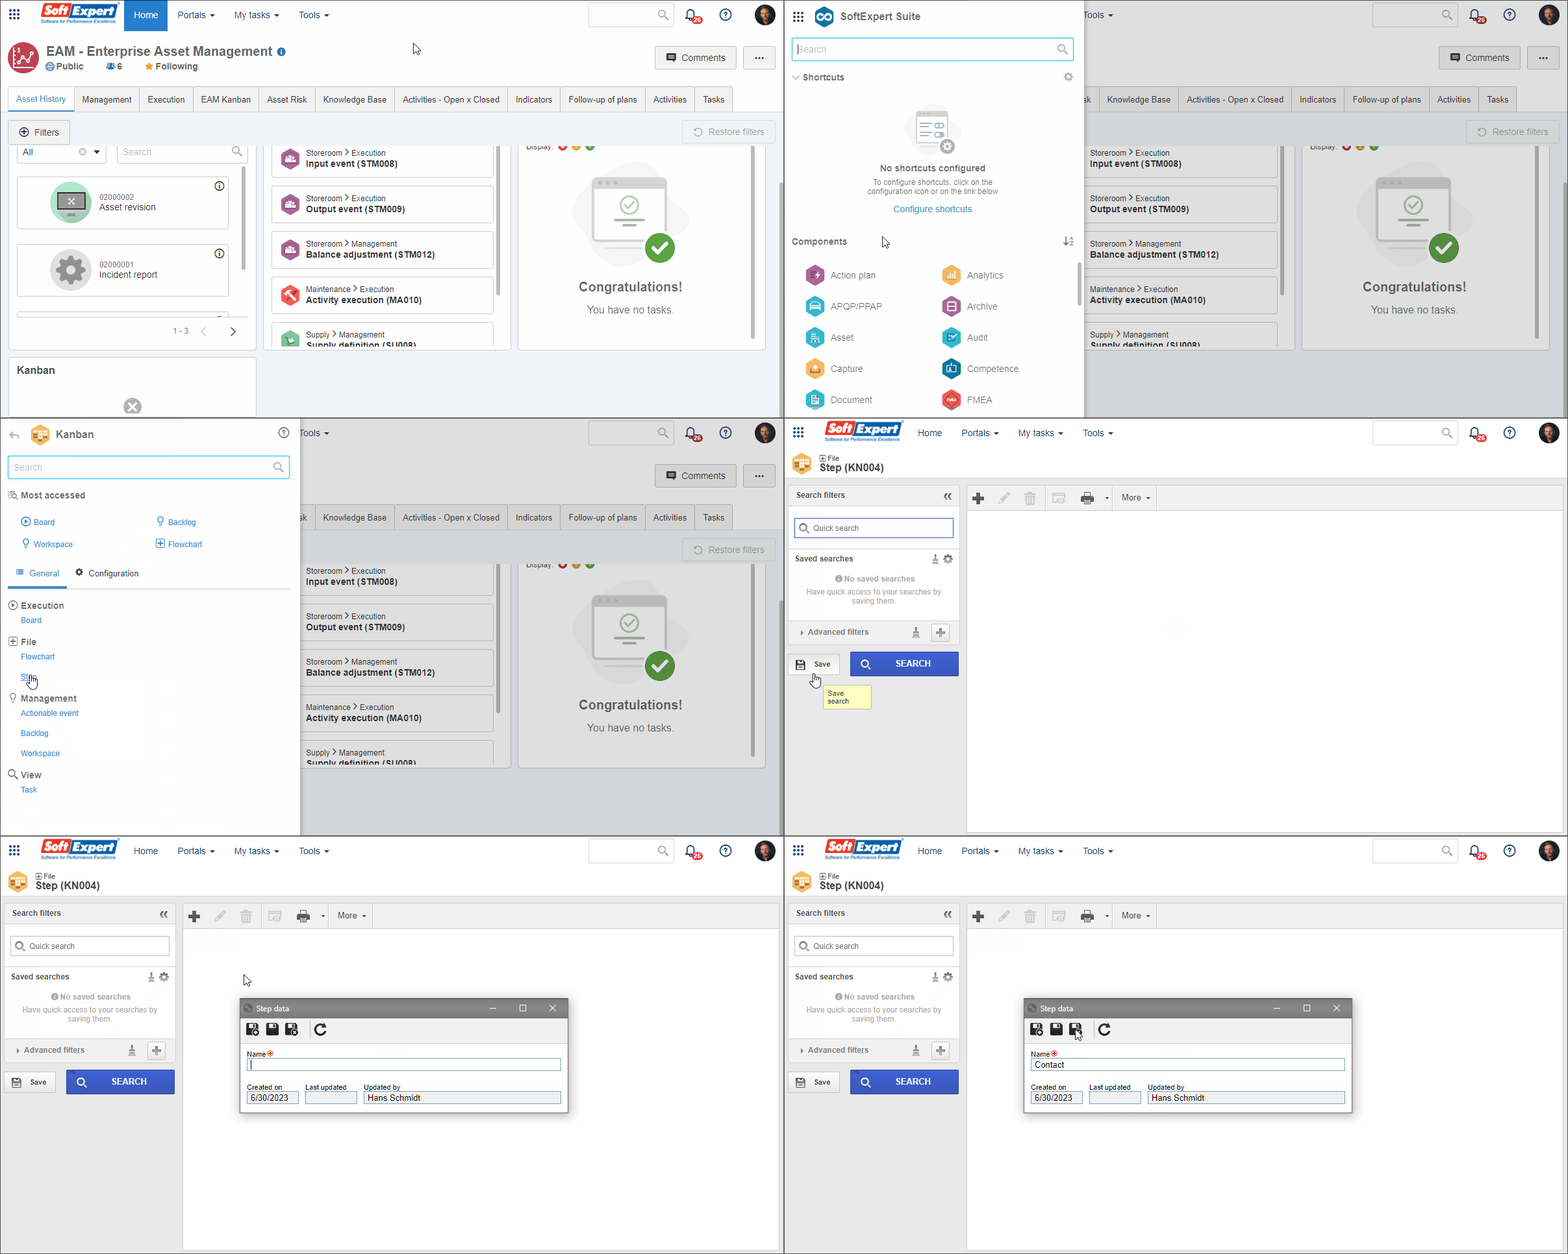
Creating steps
1. Access the File > Step (KN004) menu and click on the  button.
2. Enter the name of the step and click on  .
.
Creating a flowchart
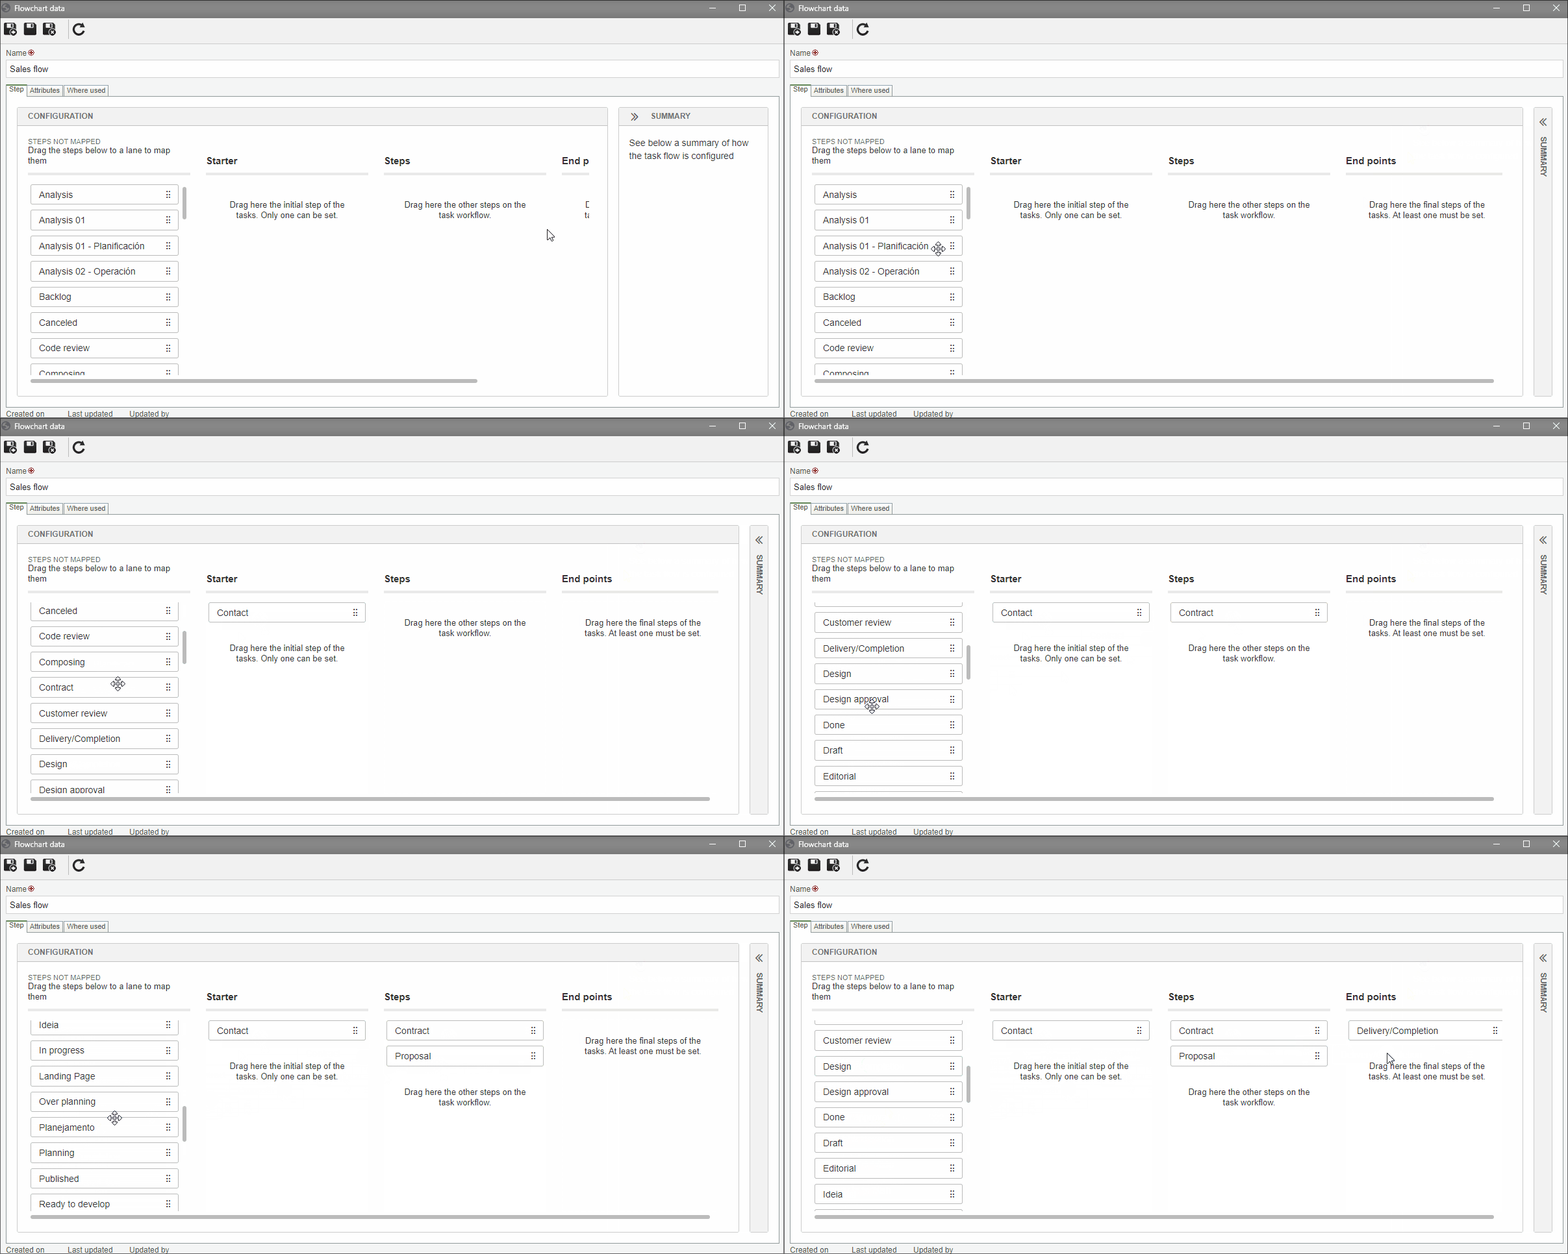
1. Access the File > Flowchart (KN006) menu.
2. Click on the  button.
3. On the screen that will open, enter the name of the flowchart.
4. In the Step tab, drag each step to the lane of the corresponding flow:
- Starter: defines the initial status of the tasks. Only one step can be dragged to this lane.
- Steps: drag to this lane all the execution steps of the task.
- End points: drag the finishing step of the tasks. Only one step can be dragged to this lane.
5. Click on  to save the record. Now, all tabs will be enabled.
Additional information
From the Attributes tab, it is possible to associate attributes with the flowchart in order to complement information referring to the execution of the tasks whose type is configured with this flowchart. Once associated, the attributes will be shown as fields of the task. See further details in Associating attributes with the flowchart.
From the Where used tab, it is possible to click on the card and view the details of the workspace with which the flowchart has been associated.
Defining the sequence of the steps
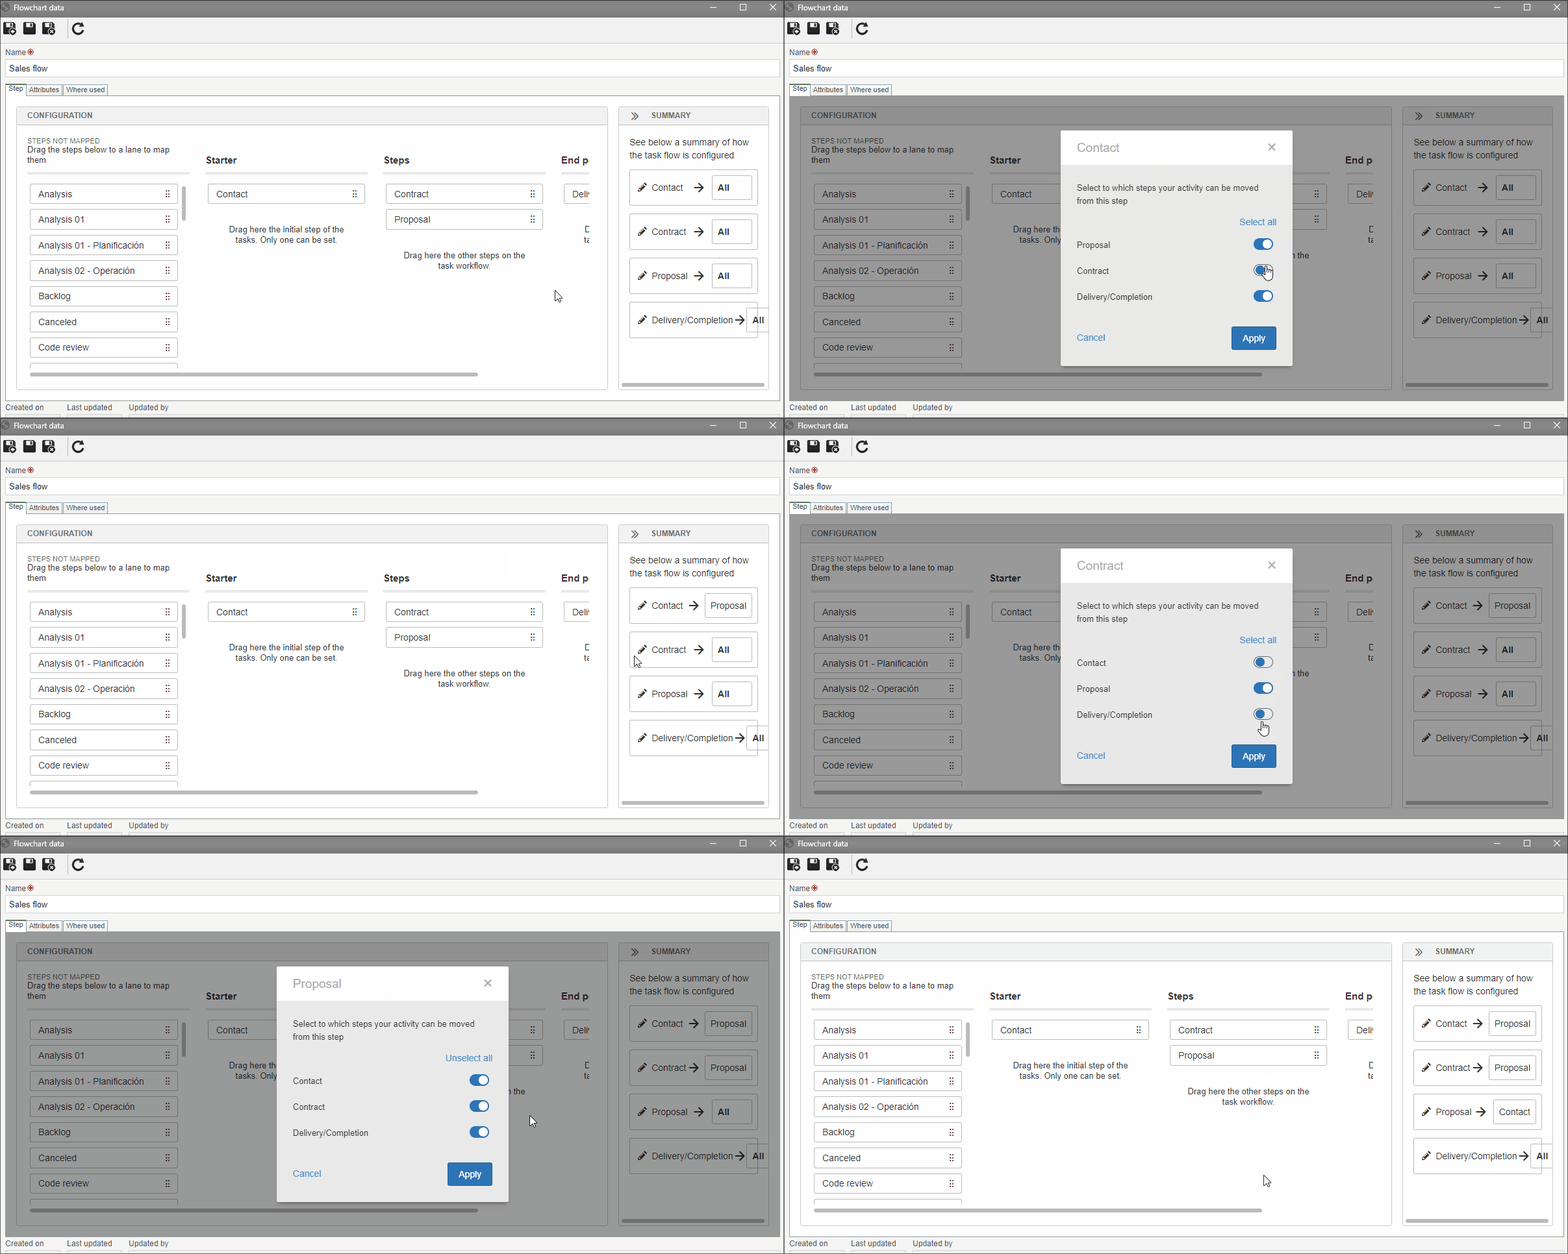
Then, it is necessary to define the order in which the tasks will go through the steps. In the Summary section of the Steps tab, click on  , next to the name of the steps, to change their direction.
For example, when the task comes from the "Contact" step, the next step can be "Proposal"; subsequently, if the proposal is accepted, we send it to "Contract" for the proposal contract to be written, and, finally, to "Delivery/Completion".
See below how to define the step flow of the tasks.
If the flowchart is already being used in a difference workspace, and a step is deleted, the system will display an alert in case there are tasks in that step.
On the warning screen, a new step must be selected to replace the one removed from the flowchart. The tasks that were in the deleted step will be automatically migrated to the new one.
Conclusion
The flowchart is now ready to be used in the workspaces. Access the Configuring a workspace article to continue the flow.
